Tag Archives: cnc router machines

Cabinet Doors and Drawer Fronts – Outdoor Kitchen Island – Day 4

Cabinet Doors and Drawer Fronts – Outdoor Kitchen Island – Day 4

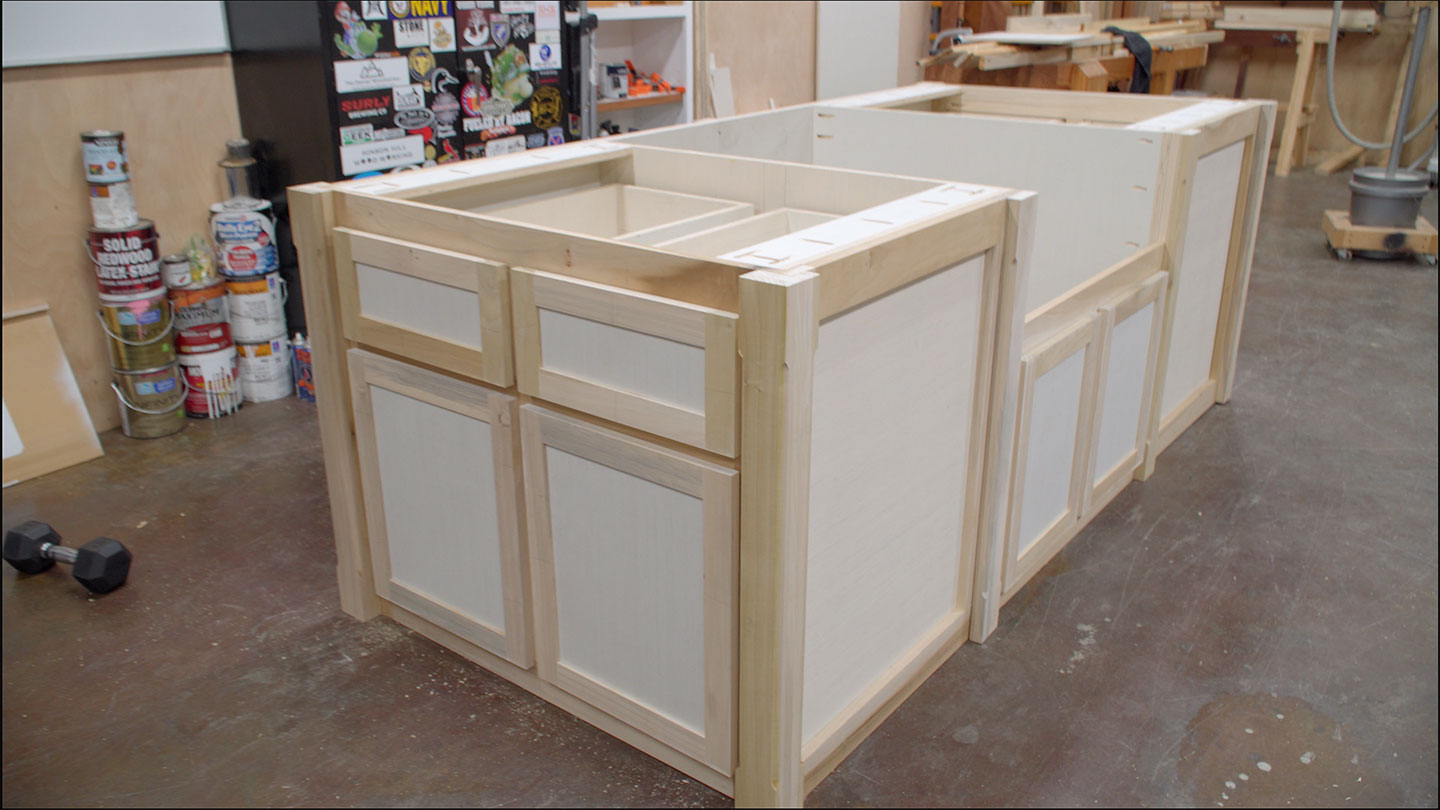
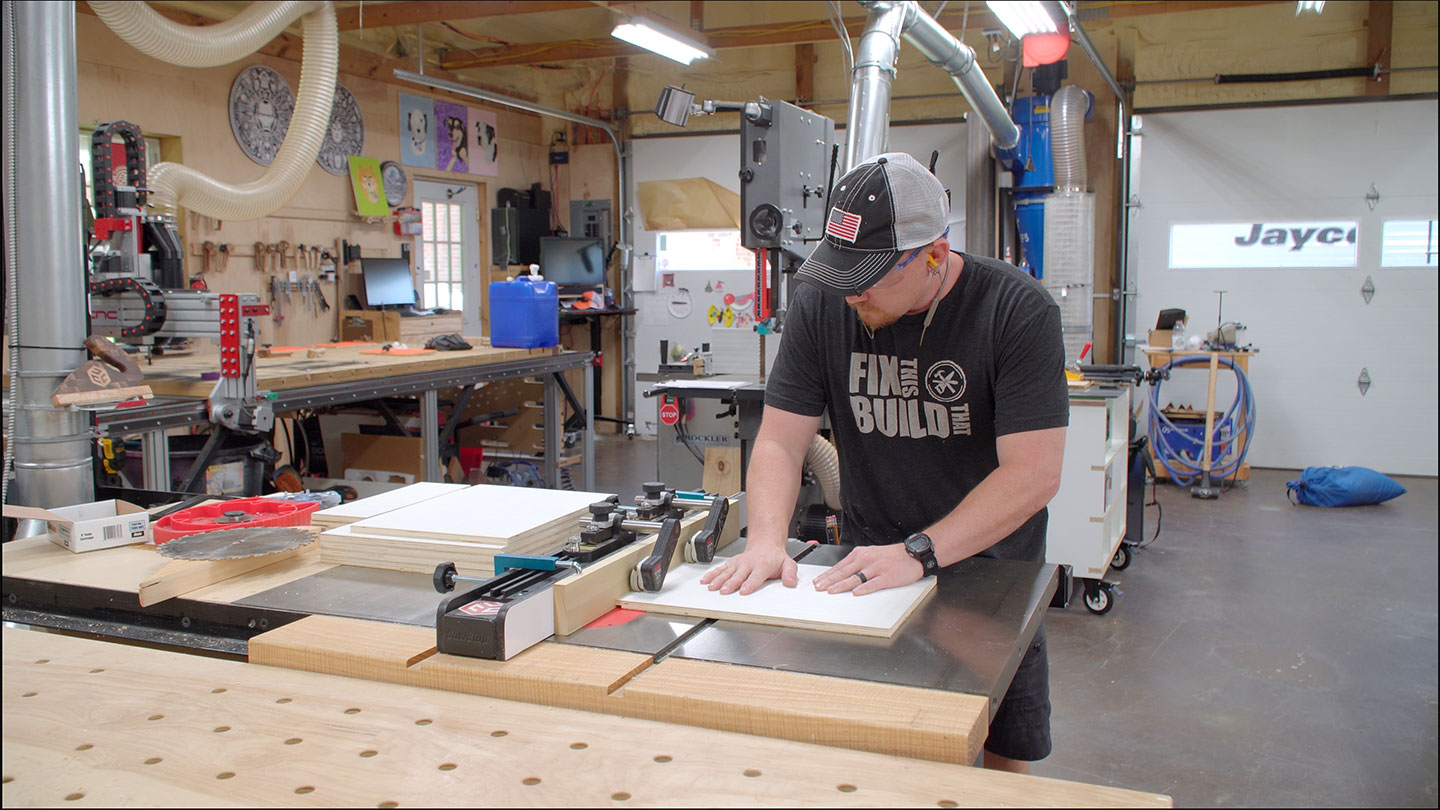
Day 4 of the out of doors kitchen island construct begins with the door and drawer entrance meeting. I’m the usage of 1/2” plywood for the panels and will want to minimize a rabbet on every panel sooner than meeting.

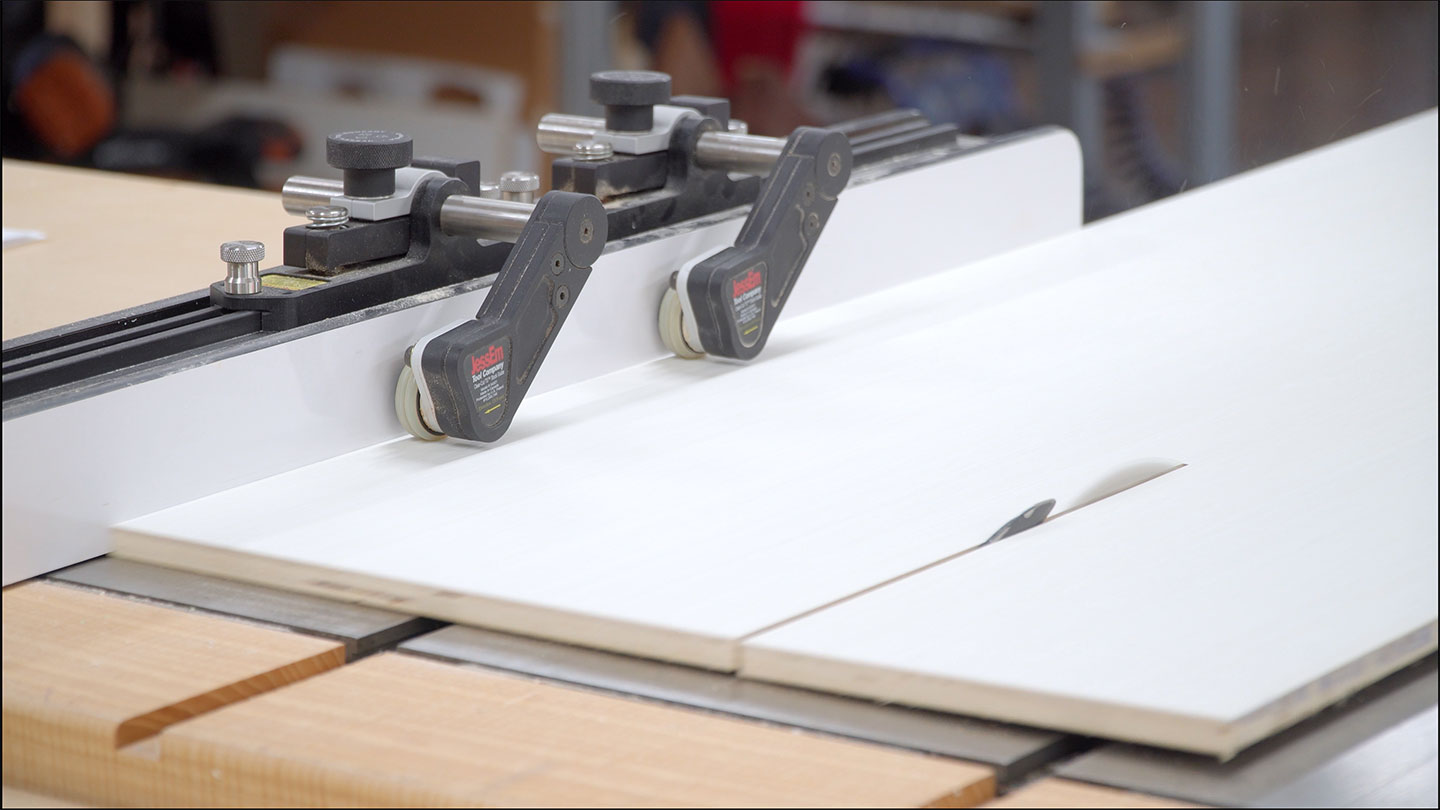
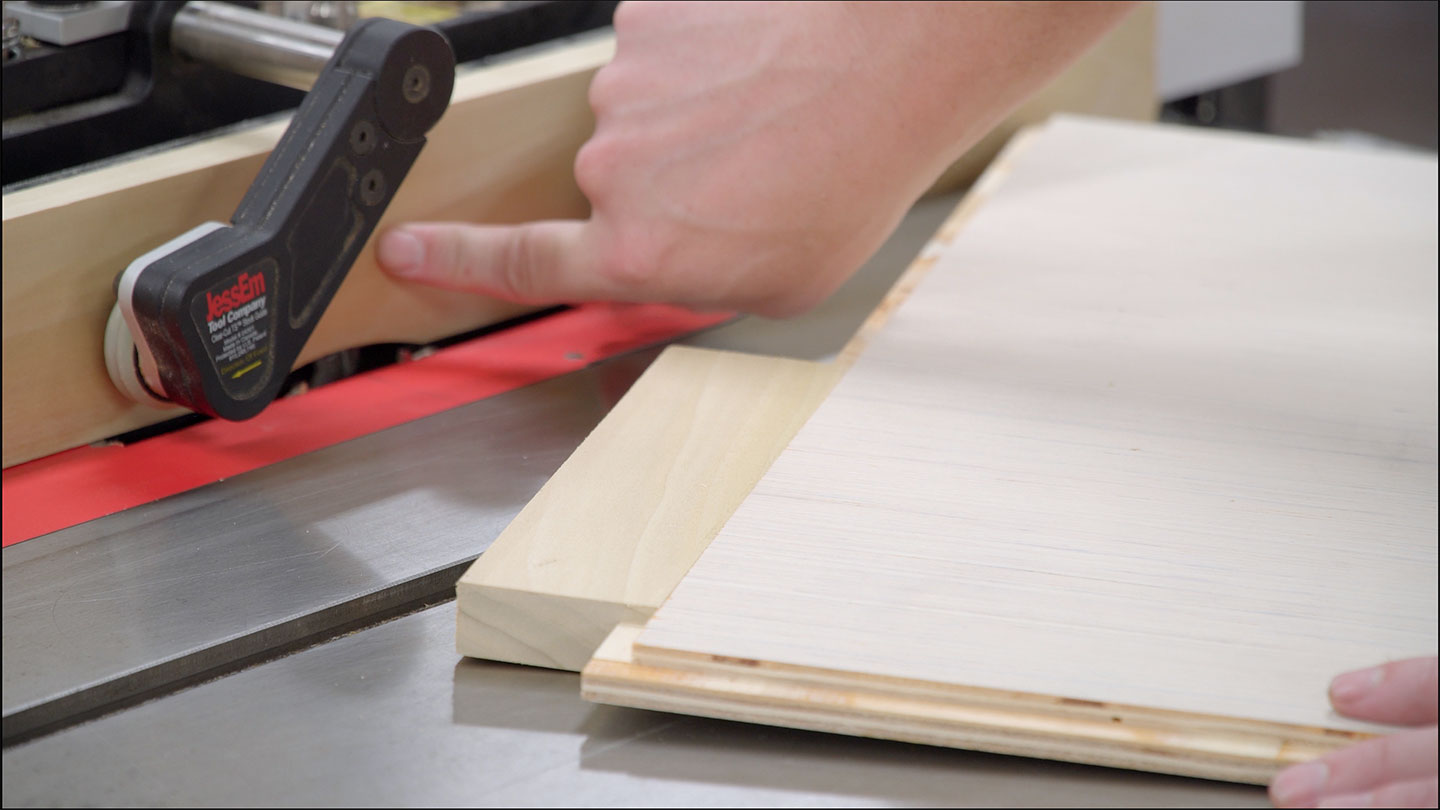
However first, a snappy notice on those JessEm curler guides. I really like them however haven’t been the usage of them in recent years because of laziness. Now and again I am getting in my very own approach. I’ve them, they paintings nice, and I must use them always. For those who’re no longer accustomed to them, they’ve a curler on a slight inward attitude towards the fence. The curler has grippy subject material to carry the workpiece and they just roll ahead. This very much reduces the chance for kickback. For smaller items not up to a few inches they only get in the way in which. On this case, they’re going to be useful.

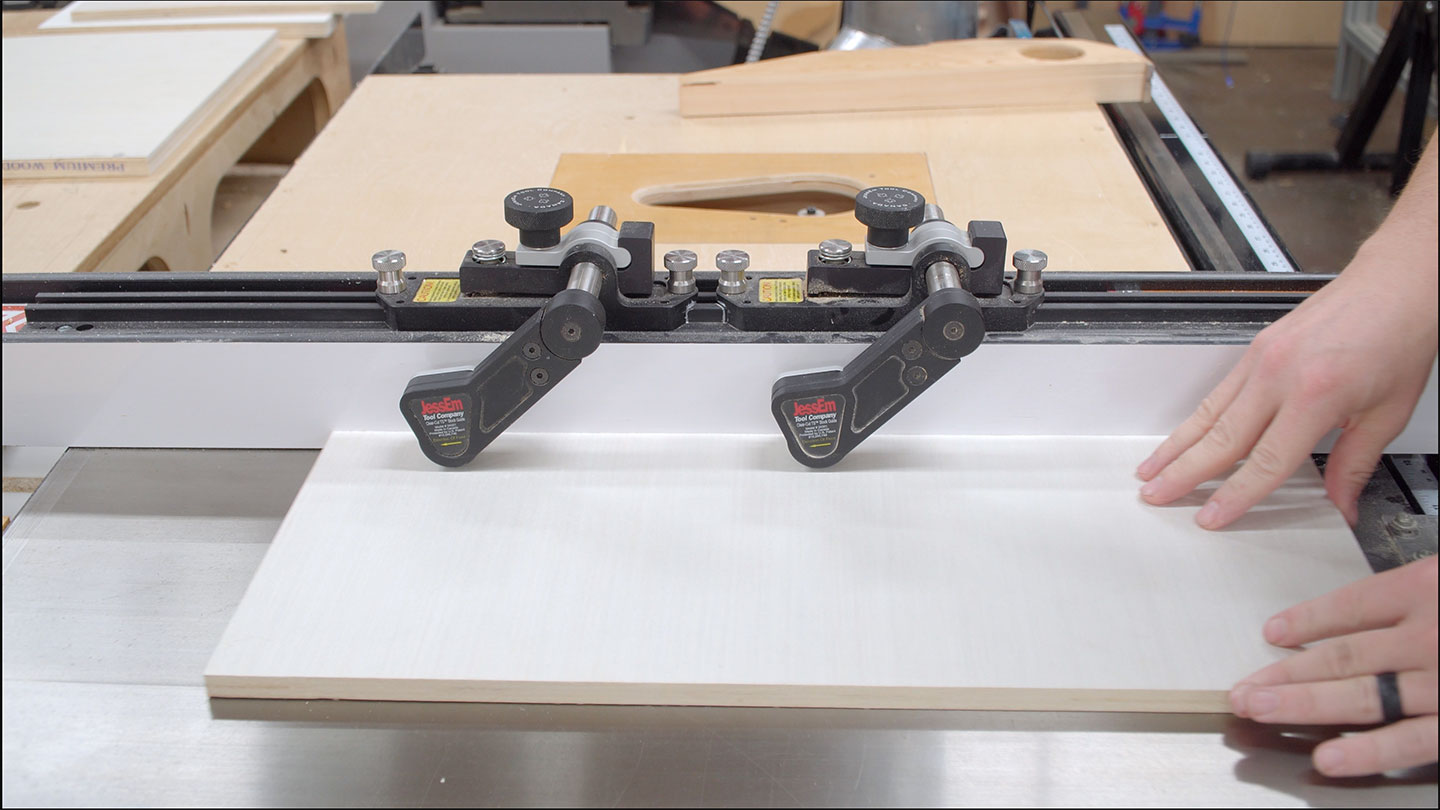
When used, I’m straight away grateful that I’ve them. It’s peculiar how some pieces I’ll move out of my approach to make use of and others I’ll have lazy moments, even making an allowance for how handy they’re.

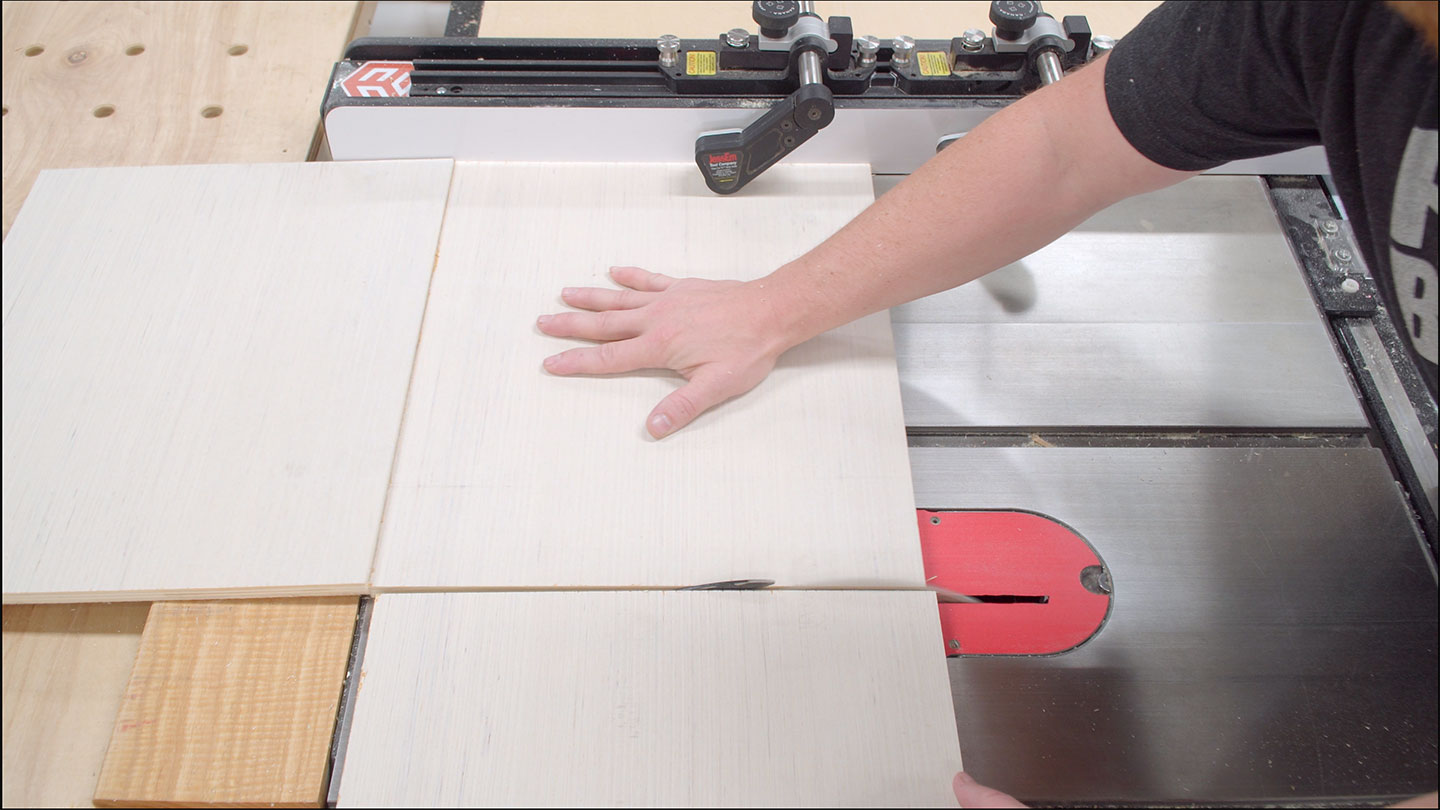
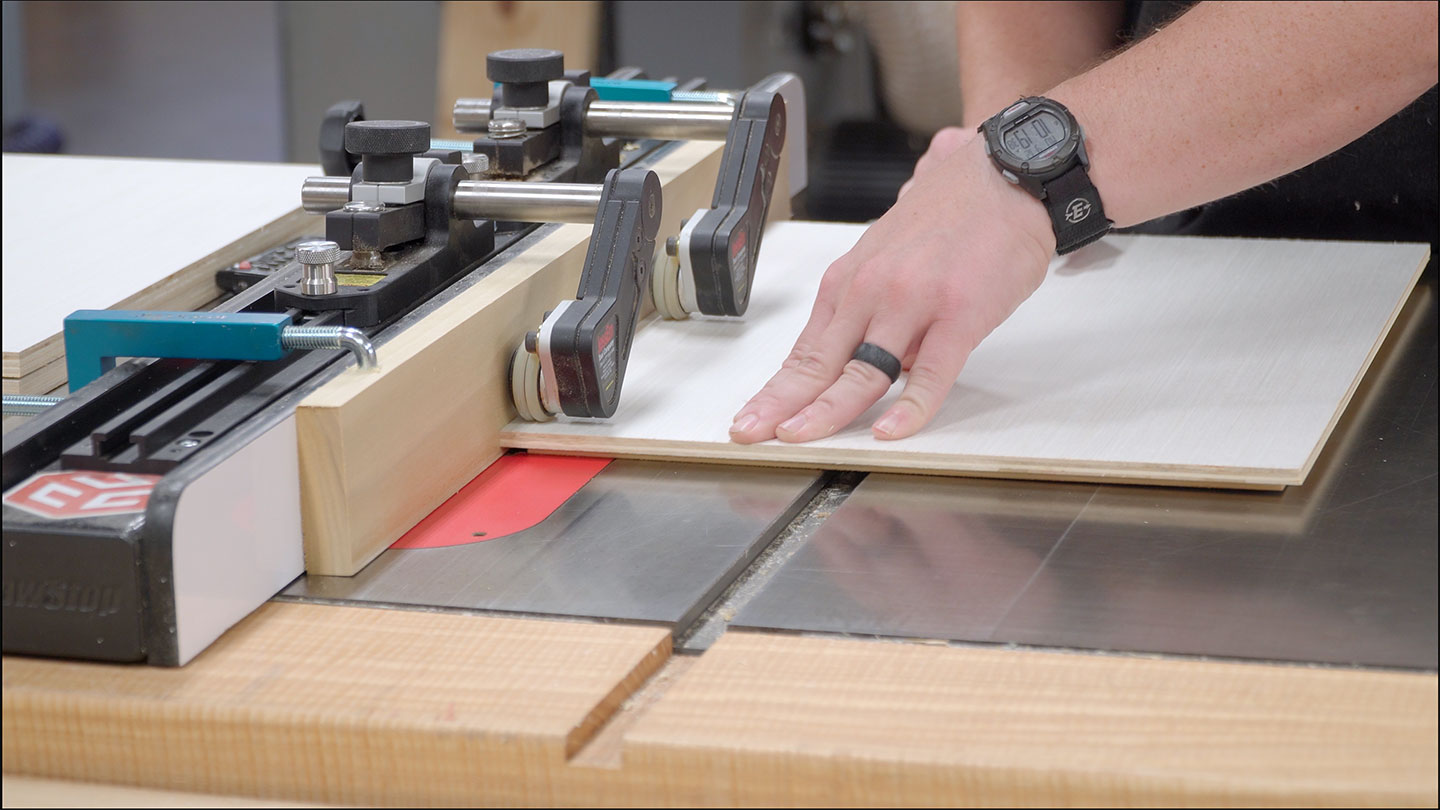
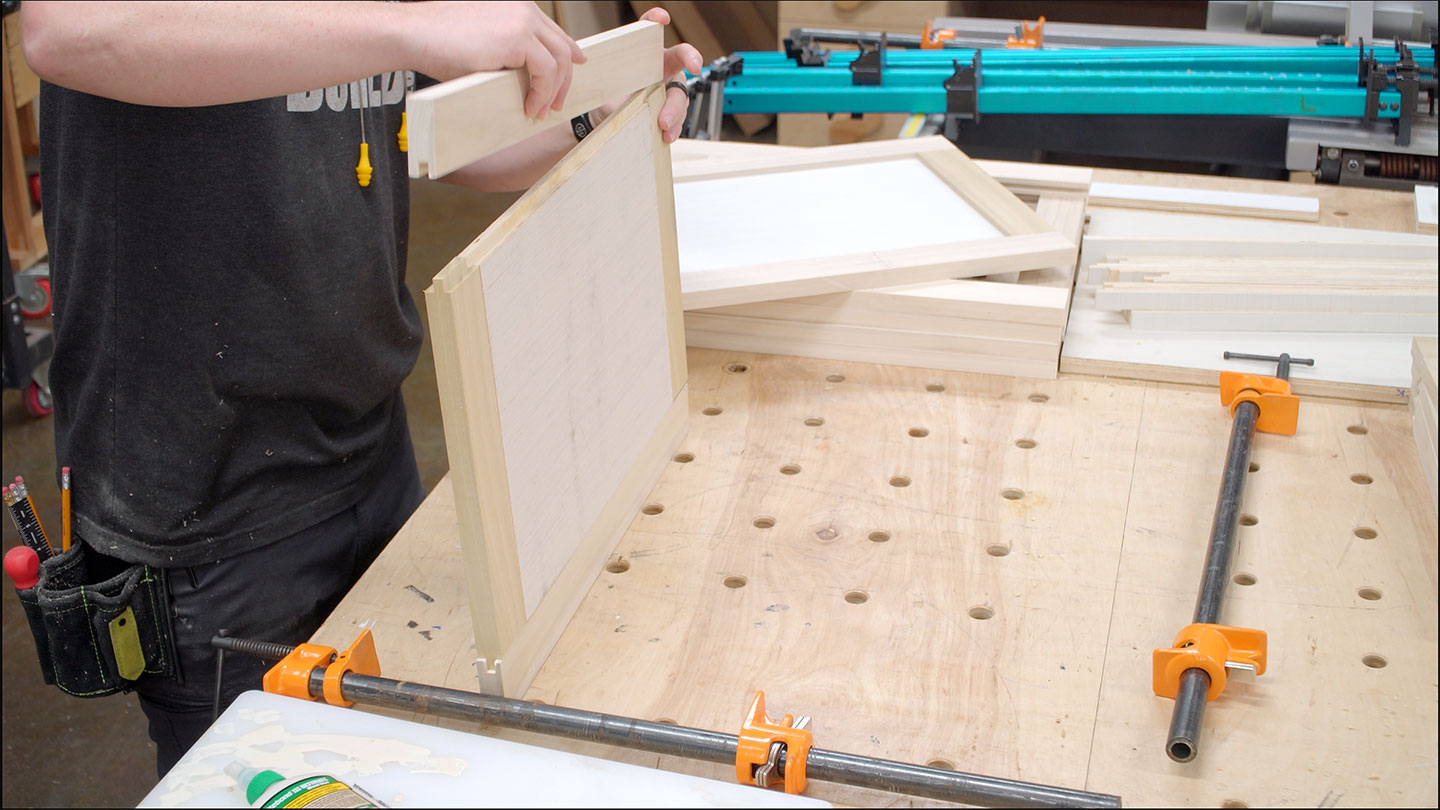
For the panel rabbets, I selected to make use of a dado stack within the desk noticed with a sacrificial fence. The sacrificial fence lets in the overall dado stack for use and buried within the fence. The fence place determines the width of the rabbet and the peak of the dado stack determines the intensity of the rabbet. As soon as dialed in, the interior face of the panel must be flush with the interior face of the door and drawer entrance frames. The entrance may have the standard 1/4” step not unusual in shaker cupboards.

Now the doorways and drawer fronts can also be assembled. Since the panel is an engineered panel, all of the panel can also be glued in position. Little need for a spread and contraction hole right here.

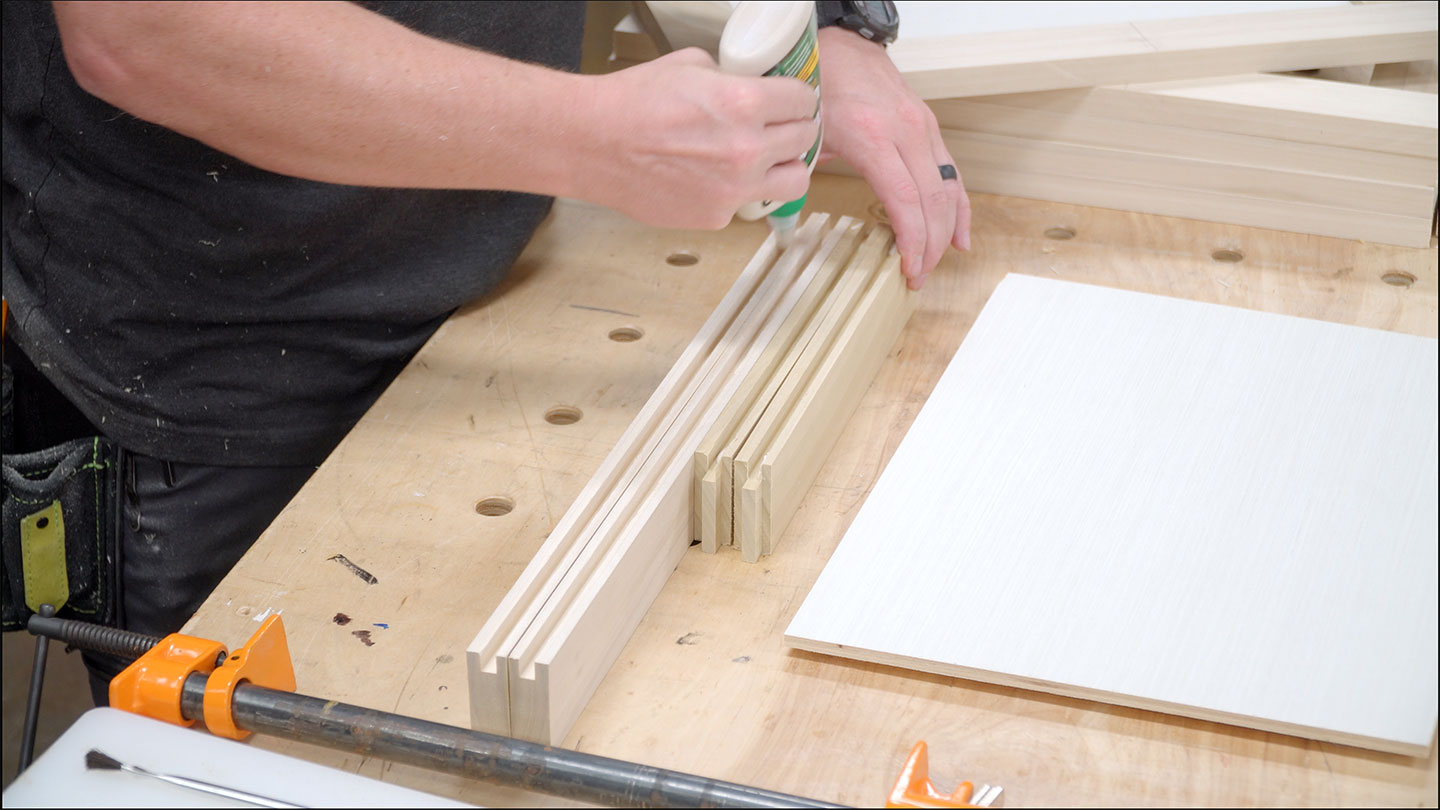
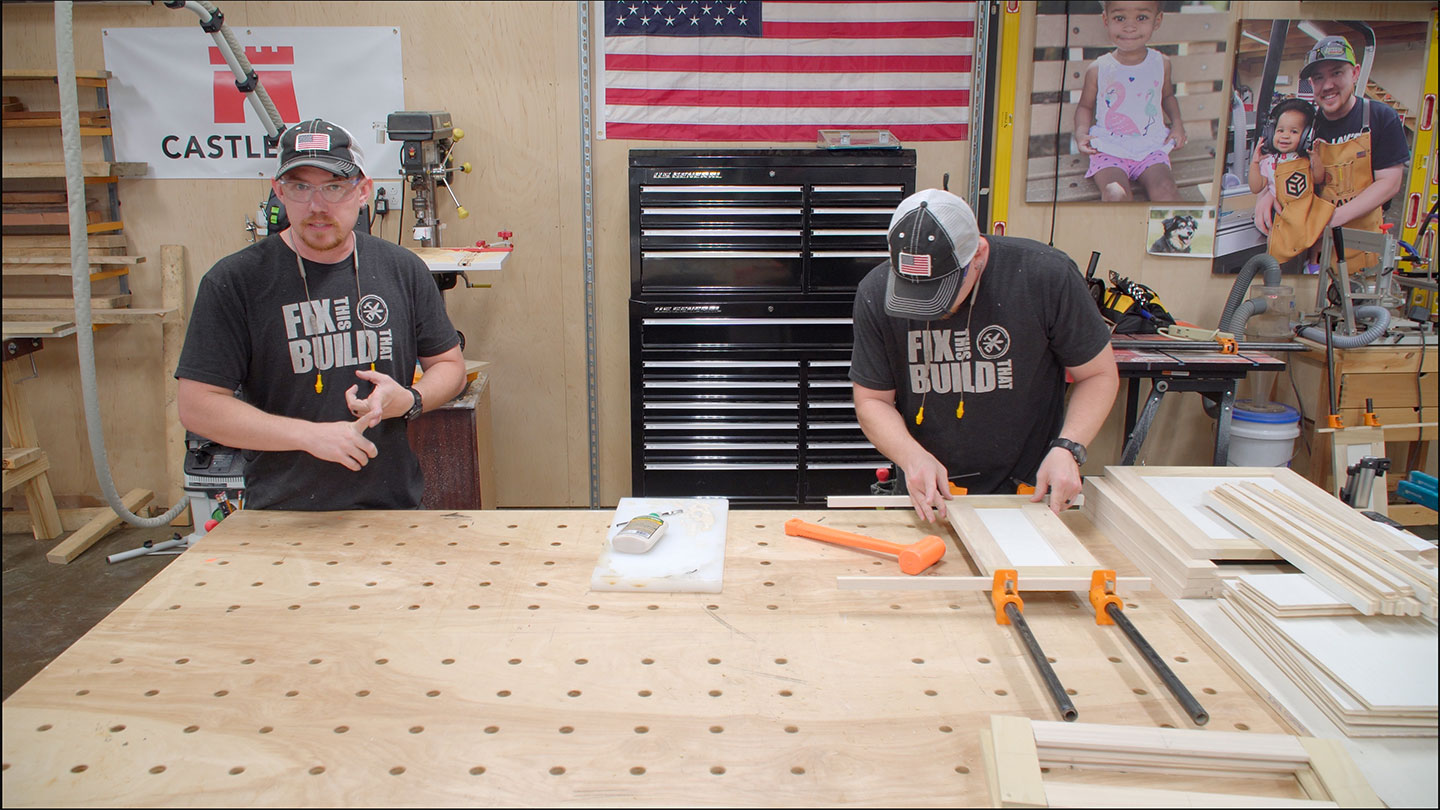
After you have the entire doorways and drawer fronts in clamps I notice why maximum cupboard stores choose to outsource their door introduction. Between milling the lumber, reducing the joiner, and assembling the doorways there may be a large number of time intake. It simply is sensible for a large number of cupboard stores to outsource this step.

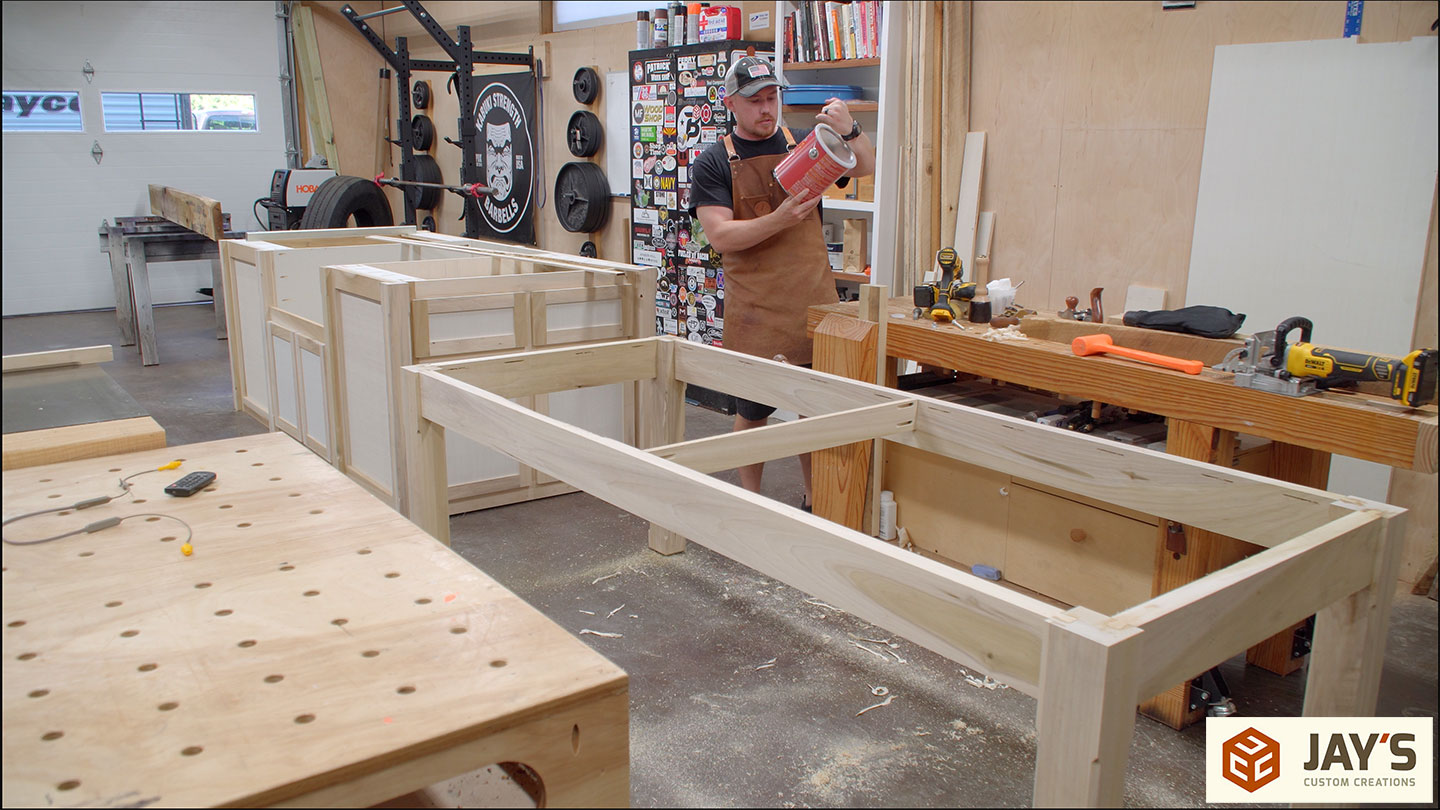
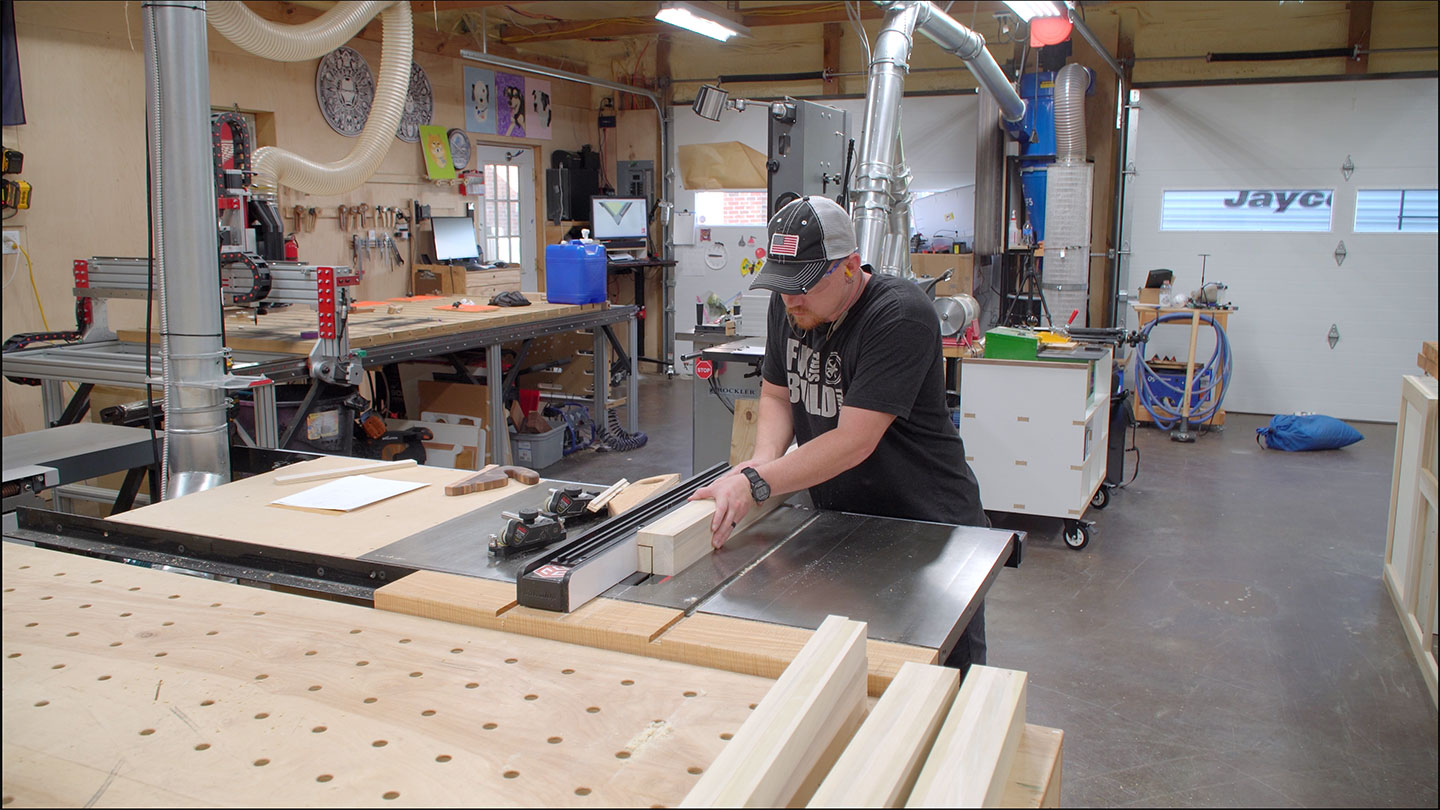
Whilst the doorways and drawer fronts are in clamps I converted to the legs. The 4 nook legs shall be sq. and the 3 inside legs shall be oblong.

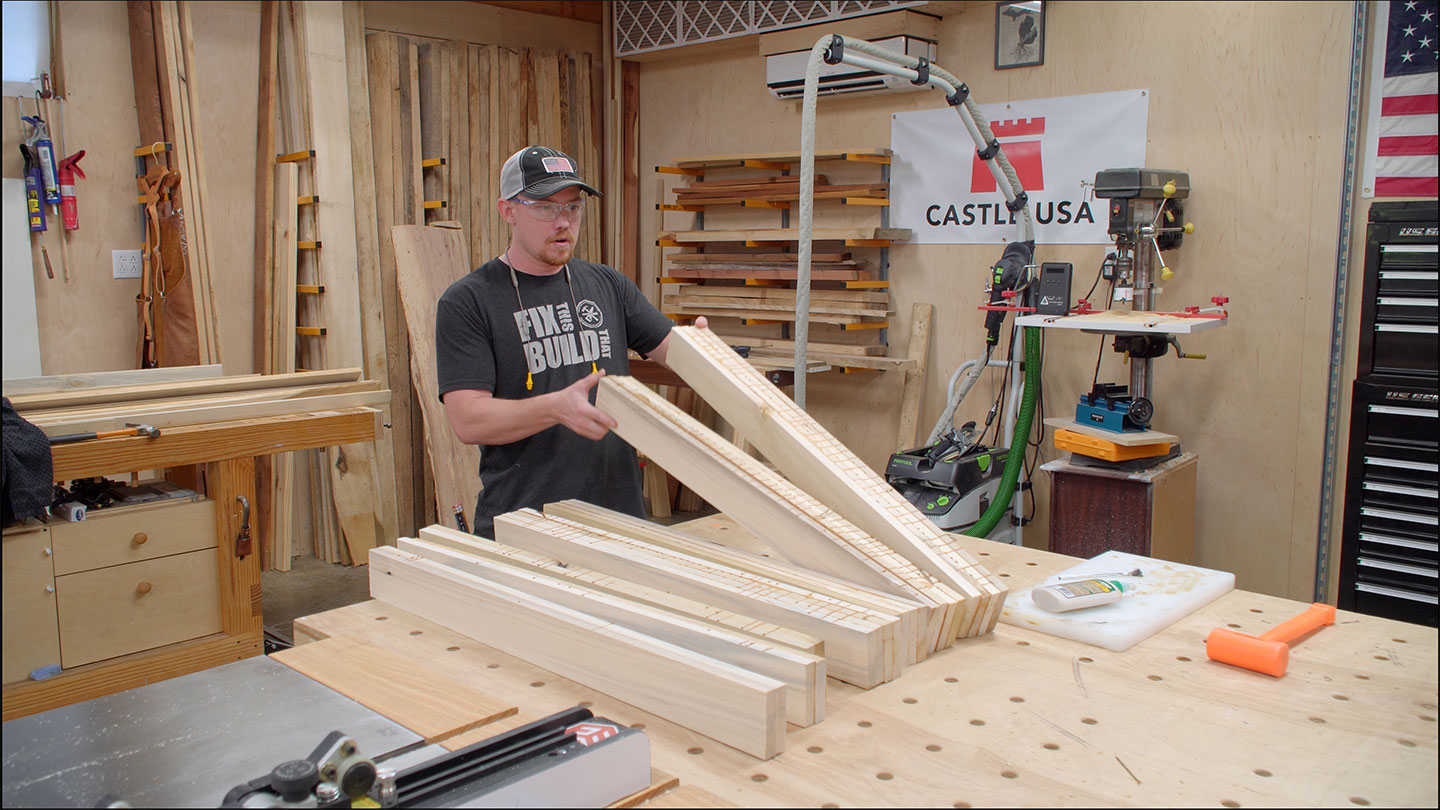
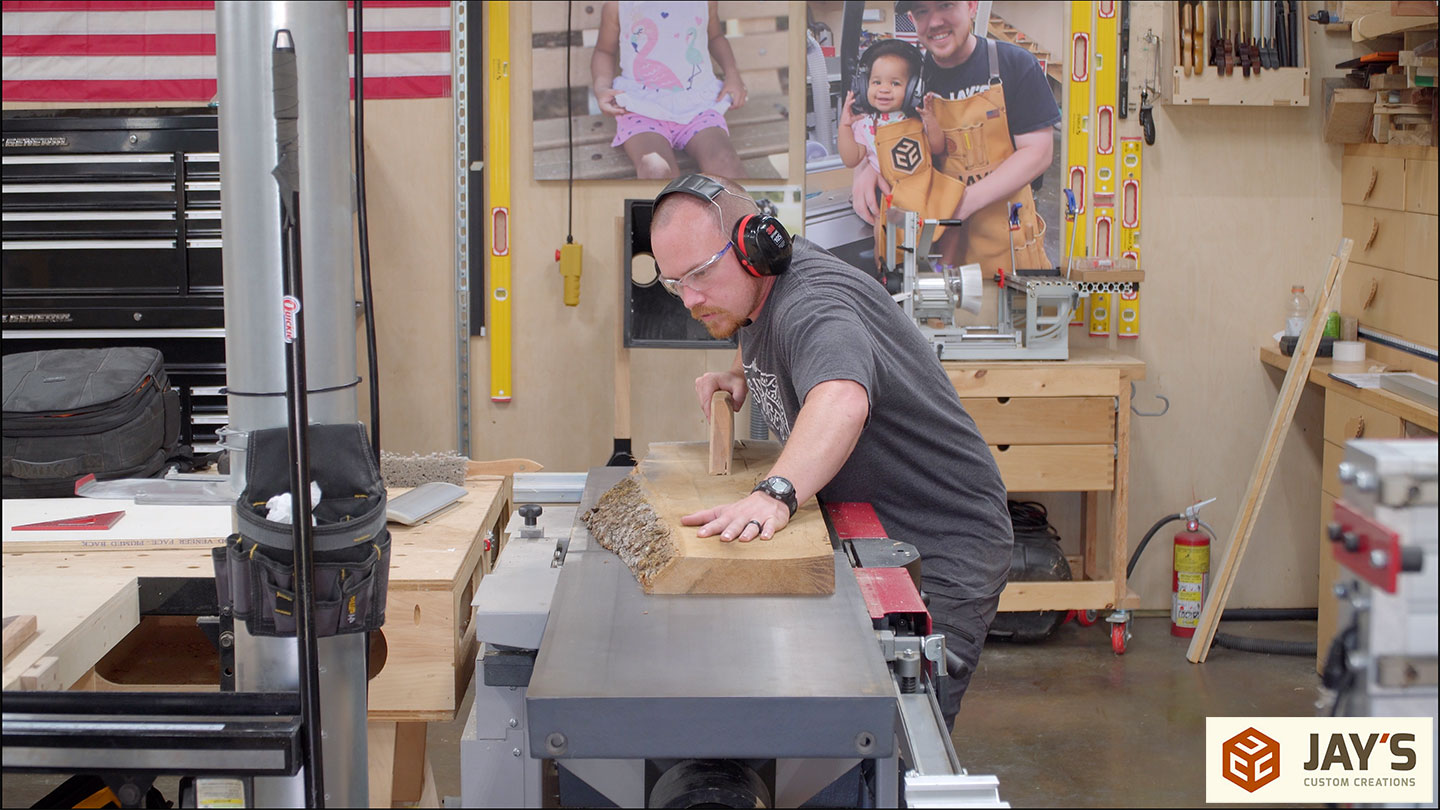
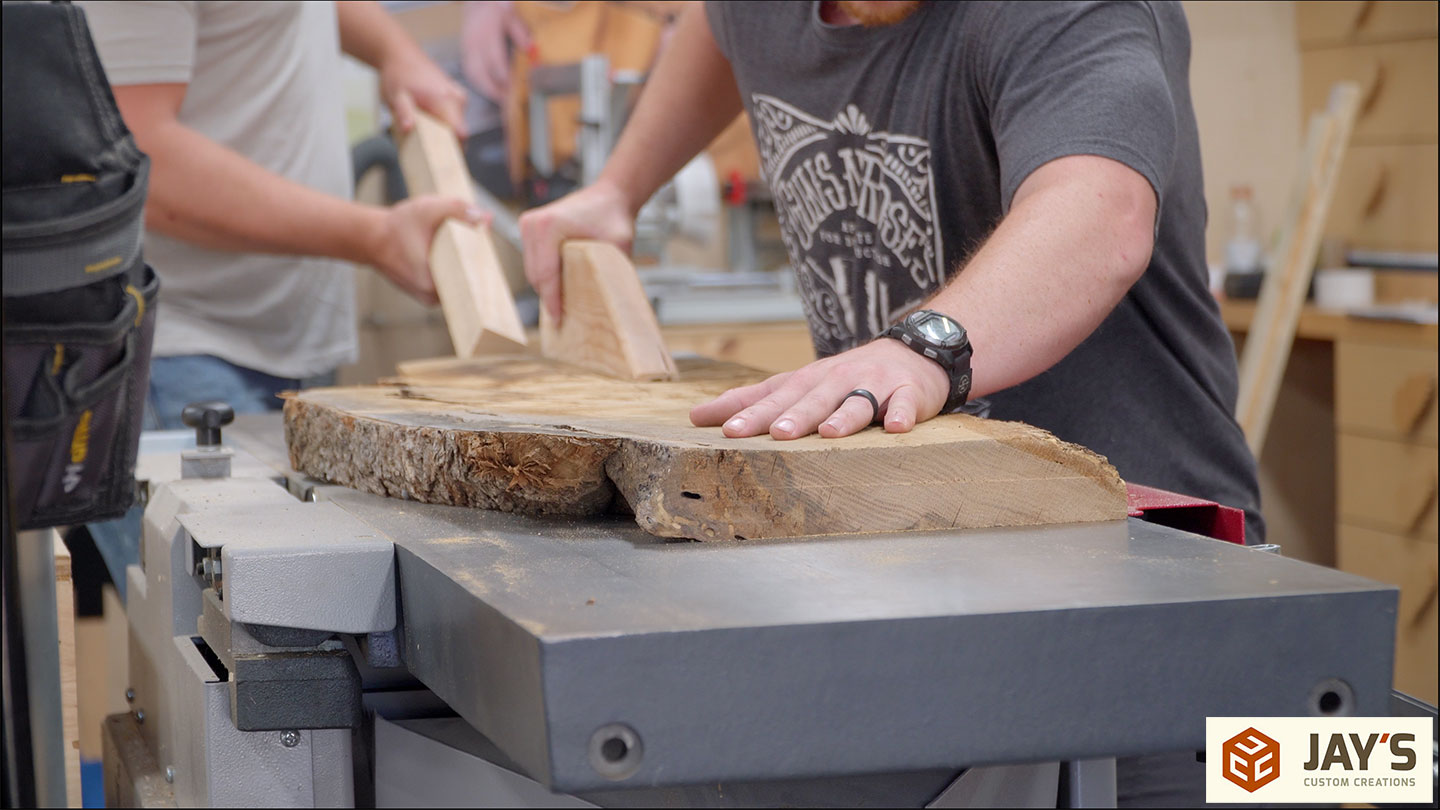
The everyday milling technique of jointer > planer > miter noticed > desk noticed is adopted.

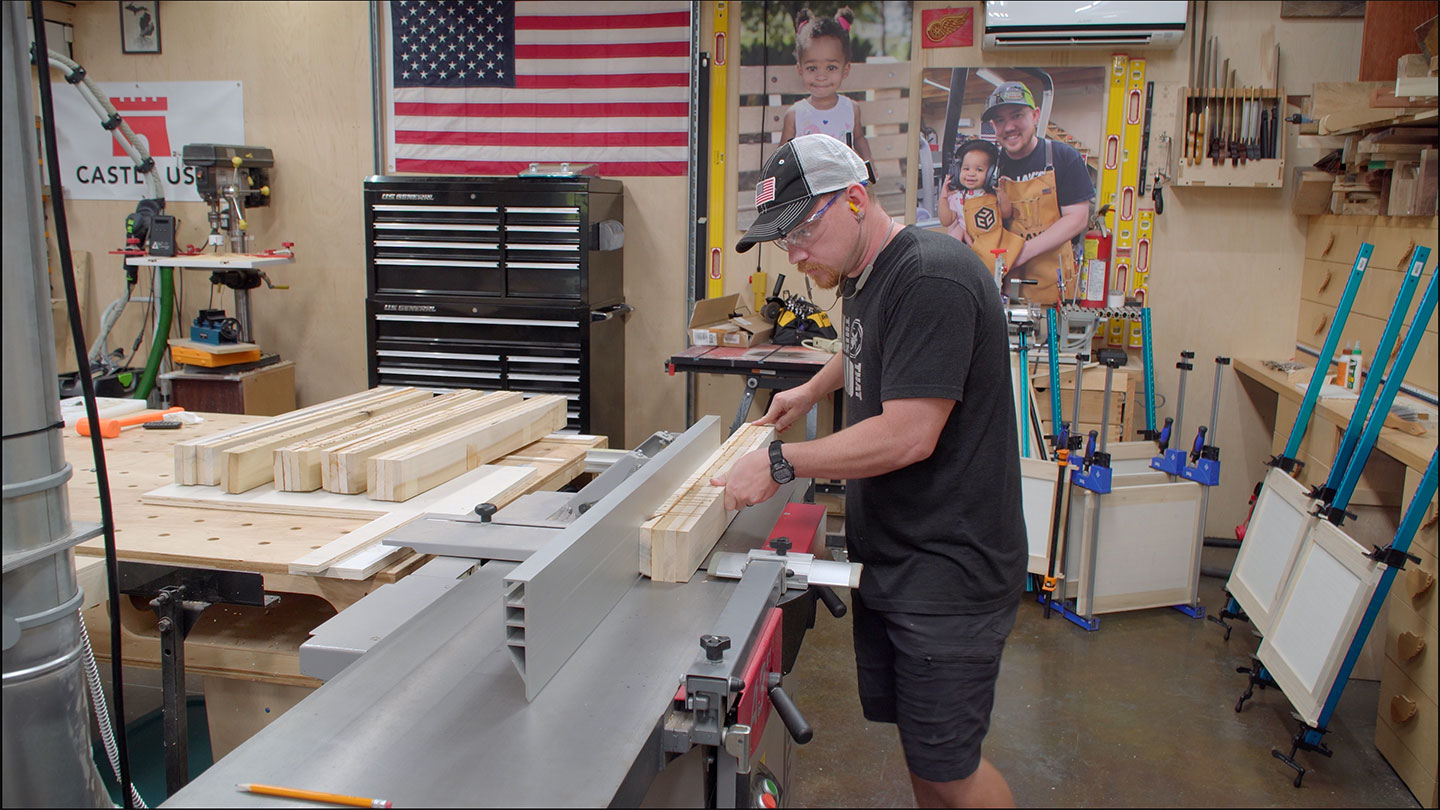
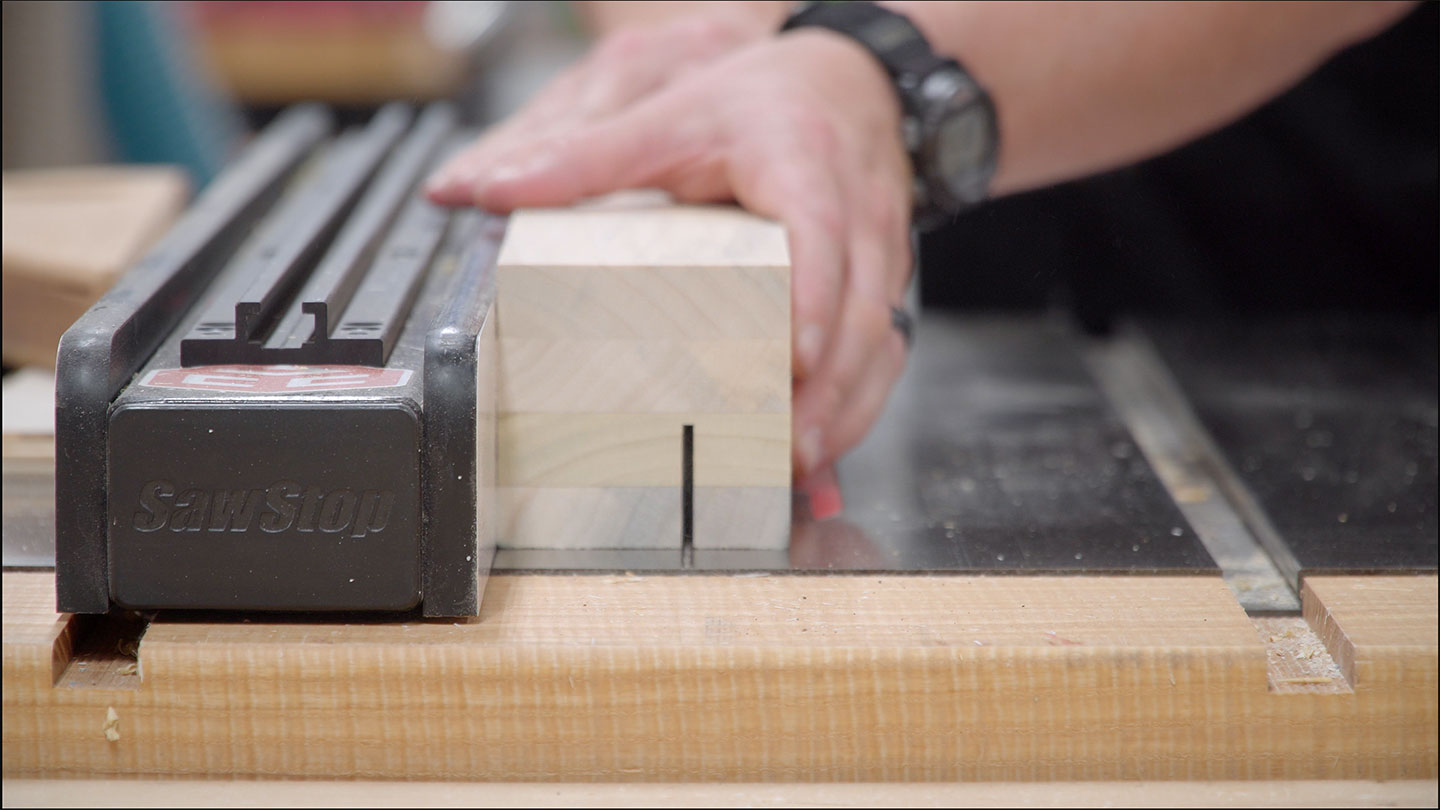
On the other hand, the desk noticed used to be handiest used for the nook leg rabbets. Those too will are compatible in position by the use of a rabbet. Two cuts on the desk noticed to create it however take into accout of the second one minimize I made. It’s generally no longer really useful to have the offcut trapped between the fence and the blade for kickback causes. If the piece has any pressure motion whilst being minimize you possibility that offcut being shot again like a missile. On this case, I didn’t see any indication of inner stresses and I extensively utilized a push stick with stay the offcut shifting ahead, previous the blade.

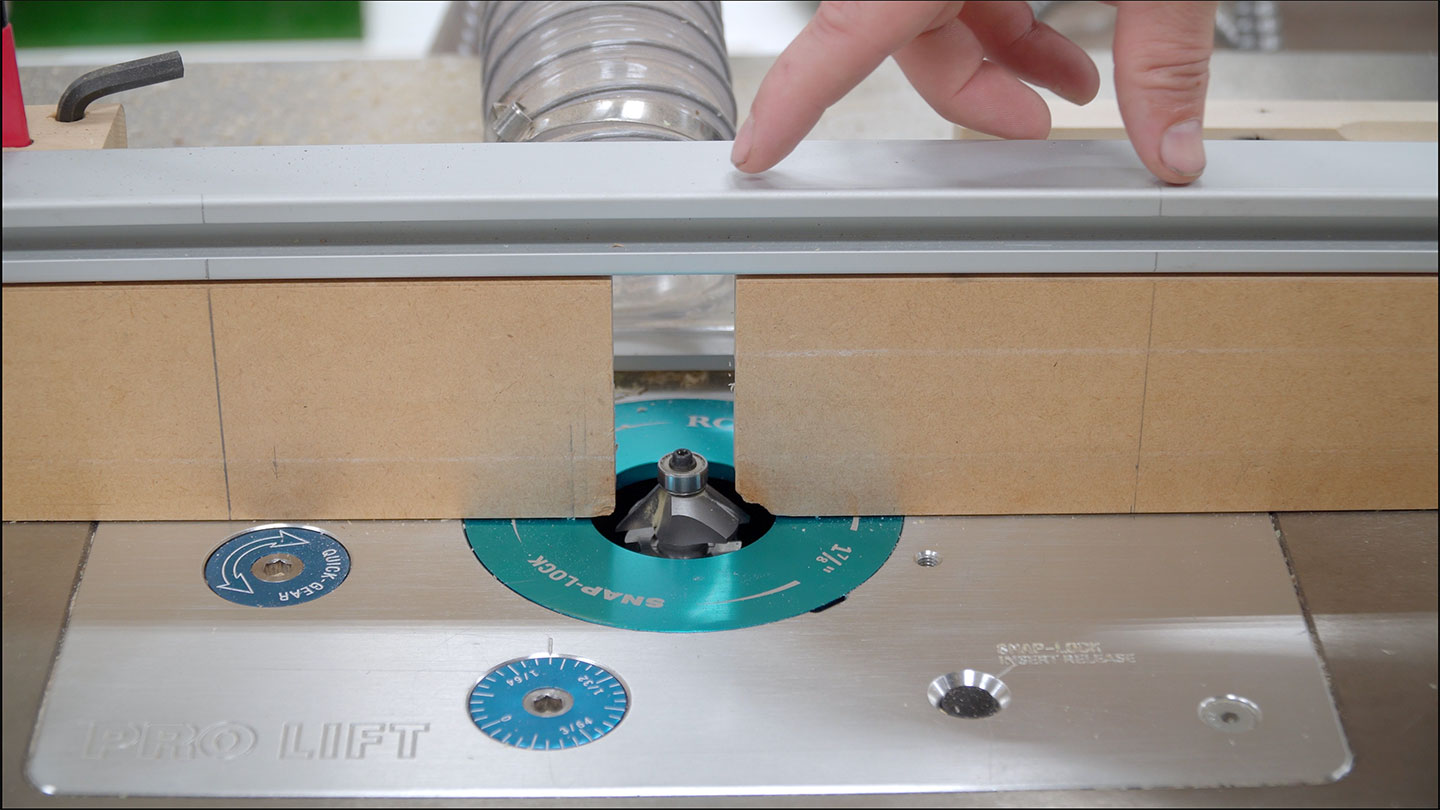
I’m the usage of the router desk so as to add a stopped chamfer element on every of the legs. The chamfer will get started and forestall a couple of inches clear of every finish of the leg so I scribed visible reference marks at the fence. It’s simple sufficient to begin and forestall at those traces through eye. No forestall block gadget is vital.

Throughout the chamfering procedure, I had an oopsie! The mud assortment at the router desk pulled some of the legs into the bit after I didn’t need it to. This gouge must be patched certainly one of two techniques. If this had been a transparent end piece I’d course a rabbet into the brink to totally get rid of the oopsie. Then glue a grain matching piece in position, flush it with each huge faces, then recreate the chamfer forestall location. Fortuitously, it is a painted piece so filling this with Bondo or one thing identical shall be more uncomplicated and simply as applicable.

The nook legs shall be secured with glue and a couple of screws in the course of the inside of the cupboard.

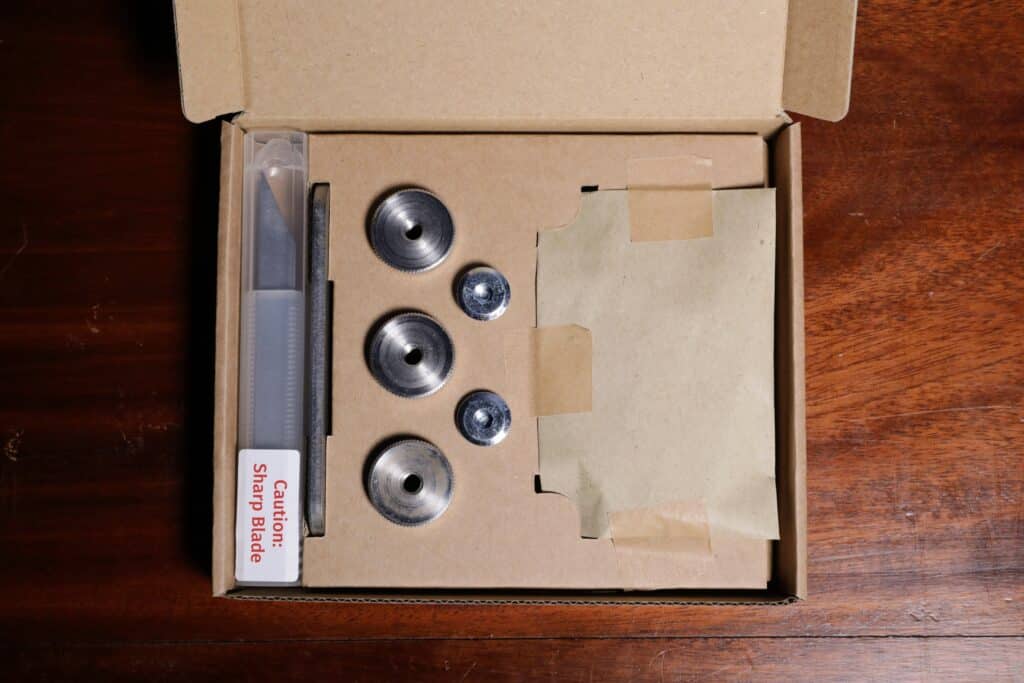
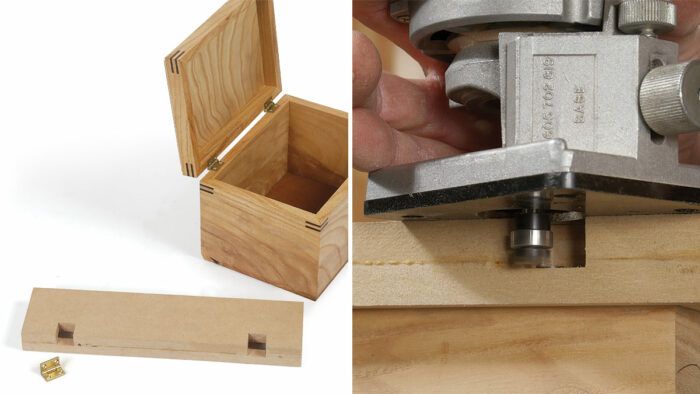
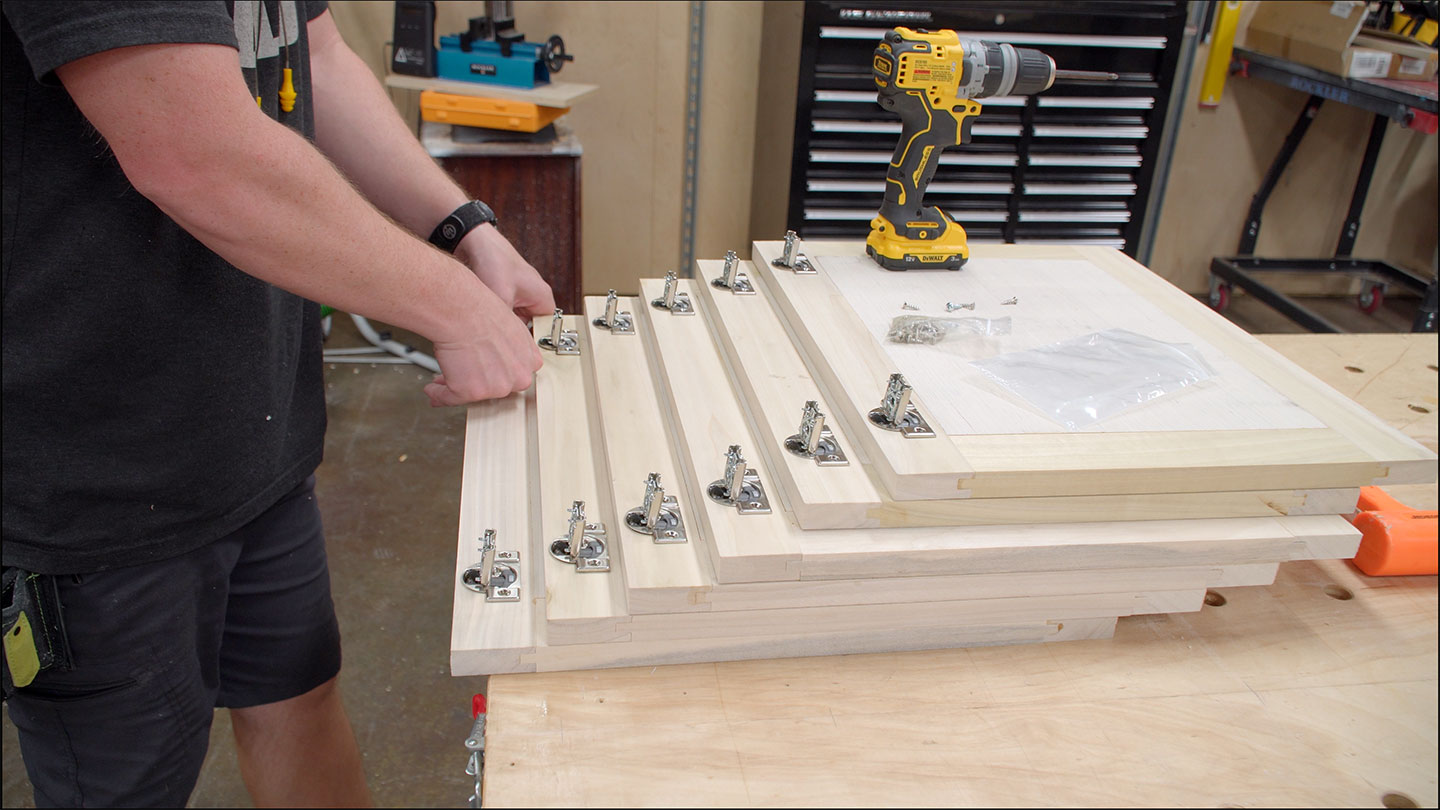
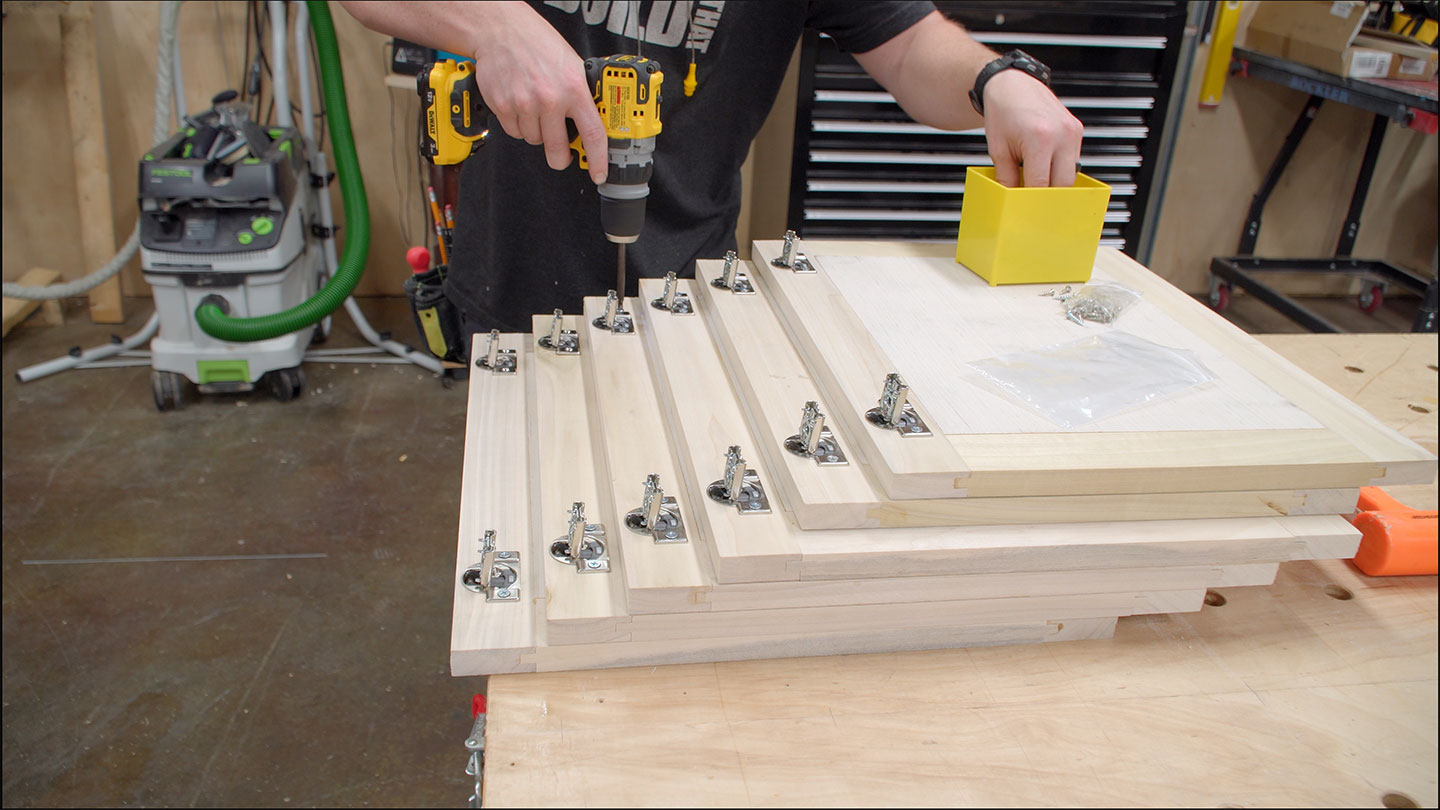
It’s time for the hinges. Those 1/2” overlay Blum comfortable shut hinges are my go-to for overlay doorways. They’re affordable and tremendous simple to enforce. I’m appearing this section on the drill press in the beginning as a result of that in point of fact is the quickest method to make the cup hinge holes.

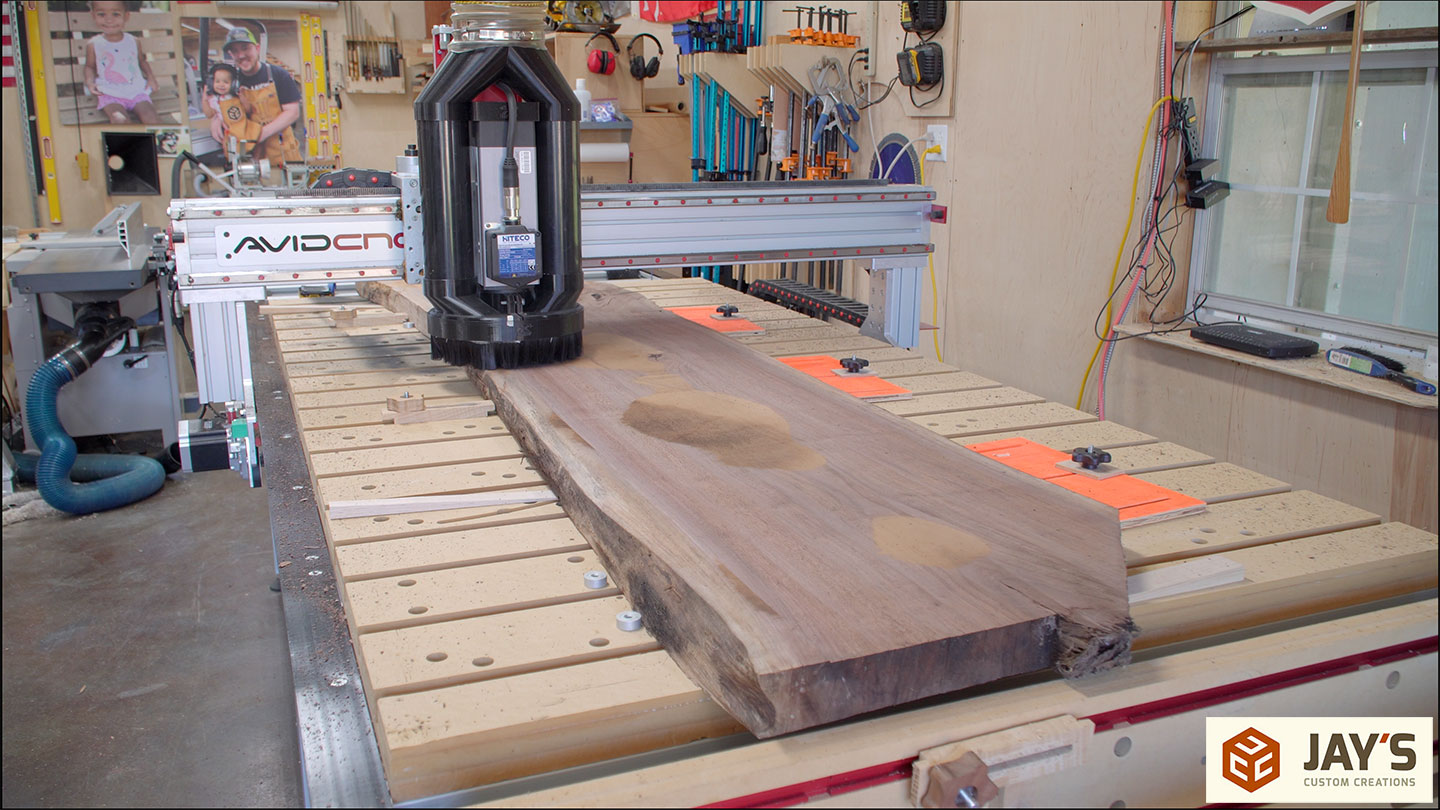
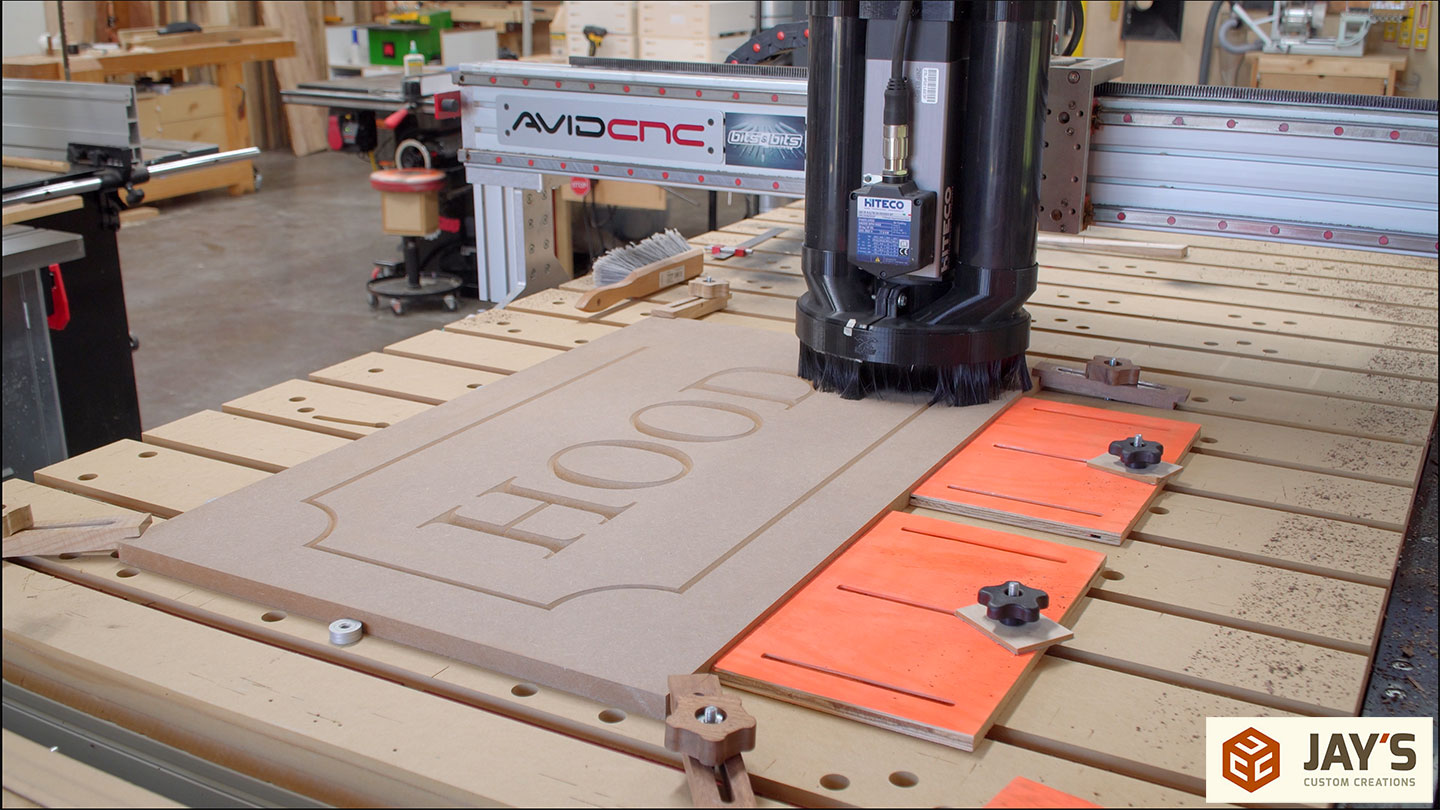
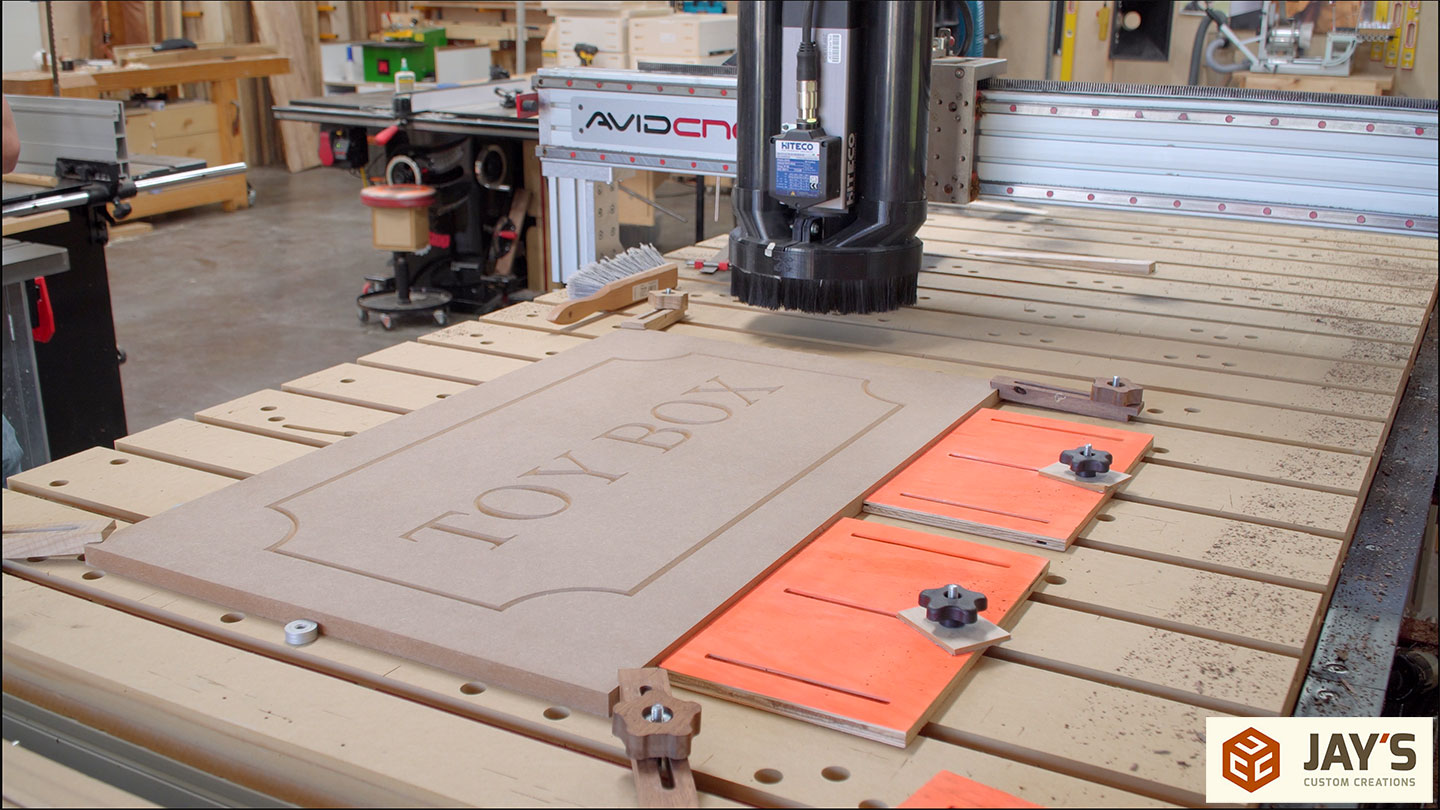
On the other hand, I couldn’t to find the right Forstner bit for the duty so I opted to make use of my CNC as an alternative. My setup is to just minimize one hinge hollow at a time. If I had been to create a program for each cup hinges I’d want a new program for every door of a special top. As a substitute, I made a program that has one hollow minimize on two doorways on the similar time. One is the highest hollow and the opposite is the ground hollow. By means of operating the minimize as soon as, switching the doorways, and operating the minimize a 2d time I’ll have all of my cup hinge holes minimize the similar distance clear of the highest and backside in the entire doorways irrespective of top.

Pop the hinges in position and upload the small screws to protected them. Relying at the picket species, pilot holes could also be required. Poplar is reasonably comfortable so I opted to not make the pilot holes.

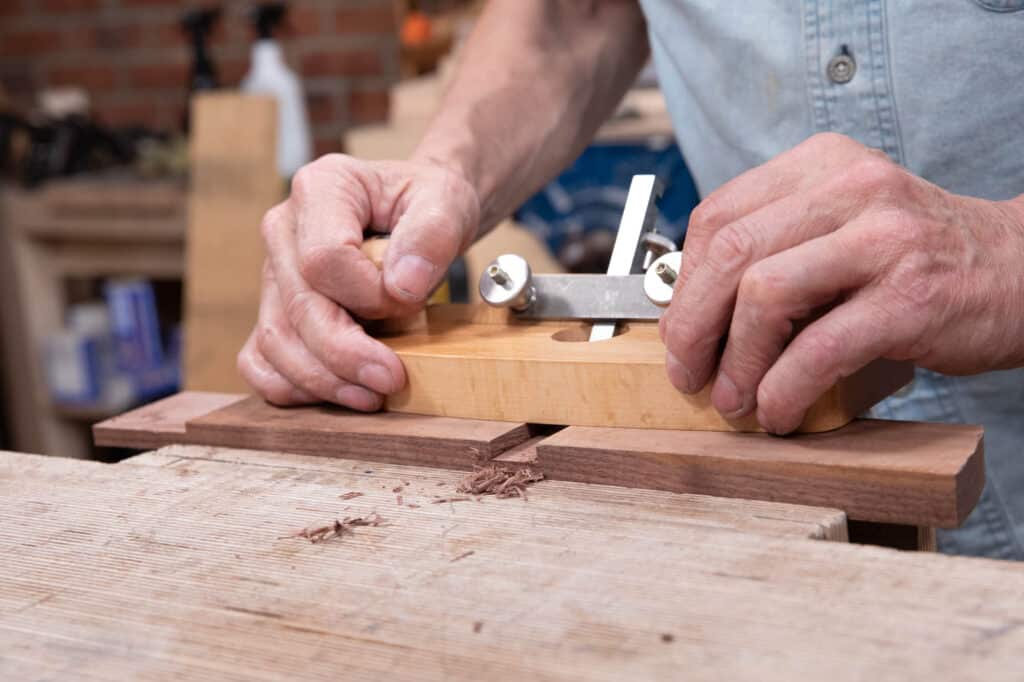
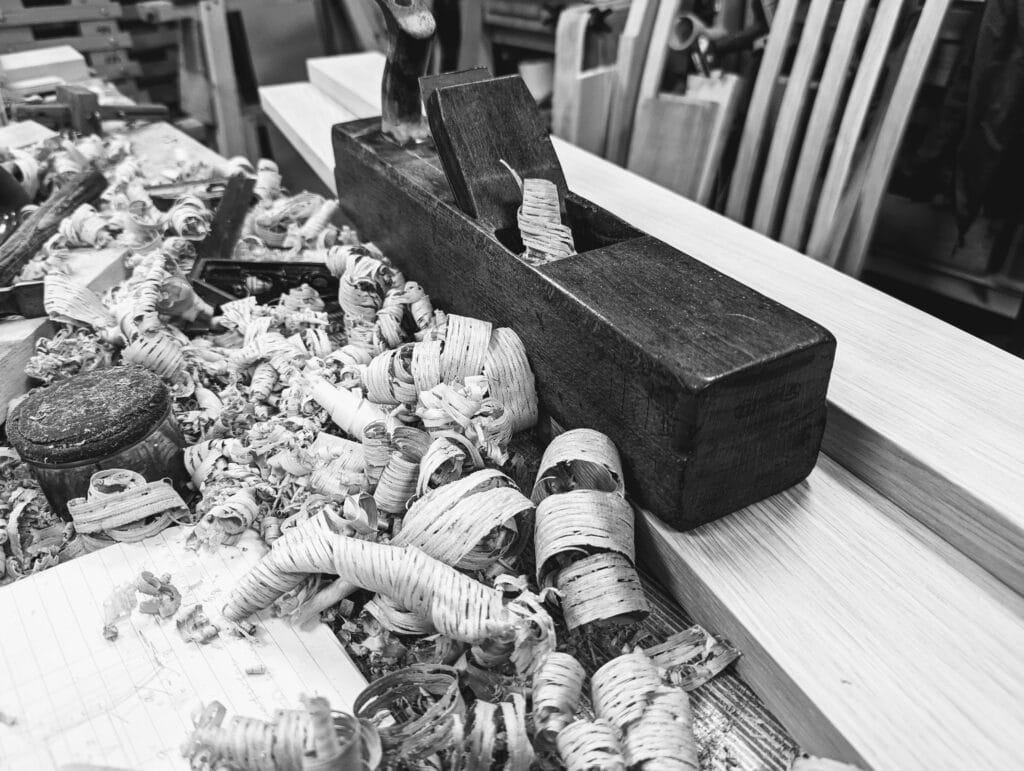
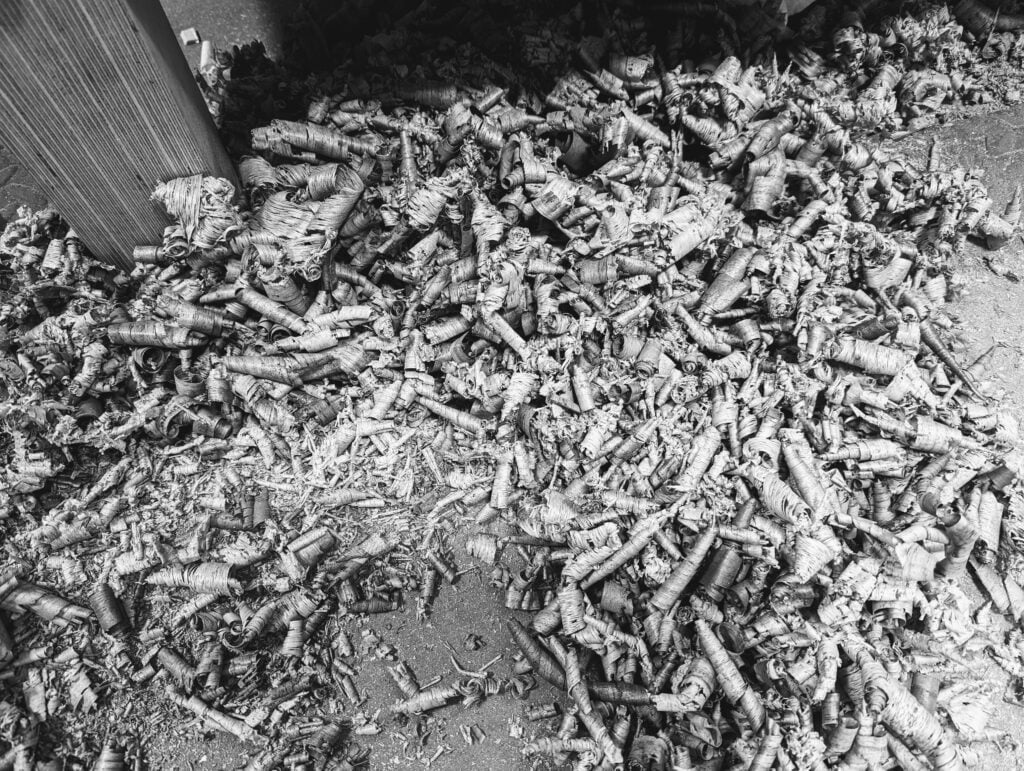
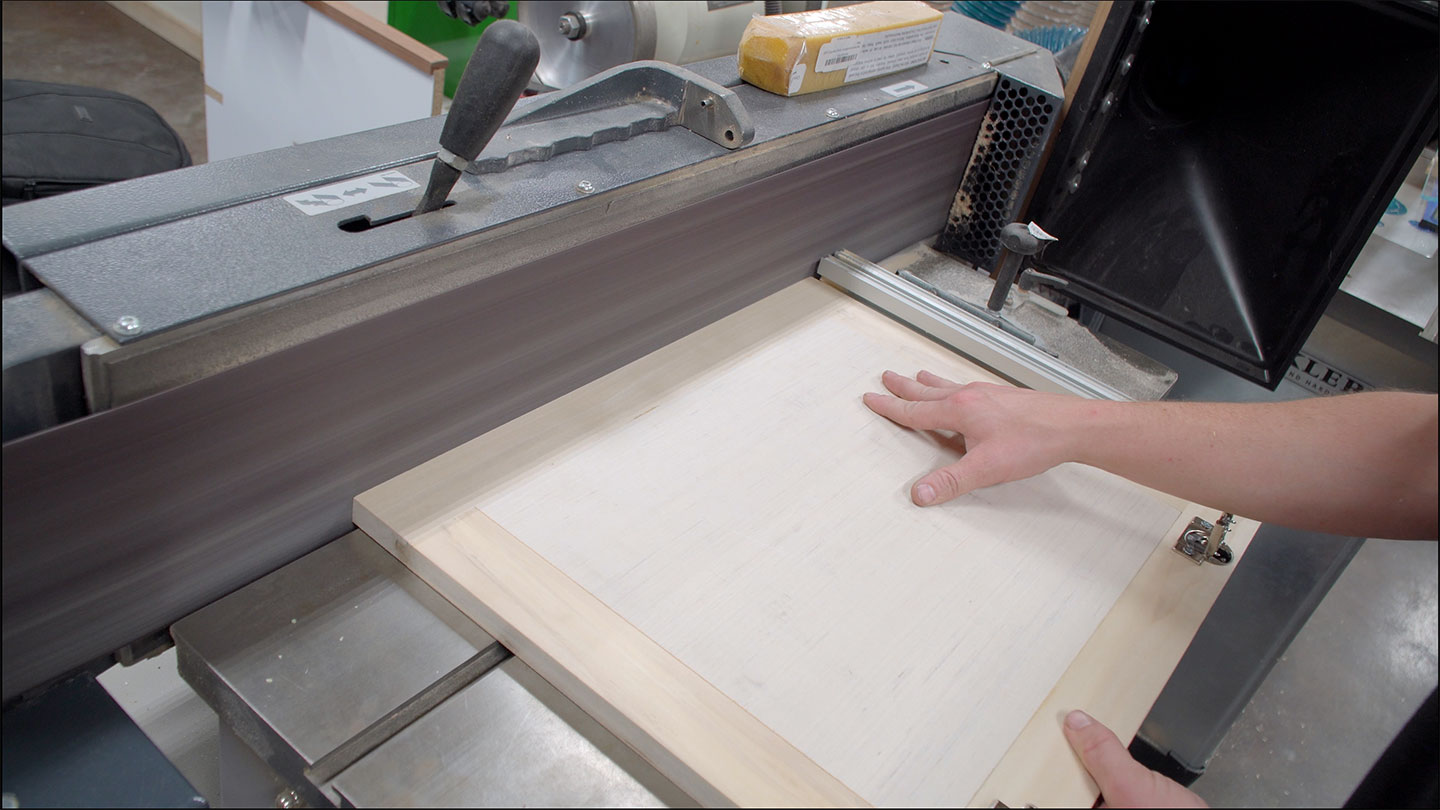
One ultimate step sooner than putting in the doorways and drawer fronts is to flush the fringe. A hand aircraft in a workbench vise gets the task accomplished simply superb however I opted to make use of my belt sander. This is among the maximum used machines in my store that will get reasonably little airtime. It’s extremely at hand for lots of duties out of doors of woodworking as neatly.

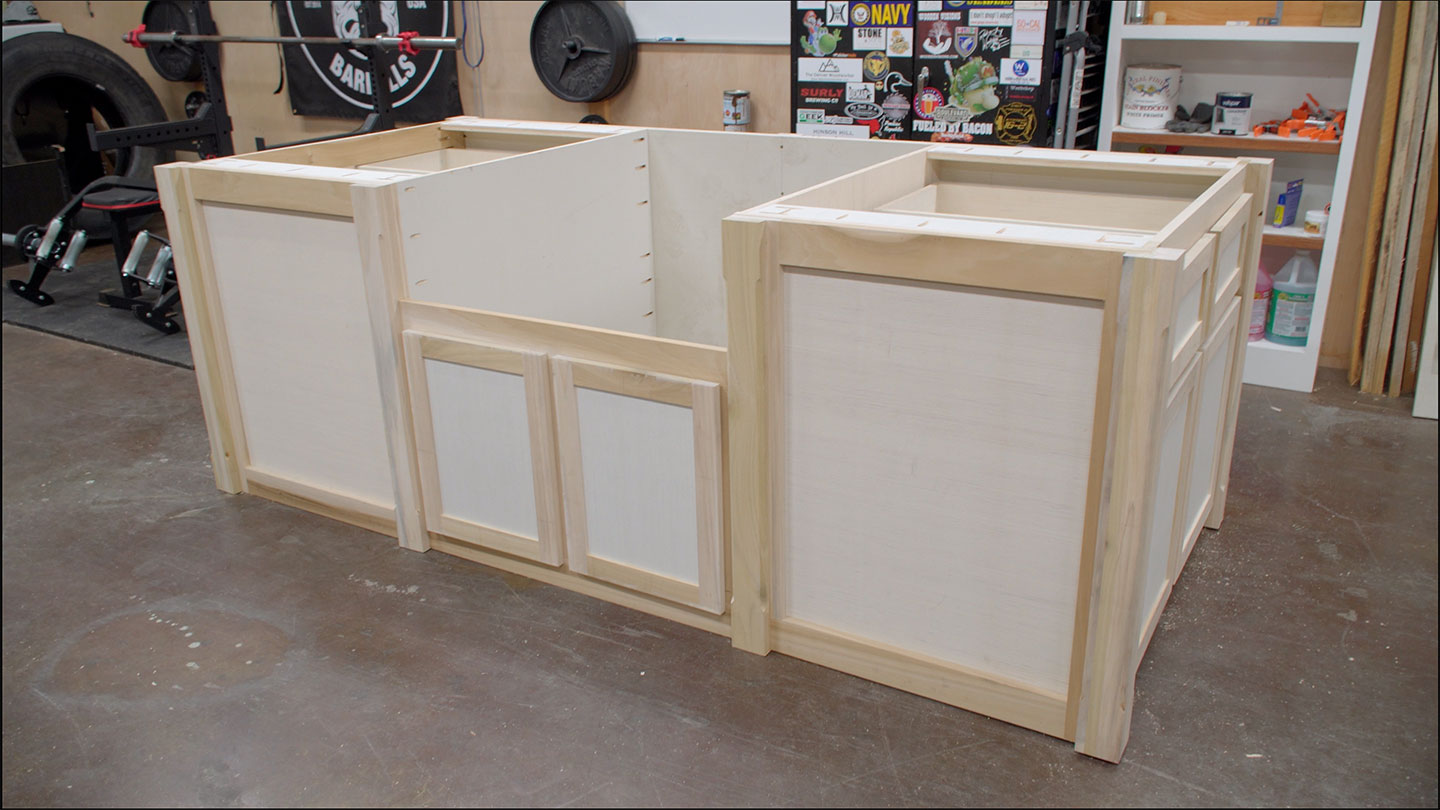
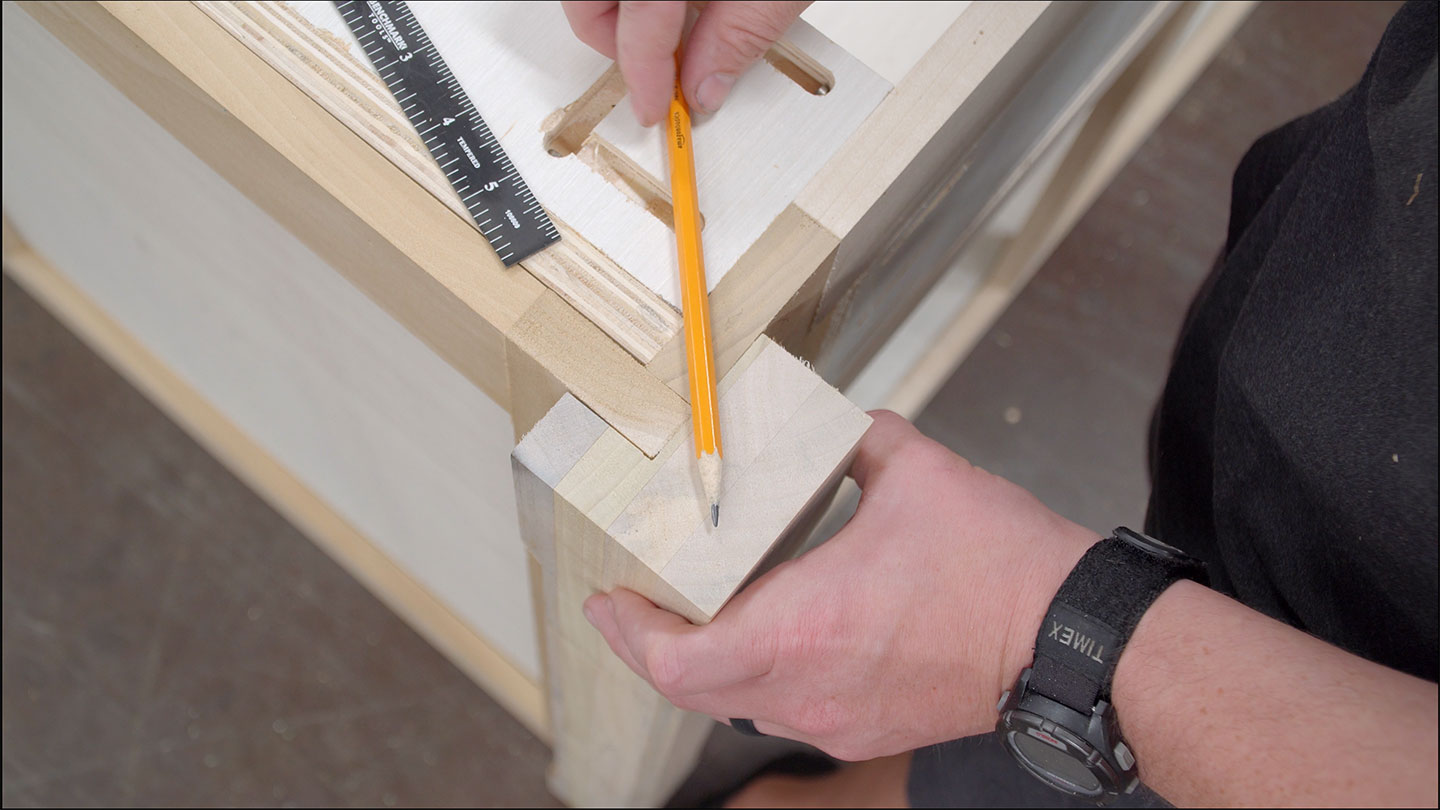
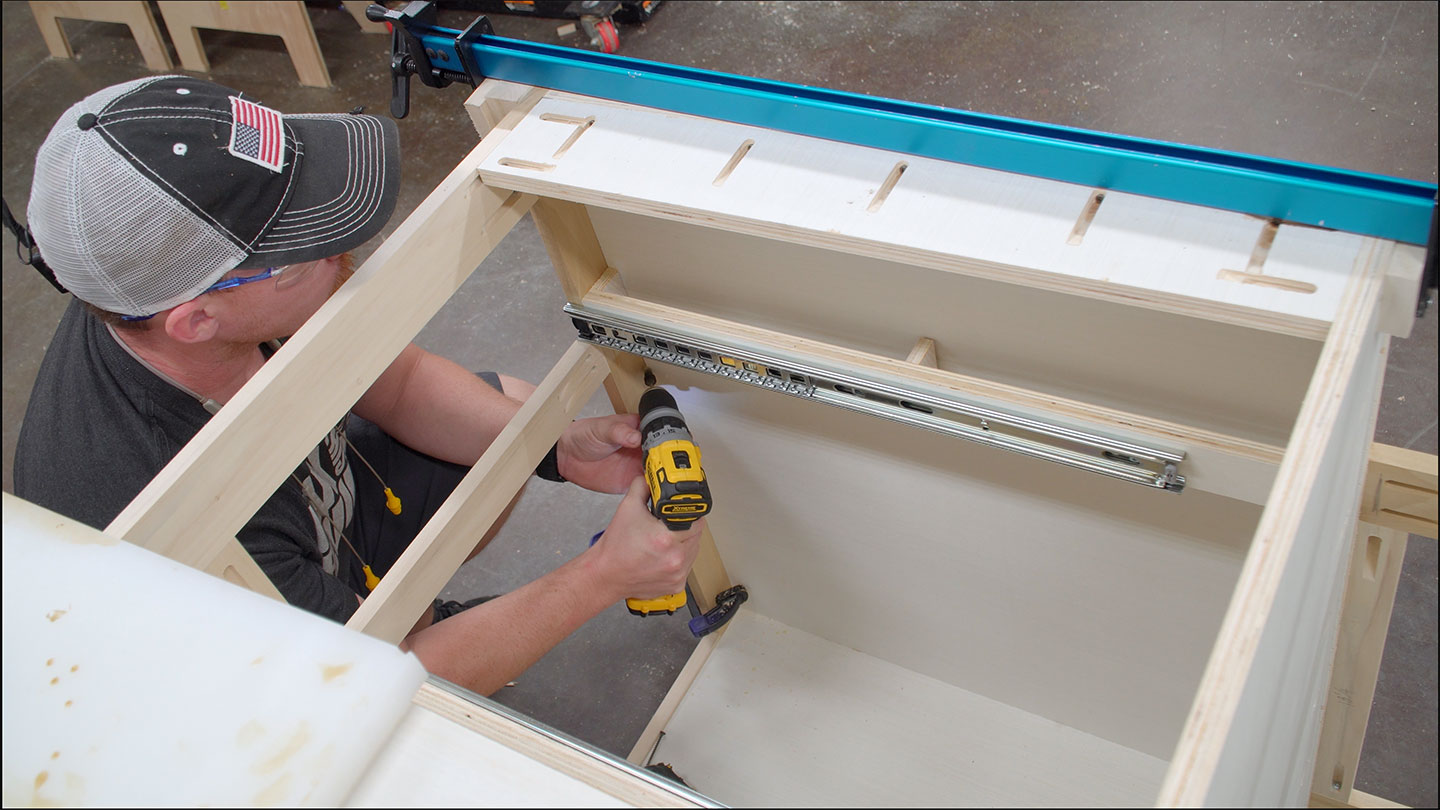
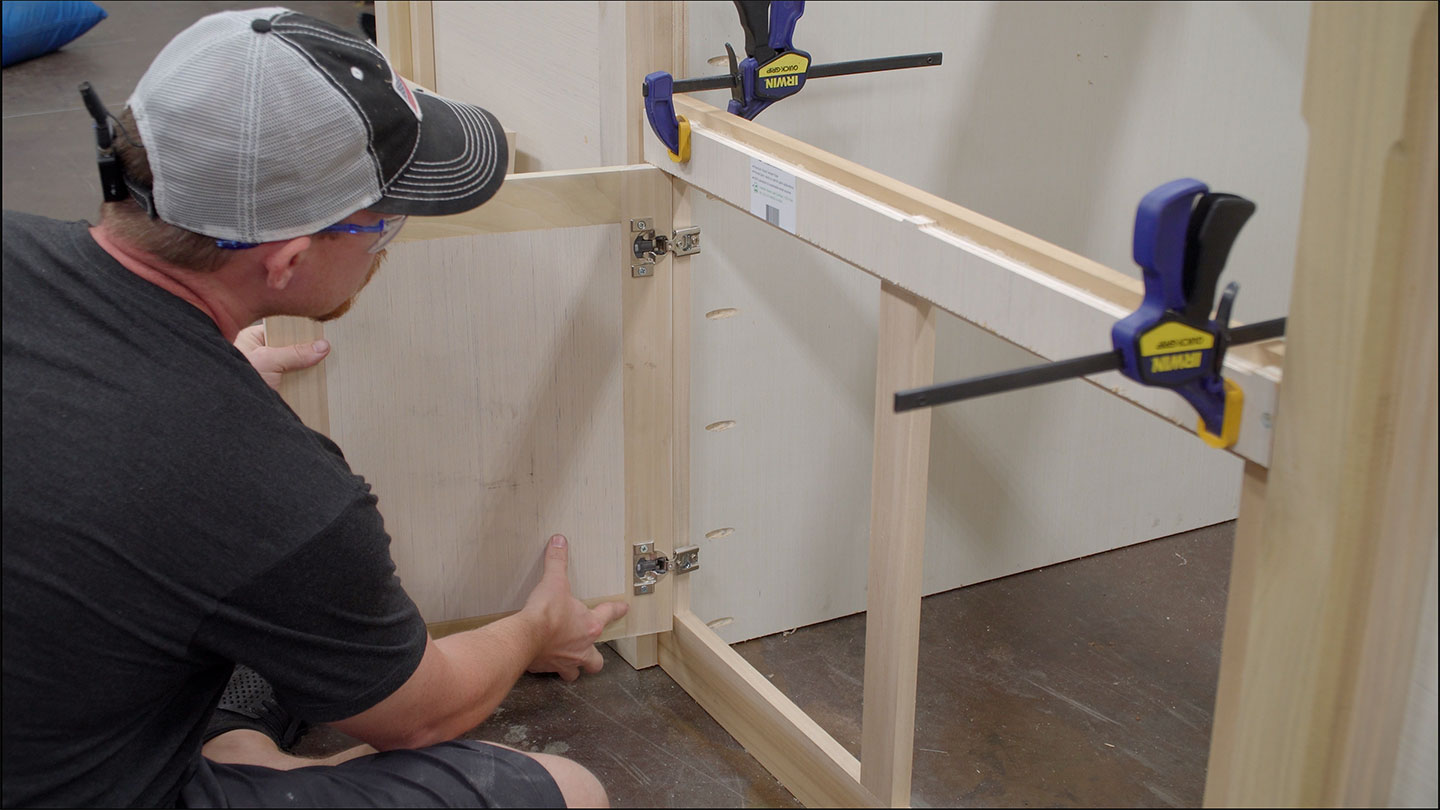
The hinges used are 1/2” overlay hinges. Because of this when put in at the face frames they’re going to overlay the face body through 1/2” when closed. The one alignment wanted through the installer is to verify the peak is about for the highest and backside 1/2” overlay. One of the best ways to try this is with a forestall block clamped to the cupboard someplace. I generally put the forestall block at the backside in order that gravity works for your prefer. On the other hand, the space between the highest of the door and the ground of the drawer is what is going to be maximum noticeable so I opted to position the forestall block on most sensible. From right here, I will be able to use my foot to raise the door whilst I take advantage of my palms to carry the door and protected it with screws.

The drawer fronts are even more uncomplicated. The forestall block rests on most sensible of the doorways, pilot holes are drilled, and a couple of screws added from the interior of the drawer cling the drawer entrance in position. Those doorways and drawers will in the end get pulls that fit the countertop.

(*4*)

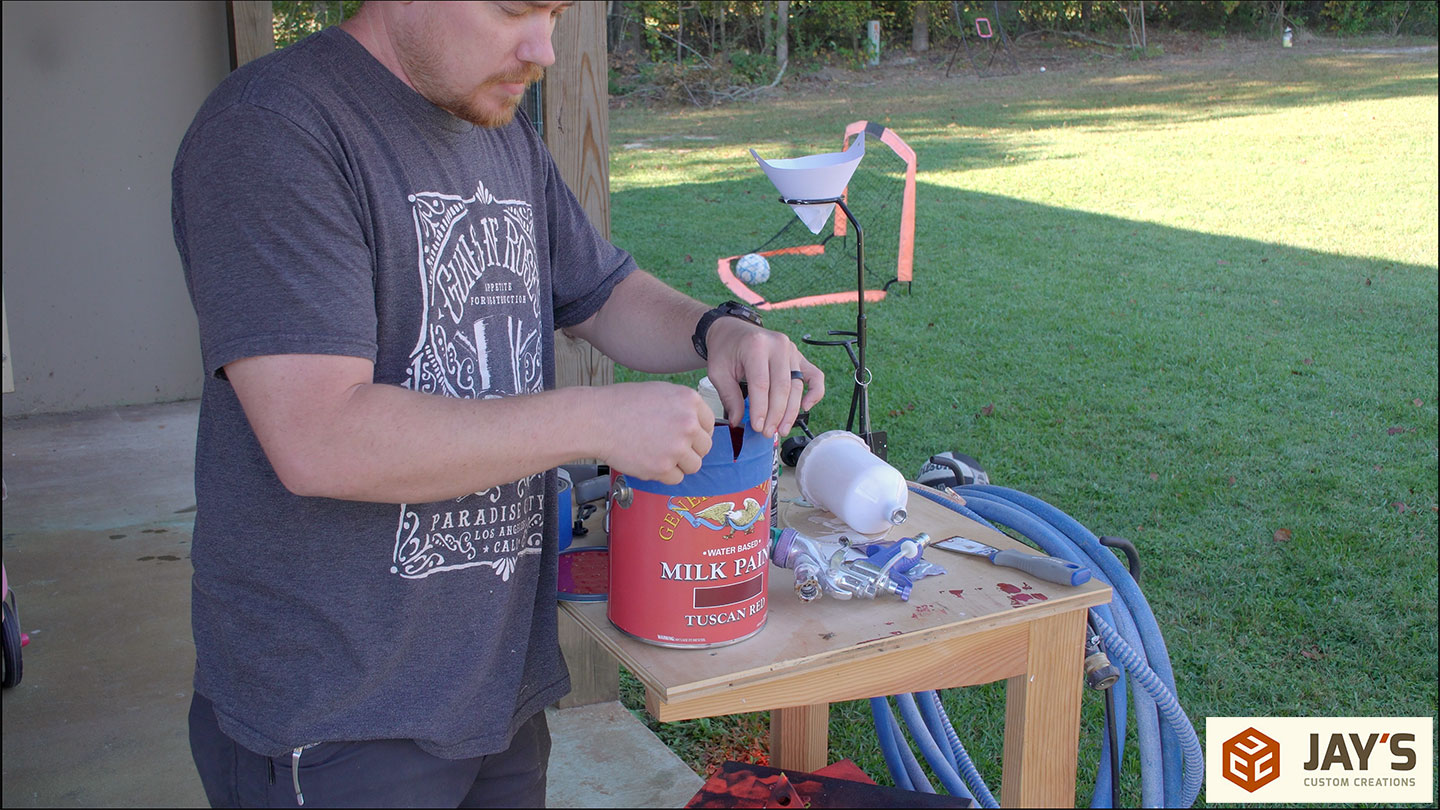
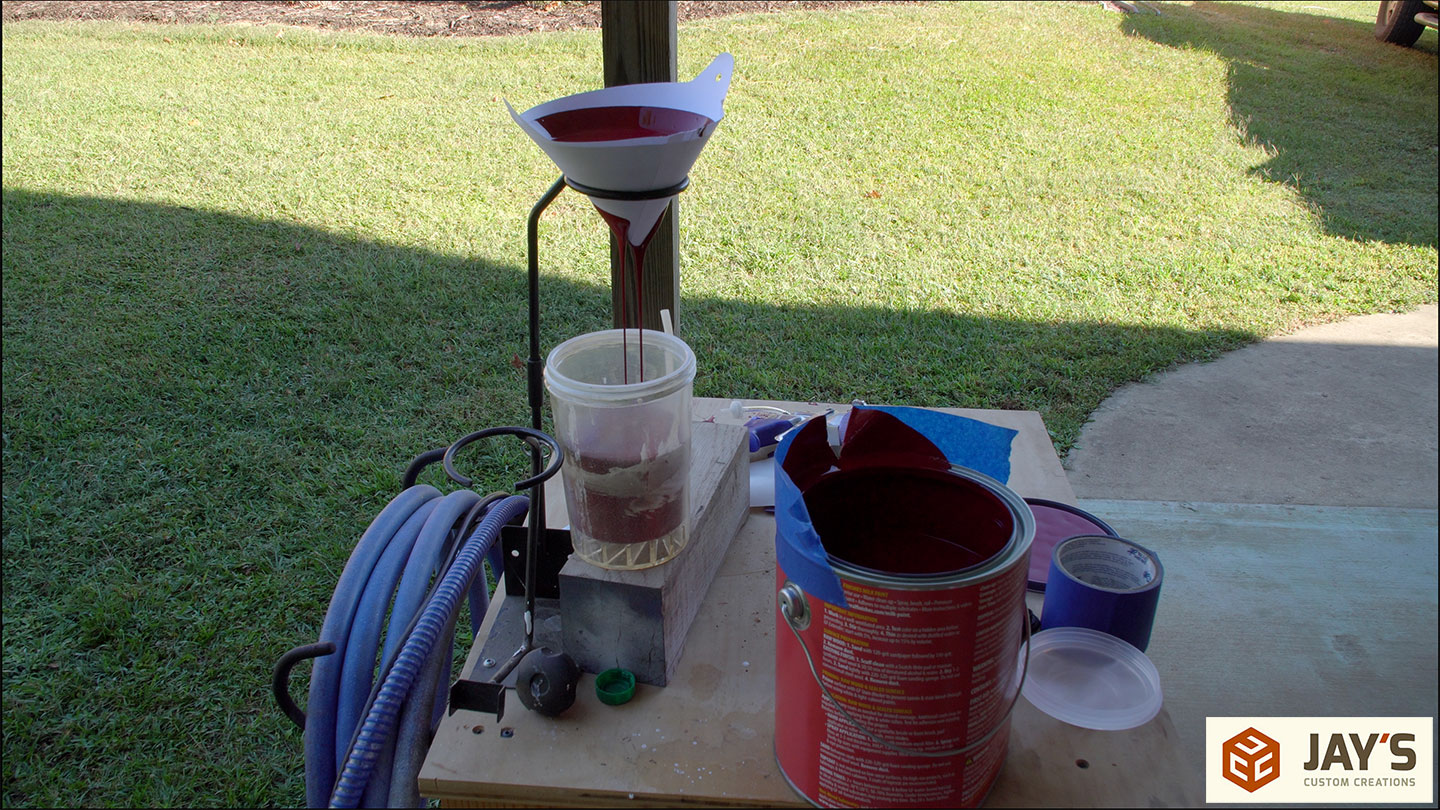
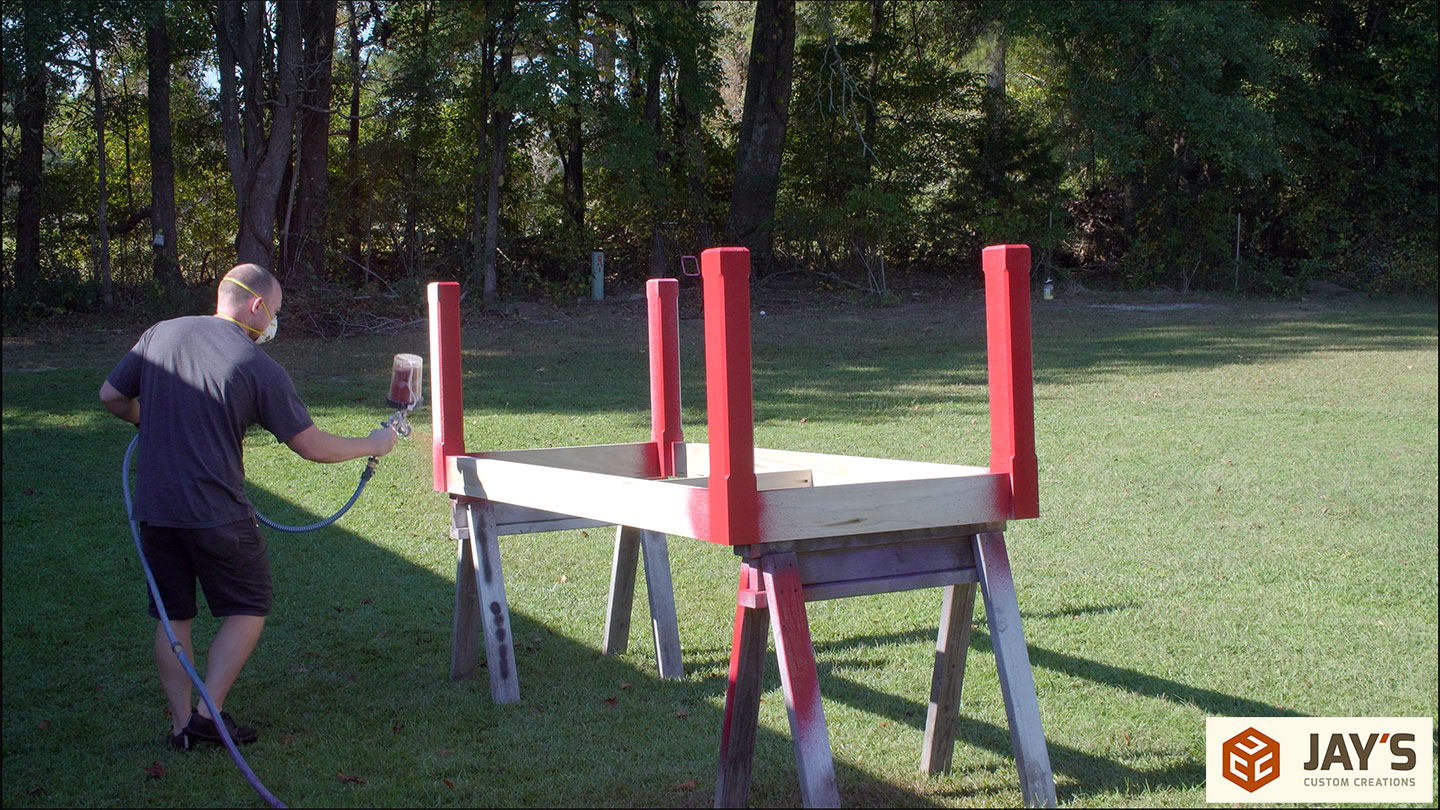
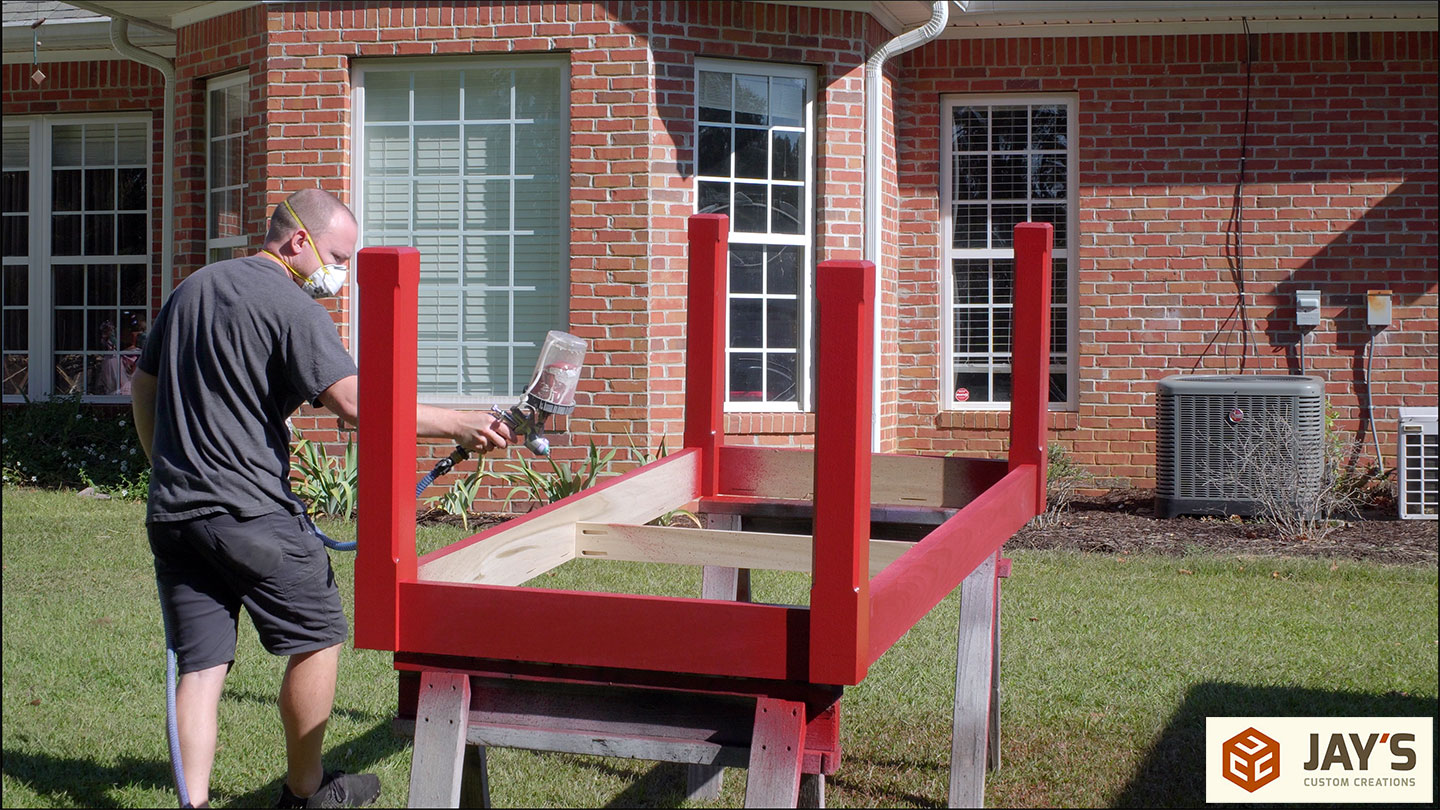
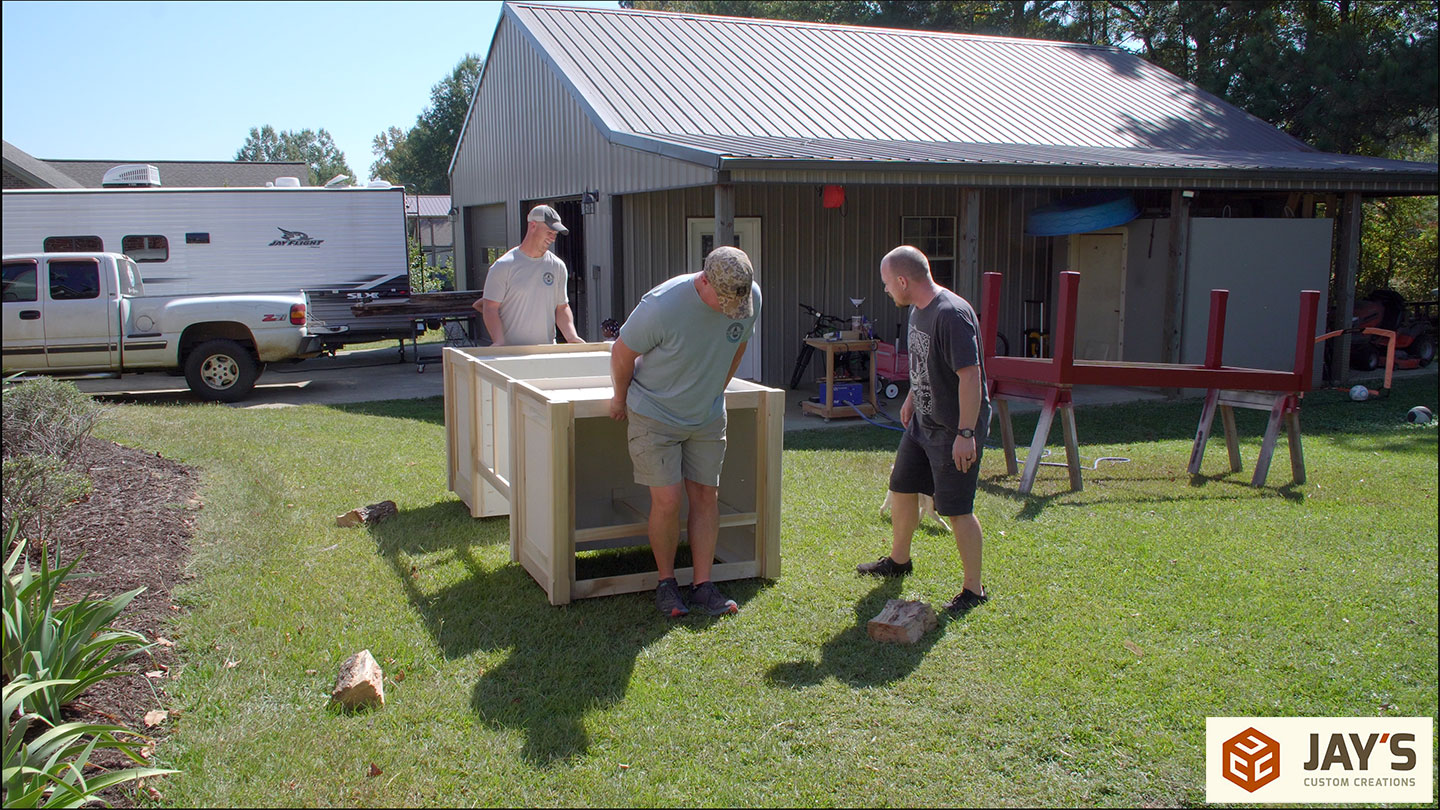
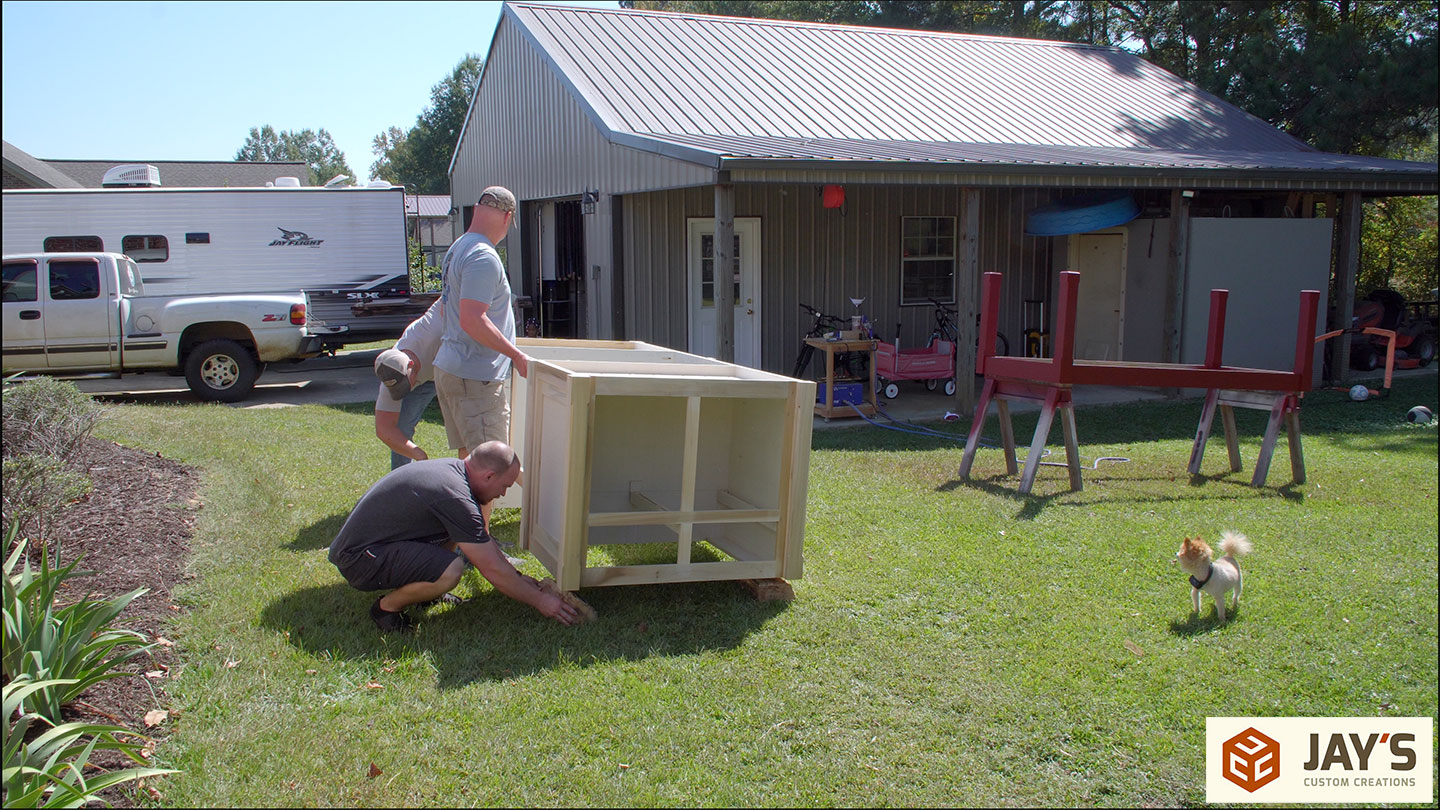
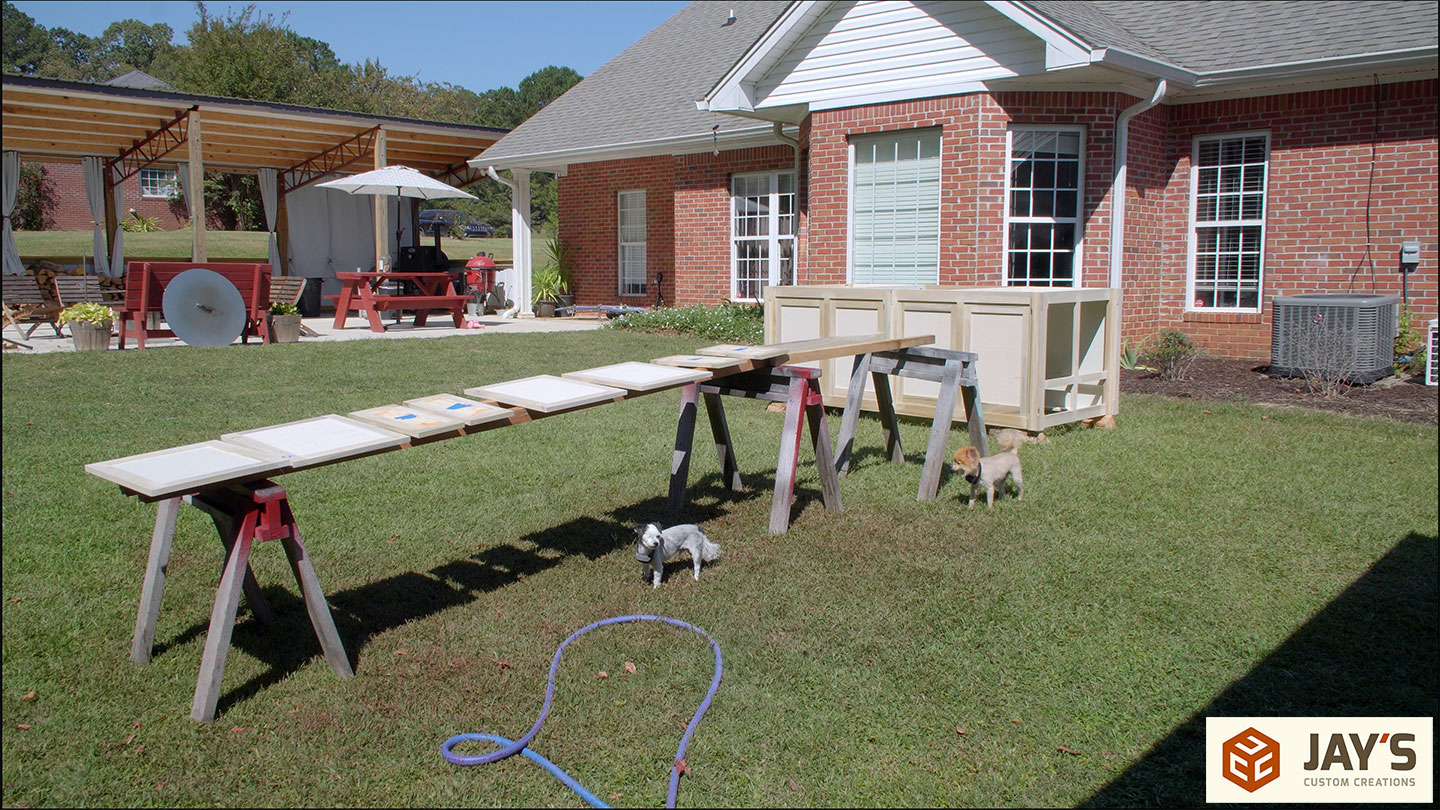
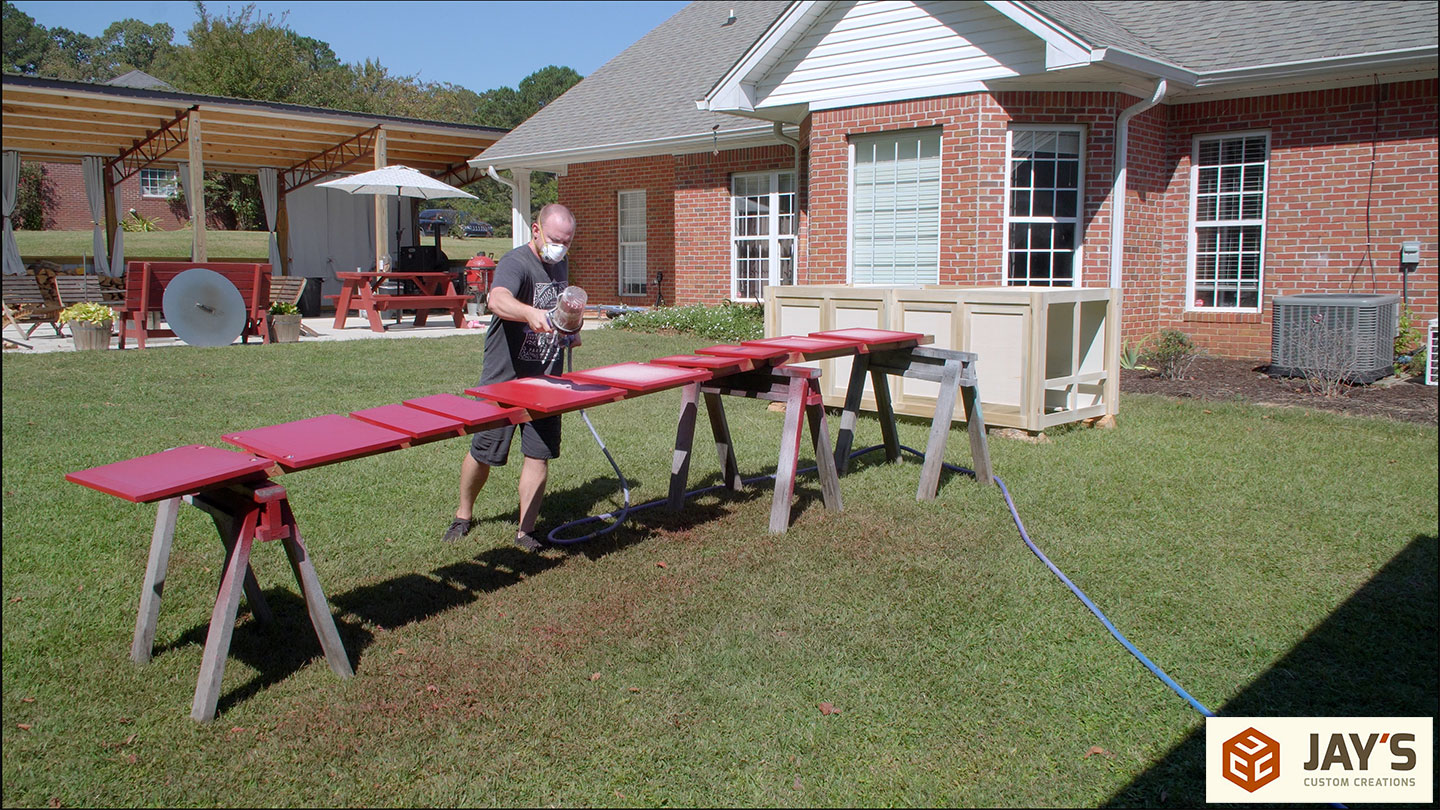
And that’s it for day 4 of development in this construct. All that’s left to do is somewhat little bit of fundamental trim paintings to the entrance and again plywood panels, the middle sink fortify, and the leveling ft. I’ll be completing the bottom with milk paint however will cling off on that till I am getting the matching farm desk constructed. That approach I will be able to spray them each on the similar time.

Video: Ben Prowell’s ebony and oak shelves

Video: Ben Prowell’s ebony and oak shelves

Ben Prowell proves that if you’ll see the road, you’ll noticed the road.

17th-century ‘Desk Box’ | Popular Woodworking

17th-century ‘Desk Box’ | Popular Woodworking

17th-century ‘Table Field’2023-01-05Popular Woodworking//www.popularwoodworking.com/wp-content/uploads/2020/01/deskboxopener.jpg200px200px

We might obtain a fee whilst you use our associate hyperlinks. On the other hand, this doesn’t have an effect on our suggestions.

Easy joinery will stay this piece in combination for hundreds of years.

Books, papers, lamps, candlesticks, spoons, Legos, clothes, electronics and extra all finally end up on most sensible of any flat surfaces in our area.


<br />


Via registering, I recognize and comply with Energetic Hobby Media’s (AIM) Phrases of Carrier and to AIM’s use of my touch knowledge to keep up a correspondence with me about AIM, its manufacturers or its third-party companions’ merchandise, services and products, occasions and analysis alternatives. AIM’s use of the ideas I supply will probably be in step with the AIM Privateness Coverage.


Router Plane Catch-up – Paul Sellers’ Blog

Router Plane Catch-up – Paul Sellers’ Blog

It’s been about 18 months since I turned into really stricken at sending other people out to spend loads of kilos on a unmarried device. Simply how may I am getting the fee down after sending other people to eBay to shop for up all of the inventory to be had? The costs rocked up ten to 15 occasions inside of a yr just because till that point this necessary device were altogether deserted. After I presented it for perfecting tenon cheeks along with mere dadoes it remodeled hand-device woodworking for such a lot of who gave the impression all the time to misalign their saws on tenons. Lately, everybody assumes that the router aircraft is a regular approach however till a couple of brief years in the past nobody ever used a router aircraft for this process. On account of the larger costs of secondhand after which the loss of availability of latest variations, I pulled in combination my very own model and made my prototypes adopted by means of the manufacturing fashion — I will be able to by no means return to any of the all-steel variations once more. I stated it again then and I will be able to say it once more, that is the most efficient router aircraft on this planet. What’s even higher is that any and all woodworkers could make their very own in a day’s paintings.

After we first launched the router aircraft equipment we felt we couldn’t market it as a result of we have been nonetheless within the early days of sourcing the inventory. Now we have just right shares in a position for transport out which you’ll be able to acquire right here. In my movies, I display you the right way to make the blade and the retainer bar however with the equipment, there’s no metalwork wanted.

For my part, each and every woodworker will have to personal this sort of just because they are able to make the majority of the aircraft from their very own picket and any aggregate of woods they select. I’ve used principally beech as a result of I’ve it in inventory however oak, ash, cherry and lots of extra will make a good looking lifetime router aircraft for everybody so as to add to their meeting of gear to revel in their woodworking with. For me, the router aircraft is a non-negotiable device. I want I had advanced this once I wrote my guide Very important Woodworking Hand Gear however I’m making plans a downloadable addendum to slide into the guide quickly.

You’ll certainly position your order right here and glance ahead to a few updates or upgrades so that you can upload a intensity forestall after which choice variations too proper right here on my weblog. I will be able to stay you posted!

Get to Know Black Bison Wax – Lost Art Press

Get to Know Black Bison Wax – Lost Art Press

Black bison wax over acrylic paint,

I exploit coloured waxes relatively so much in my completing, particularly the darker colours. I’m partial to Liberon’s Black Bison Paste Wax, however that’s as a result of it’s the best logo I’ve ever used.

Coloured waxes are a secret weapon when it comes to muting a in particular loud or brash colour. Additionally they upload a intensity to many finishes via including a 2nd hue to the full piece. 

Many vintage restorers use black wax to upload age to a end or a restore, and it’s nice for that. However that’s now not my purpose with black wax. I am hoping the footage right here will provide an explanation for it higher than phrases.

First, forget about the gross sales reproduction concerning the stuff. 

“(I)t feeds, polishes and is helping to save you picket drying out…” No, it doesn’t.

“Giving a extremely lustrous and hardwearing end…” It in truth offers a low-luster end. And, like any waxes, isn’t in particular sturdy.

“Well known for its high quality and delightful, unique aroma…” Uhhh, these things smells like a Fifties cleansing resolution for septic tanks. It isn’t delightful. However the odor dissipates.

A comb-back chair with best acrylic paint. No black wax.
The similar chair after a coat of coloured wax.

Right here’s what it in point of fact does. It’s a fast-drying sludge. Select a colour. I exploit “Darkish Oak” and “Tudor Oak” and can not inform the adaptation. While you apply it to uncooked picket, reminiscent of oak, it is going to darken the oak and accumulate within the picket’s open pores. When used on uncooked closed-pore woods, reminiscent of pine, it most often looks as if a smeary mess (a take a look at board will verify this).

I generally apply it to best of a end, both shellac or paint. When used over shellac, it is going to cut back the brashness of the brand new shellac, and the wax will accumulate within the pores of the picket, giving the piece just a little of measurement.

I like the combo of mahogany, shellac and black wax. That’s what I exploit on nearly all of my marketing campaign items.

When used over paint, the black wax will get just a little smeary. It’ll accumulate in small voids left within the paint. And it is going to buff off inconsistently at the paint. This can be a excellent factor. A vibrant new paint end can seem like you dipped your furnishings in Plasti-Dip. The asymmetric absorption of the wax mutes the one colour.

Software

The stuff dries briefly, so I like to recommend you’re employed small spaces, about 12″ x 12″. Wipe the wax on generously with a rag so you’ll be able to push it into the pores and small voids (put on protecting gloves). Stay wiping the wax till you may have a skinny, constant coat. Then right away start wiping it off with a blank, coarse rag (I exploit towels with a Huck weave – mainly surgical towels). Stay wiping till you can not take away to any extent further. Then transfer on to the following segment of the challenge.

When you botch a bit, merely observe extra wax. The wax’s solvent will dissolve the onerous layer and you’ll be able to wipe once more. Or dab some mineral spirits on a rag and you’ll be able to rub the skin to take away skinny layers of wax till you get the impact you wish to have.

If at any time you hate the end, flood the skin with mineral spirits and rub onerous. Many of the wax will come off.

A contemporary take a look at board, The uncooked colours are at the proper. The colours at the left display the illusion after a coat of the coloured wax.

Check Forums

Making take a look at forums is the one manner to be certain you are going to get the impact you wish to have. I’ve used the wax for many years and nonetheless do a take a look at board earlier than I get started smearing the stuff on anything else.

A tin of these items lasts for a few years, so don’t be eliminate via the top value (about $35-$40 right here within the U.S.). Don’t be eliminate via the odor (we name it the “pungent janitor” wax as it smells like some cleansing fluid from my youth). And don’t be eliminate via the bison phase. I believe there’s hardly ever any bison within the wax.

– Christopher Schwarz

Hinge mortise jig for boxes

Hinge mortise jig for boxes

Synopsis: Becoming hinges is without doubt one of the largest demanding situations for new boxmakers. This jig is helping Doug Stowe’s scholars get completely matching hinge mortises on each the field and its lid. This jig merely clamps to the field frame and the bench, and slides to the opposite finish for the second one mortise. Recommendations on the use of the jig and adapting it to other tasks are integrated.


I’ve made a large number of boxes and taught a large number of other folks the way to lead them to. One of the most spaces that scholars to find maximum difficult is becoming hinges to a just about completed field. To lend a hand my scholars throughout all categories and boxes, I devised a quick-and-easy jig with notches for the router to practice and a fence to place it in opposition to the workpiece. The jig all however promises completely matching mortises within the field and its lid. Fortunately, it really works simply as smartly for me in my very own store.

Finish stops are the important thing to clean registration

End stop drawing
All portions comprised of 1 ⁄ 2-in. MDF.

With notches sized to a particular hinge and a fence and forestalls for certain reference, this no-frills jig takes the headache out of becoming hinges to a field and its lid—or many boxes and plenty of lids. The top stops lend a hand make sure that correct alignment between the field and lid.


Symmetrical jig with stops

Tailor your jig on your router, hinges, and boxes. The jig’s base will have to be 1 in. or extra longer than the longest field you are expecting to make with a specific hinge and vast sufficient to with ease strengthen your router. I discover a trim router to be superb right here, because it’s small, light-weight, and clean to regulate. I take advantage of a three ⁄ 16-in.-long dado blank out bit from MLCS (merchandise no. 5382).

Since the notches within the jig are sized to a particular hinge, you wish to have to make a separate jig for each and every measurement of hinge you’ll use. Fortunately, making one is a work of cake.

To put the notches, make a decision how a ways you wish to have each and every hinge from the tip of the field. Typically 1 in. or so works smartly for the vast majority of small and medium boxes I make. That distance assists in keeping the hinge screws safely clear of the corners so that they don’t compromise the joints.

On the tablesaw, I reduce the notches to the precise width of the hinge. Arrange two stops on a sled to restrict the side-to-side go back and forth of the jig base. After each and every reduce, attempt to are compatible the hinge within the notch. Preferably, the primary reduce can be too tight, letting you faucet a prevent away as you creep up on a cosy are compatible.

Surroundings the blade top calls for some math, now not take a look at becoming. It must be raised sufficient to account for the hinge mortise plus the width of the fence. I want about part of the hinge barrel to stay out in the back of the field, offering a complete vary of movement. So that you could decide the intensity of the sawcut, measure from the brink of the hinge leaf to the barrel and upload 1⁄2 in. for the width of the fence.

After homing in at the notch at one finish, turn the bottom finish for finish and reduce the second. As a result of I turn the bottom to chop the second one notch, each notches can be similarly spaced from the tip of the jig, simplifying the jig’s use.

To complete the jig, glue at the fence and finish stops, being cautious that the strips are flush with the fringe of the bottom.


Make the jig

Clamping a pair of stops to a sled to notch the jig base
Clamp a couple of stops to a sled to notch the jig base. The stops will have to be set to yield a notch the width of the hinge leaf. When environment the blade top, upload the specified width of the hinge mortise to the width of the jig’s fence. Slowly advance the sled whilst sliding the bottom facet to facet to chop the notch. Take a look at the are compatible (proper), after which turn the bottom to chop the second one notch.
testing the notch’s width against the hinge
Check the notch’s width in opposition to the hinge. It’s very best first of all the stops a little bit too shut in combination, then transfer one farther away as you sneak up on the proper width.
Add the fence and end stops
Upload the fence and finish stops. Glue those flush to the bottom’s perimeter to verify they’re sq. and spaced symmetrically.
Snugging the jig to a corner of the box and clamp everything down
Cosy the jig to a nook of the field and clamp the whole lot down. Double take a look at that the fence and finish prevent are tight to the field. Clamping to the workbench guarantees not anything will transfer when you are routing.

Jig’s a template that slides and flips

To rout the mortises, I take advantage of the dado blank out trend bit discussed previous. Its brief reducing duration method there’s a lot of room left for the bearing to sign up at the jig’s notches.

To make use of the jig, clamp it and the field frame to the bench, ensuring the field is tight to the jig’s finish prevent and fence, and rout. If you wish to have to sq. the corners of the mortise, depart the jig clamped in position, since it’s going to lend a hand information your chisel paintings. To rout the opposite mortise, merely slide the jig to the opposite finish of the field and undergo the similar technique of routing and slicing.

For the lid, turn the jig and repeat. You’ll finally end up with matching mortises with little format or fuss.


Mortise the field

Routing with a short pattern bit
Rout with a brief trend bit. Take take a look at cuts in scrap to remember to have the bit set to the appropriate intensity. The jig’s fence, which you’ll rout thru at the preliminary move, supplies zeroclearance strengthen for the reduce, restricting blowout.
Jig guides the chisel when squaring the routed hinge mortise
Jig guides the chisel when squaring the routed hinge mortise. The router leaves rounded corners, which received’t are compatible sq. hinges. You want to sq. those corners with a chisel. Because the jig is sized to the hinges, squaring the corners with it in position is straightforward and correct.
Sliding the jig tight to the other side for the other hinge
Slide the jig tight to the opposite facet for the opposite hinge. Since the jig’s notches are the similar measurement and the similar distance from the bottom’s ends, putting in for the field’s different hinge is a straightforward subject of sliding the jig.

A tip for environment the bit intensity

Surroundings the bit’s intensity generally is a problem, so I like to recommend a take a look at run.

I decrease the bit in order that it extends 1 ⁄ 2 in. (the bottom’s thickness) plus part the thickness of the hinge barrel. I then decrease it any other hair to stay the hinges from binding.

Seize a work of scrap and rout two take a look at mortises. By way of then crosscutting the scrap in two, you’ll put the mortises in combination to simulate the routed field and lid.

Put the hinge barrel on this area. If the hinge falls out, the reduce is simply too deep. As an alternative, you wish to have the take a look at blocks to pinch the barrel in position with an opening of about 1 ⁄ 64 in. between the blocks. Then your hinges will function easily and the relationship between the field and lid will glance blank.


Mortise the lid

The jig works just the same for the box’s lid
The jig works simply the similar for the field’s lid. The use of the jig in the similar approach for the lid promises matching hinge mortises between the lid and the field, making set up correct and fuss unfastened.
Attaching the hinges
Connect the hinges. Stowe attaches the hinges to the lid first, because it’s more uncomplicated to steadiness when using the screws into the field. He makes use of highquality brass screws, drilling pilot holes and, if conceivable, pre-cutting threads within the holes with tougher, much less fragile metal screws.

—Doug Stowe is an writer and boxmaker in Eureka Springs, Ark.

Pictures: Barry NM Dima.

Drawings: Dan Thornton.

Hinge mortise jig for boxes spread

To view all the article, please click on the View PDF button under.

From Fantastic Woodworking #301

Obtain FREE PDF

whilst you input your e-mail deal with under.

View PDF


Jack Collins – Quiet Influencer

Jack Collins – Quiet Influencer

Jack pulled on the strap of my bib ‘n’ brace to jerk me again and spin me round to stand him at his bench. Mild even though he was once he sought after to make some degree. I at all times have shyed away from sweeping round his bench as a result of I by no means favored the grubbiness of his running area. His spilt beverages and cigarette burns all alongside the brink of his bench, some deeply burned in and some distance sufficient to replicate previous fireplace hazards, spoke of a person whose hobby in lifestyles was once seriously decreased. He by no means stored his benchtop tidy so the ground by no means, personally, warranted the efforts with my broom. Jack was once in point of fact the boss of the workshop as foreman and grasp joiner. He was once a quiet unassuming guy and was once simple sufficient to put out of your mind on account of it. He spoke little or no and seldom to the apprentices at once. His house of speciality with the exception of being the most efficient joiner was once laying out tasks, the entirety from spiral stairways to round window frames. He spent maximum days poring over technical drawings and checking the main points able to visit the picket from which they’d be made. As store foreman, he laid out the joinery for nearly each and every undertaking that got here into the store; no small activity with a dozen males and boys running across the store making the entirety from doorways and home windows to drawers, containers, case items and the standard joinery of a prolific joinery workshop.

“Blank up ‘roun’ my bench, lad,” Jack ordered. Best, beneath and round had been unpassable for stacks of picket he would get to to put out. I seemed on the wreckage in disbelief, questioning the place to if truth be told start and the way any guy may permit such dereliction of order to his lifestyles. It seemed like no person had taken on this kind of activity at his bench in years. The thickly layered mud and shavings clogging each and every nook jogged my memory of stratas in geological digs the place time shifts had been recorded in layers of sedimentary rock and soil adjustments however on this case, we went from oak to Sapele, walnut to pine after which again to oak once more to begin over the following batch of tasks. The particles have been additional hammered down and residential in corners underneath Jack’s black and neatly-worn boots yr in yr out. What did he need to stay and what did he need digging out and burning within the burn barrel?  I stuffed fifteen wheelbarrows with trash, shavings and sawdust sooner than I noticed the concrete flooring. Jack’s bench was once a lot taller by means of the top f the day however Jack, now in his older years, had begun to shrink. Together with his most effective paintings laying out and studying plans, I steered reducing the legs down 3 inches.

 “Cheeky beggar!” Jack mentioned. He cuffed me spherical the pinnacle as he mentioned it, reinforcing our positions within the hierarchy.

It took me two days to retrieve Jack’s paintings house. Apprentices had been the dogsbody of the store. We had been frequently referred to as toerags for some explanation why I by no means knew why. What’s a toerag anyway, chances are you’ll ask? A toerag is in most cases used derogatorily to explain any individual underneath contempt. A nugatory being of no result. Whilst you did one thing incorrect you could be known as a “little toerag’ or even worse. Everybody would glance up on the humiliation and sign up for in.

Something I came upon beneath Jack’s bench was once an overly stunning device chest replete with drawers and encumbered with gear from the former century. He had inherited them from his father and grandfather. Ebony braces, squares and 40-fives. Lengthy paring chisels and chariot planes with such Victorian loveliness you’ve hardly noticed. In my hobby, he noticed one thing and pulled open the drawers to turn me the deeper issues of woodworking.

“I made this chest as my apprentice piece.” Jack mentioned, proudly.

“All mahogany and oak. See them dovetails. None measured and all useless to measurement!” he mentioned.

Something I may by no means alternate was once Jack’s look. I doubt I may ever discover a alternative who may translate plans into completed tasks extra briefly and extra correctly than he may. His mind was once hardwired for the duty and he may decipher an architect’s designs to make what was once lacking occur. Architects by no means were given into the wanted joinery for frames and constructions past strains outlining form and measurement. Inside of each and every 90º nook there needed to be some mechanical joint that held frames totally aligned and powerful sufficient to remaining for a century and extra. This was once Jack’s primary activity. In an issue of mins, he may make a decision at the sizes of tenons and dovetails, the numbers, twinned or doubled or no matter and this fascinated me past comprehension. The trade of equals in the case of mortise partitions and tenon cheeks was once at all times foolish, little greater than a school tutors interpretation for college students to latch onto. Suppose planes mendacity on their facets right here. Foolish.

There have been days when Jack’s furry eyebrows had a layer of thick mud on them from the times machining of makore, Eu redwood, oak, ash and others. His wavy hair too carried a much wider layer and so did his jacket which summer time and wintry weather by no means left his again. He was once the one person who at all times had 3-day stubble on his chin while all the different males had been blank-shaven each day. I at all times puzzled when he shaved as a result of I by no means noticed his face any other so by no means as soon as did I see him cleanshaven however at all times with a couple of days’ expansion. 

Jack’s overalls had been what we name the bib and brace kind however within the vernacular got here out bib-n-brace as a unmarried phrase. Principally, those had been unfastened-becoming pants with get admission to to within pants thru slits, button-up fly, and an aspect knee pocket for the folding 3-foot 4-fold laws that slid alongside the aspect of the decrease leg sooner than tapes changed them later. From the entrance of the pants was once a bib held up by means of straps that came visiting the shoulder from both sides of the again of the pants. The keyhole clasp slipped over two brass buttons to carry up the bib which additionally had an angled pocket for a small notepad and pencil. Jack’s bib ‘n’ brace was once a few years previous and I doubt that they had been ever washed while the opposite males even had theirs washed and ironed as soon as each and every few weeks. Most commonly those had been to stay mud off your interior garments. In each and every crease of Jacks being, eyes, fingers, garments and overalls held encrusted layering of ever-provide picket-tan sawdust. While this did certainly outline Jack, one thing else outlined him that gave the impression fairly incongruous. His minimize strains for all joinery and the full sizing for completed components of the paintings to be carried out was once at all times inside of fractions of the smallest fraction of an inch — that’s as regards to thousandths of a millimetre. I doubt that I ever noticed any craftsman use finer issues on their pencils than Jacks. This by myself set him except all others as did the inch-and-a-quarter chisel with which he sharpened his pencils such a lot of occasions an afternoon. He was once the one that taught me precisely methods to sharpen my pencils after I wanted easiest accuracy. He did this with very good pace and accuracy to position the crisp strains for the boys to chop to. Any slight variance right here would come again on him. That by no means took place. Once I want one thing sharp for technical drawings, I exploit a newly sharpened chisel and sharpen up part a dozen pencils in order to not smash off in my paintings.

Jack’s interpretation of lifestyles revolved round 3 issues; ale, paintings and extra ale. I may say it was once a tragic situation in point of fact. Drink was once his downfall and at elderly 65 after I met him he gave the impression to be round 80. There was once every other part in his lifestyles that I puzzled whether or not it might minimize it quick. He chain-smoked  John Participant cigarettes and ate up 3 packs of 20 an afternoon or extra. They hung both from his lips or the brink nook of his bench. The ash dropped into the shavings as a rule but no fireplace ever began up. When he spoke to me his eyes screwed as much as deflect the streams of blue smoke wafting as much as his brow. When he left for house within the night he left for the pub. His tempo on the bar was once sacrosanct as was once the pint pot he stored in the back of the bar. Ten pints was once same old over the night however 5 mins sooner than seven o’clock he left for house and dinner which arrived at the desk useless on seven. However he by no means neglected an afternoon from paintings on account of drink, smoking or a hangover even though he did are available with a hangover a few times per week. He was once by no means grumpy however I knew when to go away him by myself.

Jack was once the one that would strip down a carburettor, alternate out the portions and reinstall it able for the power house. He taught me to fix machines like bandsaws and methods to strip them out, fettle portions and reinstall an entire approach of elements. Again then we filed bandsaw tooth by means of hand as we did what we then referred to as sawbenches with 22” round noticed blades. This instruction most commonly got here from Jack who took each and every apprentice beneath his wing within the first two youth. However one time he got rid of the wheel from his Nineteen Forties Ford Prefect, got rid of the innertube, minimize up some rubber and carried out some touch adhesive to each items and reinstalled the tube within the tyre (tire USA). Then he tied a rope across the tyre, used a stick as a tourniquet and began pumping the tube till a seal shaped round each rims. The tyre popped when he launched the tourniquet and he completed off the inflation able for restoring the wheel.

Neatly, that was once Jack. Any other influencer in my lifestyles. Some other folks from time to time question me which different makers affect my lifestyles. Neatly, none of them can in point of fact fit what Jack and George freely gave to me. I will be able to by no means put out of your mind his blue-gray eyes clouded and shrouded by means of blue streams of smoke and overhanging eyebrows coated with picket mud. Such males influenced many an apprentice’s lifestyles in each very sure and once in a while mildly adverse techniques. The dusty footwear even though at all times polished underneath had been coated in mud from the machines that surrounded his bench which was once centred within the hub of job each for the gadget employees and the bench fingers. Such quiet, unassuming influencers had been during England and not using a intent to ever depart their mark thru fast-witted, sensible-alecky remarks. They only deposited their wisdom and talents within the lives of those who adopted and did it fairly freely at that. They only did it!

Trading Labor – Bartering to get stuff done

Trading Labor – Bartering to get stuff done

→ Knocking down bit https://bitsbits.com/product/bitsbits-sf525-surfacing-router-bit/
→ Fuji HVLP sprayer https://amzn.to/3MLH9Wy
→ Milk Paint https://amzn.to/3TiT00H

I latterly finished an identical farm desk base and an out of doors kitchen sink island. I timed the construct of those so I may spray them concurrently. For the colour, we selected Tuscan Purple Milk Paint by means of Basic Finishes. The can supplies numerous information on how it may be implemented, together with directions for spraying, which is the course I’m taking. With a 1.8mm tip put in I will load the sprayer and get to paintings.

Right here’s a tip for pouring from a can. Use a large strip of tape to act as a spout. Lower a V notch the place you wish to have to pour, and use an axe, knife, or screwdriver to poke a hollow within the rim of the can. Now, whilst you pour, the tape will act as a spout and drain the vast majority of the surplus again into the can. The outlet within the rim will permit it to drain again into the can if you wish to have to position the lid again on loosely.

The strainers I’m the use of make the pouring procedure somewhat lengthy. On this case, it’s OK as a result of I’m buying and selling my CNC hard work for some shifting hard work to lend a hand get those initiatives sprayed.

Whilst the milk paint drips into the cup, I began a few of my CNC paintings. Zach and Jason are from Again 40 Customs in Tupelo, Mississippi they usually make numerous epoxy river tables. Those walnut slabs can be for tables however ahead of the tables can also be poured they prefer to rather flatten the slabs so they’re going to leisure flat at the backside of the paperwork.

After one slab, we’re again outdoor to get started spraying. First, the desk base. I discovered temporarily how smartly the protection is with this milk paint. I’m spraying outdoor with a slight breeze on a unprecedented low-humidity day, so the paint is drying speedy. I may most likely have got away with spraying the second one coat straight away after the primary, however as a result of there’s different paintings to be done, I switched again to the store to stay shifting.

Every other slab with the similar function. Flatten with out disposing of numerous subject material. The SF525 bit I’m the use of is flying in the course of the subject material, so thru the remainder of the cuts, I regularly greater the aggressiveness.

Again outdoor for a 2d coat of Tuscan Purple, additionally ensuring to seal the ground of the legs. I’ll have leg levelers put in so they’re going to by no means be sitting in water, however I would like to seal them just right anyway.

Slab #3 will get flattened, and by means of now, I had a beautiful just right concept of what number of passes and what sort of subject material to take away. This was once essentially the most competitive minimize at .200” DOC, 1.5” stepover, and 500 IPM. At this level, I’m maxing out the gadget’s commute and will simplest building up the intensity according to move. Every other factor I realized is how a lot more difficult epoxy is on surfacing bits. It cuts the epoxy simply effective, however it cuts thru this walnut like a scorching knife thru butter. It’s an outstanding bit.

In addition they introduced 3 smaller slabs to be used as floating cabinets, which have been sufficiently small to use at the jointer. This can be a Hammer A3-41 jointer planer combo gadget with a 16” lengthy cutter head. Hardly ever does a task arise desiring the overall width, but if it does, it’s extremely gratifying. Knocking down with the jointer will at all times be sooner than with the CNC. The CNC has a miles larger capability.

After the primary couple of forums, somewhat additional push was once certainly preferred. After all, the guards have been got rid of for photographic readability, and also you will have to by no means take the guards off your gadget simply since you noticed some dufus like me do it in a video.

Toybox fronts have been up subsequent. Those are paint-grade initiatives with a personalised entrance. The primary mentioned Hood, the second one mentioned Toy Field, and we waited at the 3rd for spelling affirmation.

Now the time I used to be looking ahead to. Gazing folks transfer the heavy stuff I made. That’s one of the simplest ways to transfer stuff; Watch folks do it.

4 chunks of firewood have been used to stay it off the grass. And we rolled it the wrong way up for spraying. That means, identical to the desk base, I may spray the ground to get higher coverage from flooring moisture. After all, the leveling ft will keep in touch with the cement ground, no longer the true picket.

A snappy notice about my canines. They pop into the body right here and there however know that my spouse was once outdoor, maintaining them again whilst I used to be spraying.

Extra trade as same old. One base coat for the preliminary protection and a 2d coat to make sure that general protection. General, I’m more than happy with how smartly this product covers. That is my first enjoy with Basic Finishes Milk Paint, so I’m curious how smartly it holds up longer term. I learn that it does slightly smartly outdoor, so I’m taking a look ahead to minimum, if any, repairs over the following couple of years.

Stick Chair Patterns Back in Stock – Lost Art Press

Stick Chair Patterns Back in Stock – Lost Art Press

We’ve simply replenished the published units of full-size paper patterns of all of the vital parts for the 5 chairs in “The Stick Chair Guide.” (They’re additionally to be had as PDF downloads.)

The 5 22″ x 34″ sheets comprise full-scale drawings of all of the seats, fingers, backrests, footwear and combs for the chairs. The drawings additionally come with all of the mortise places, drilling sightlines and centerlines. With those sheets, you’ll simply make full-scale patterns in plywood, posterboard or masonite. Then you’ll use those patterns to make your individual variations of those stick chairs and get started enhancing them to create your individual authentic chair designs.

Fitz