Associate hyperlinks to pieces used:
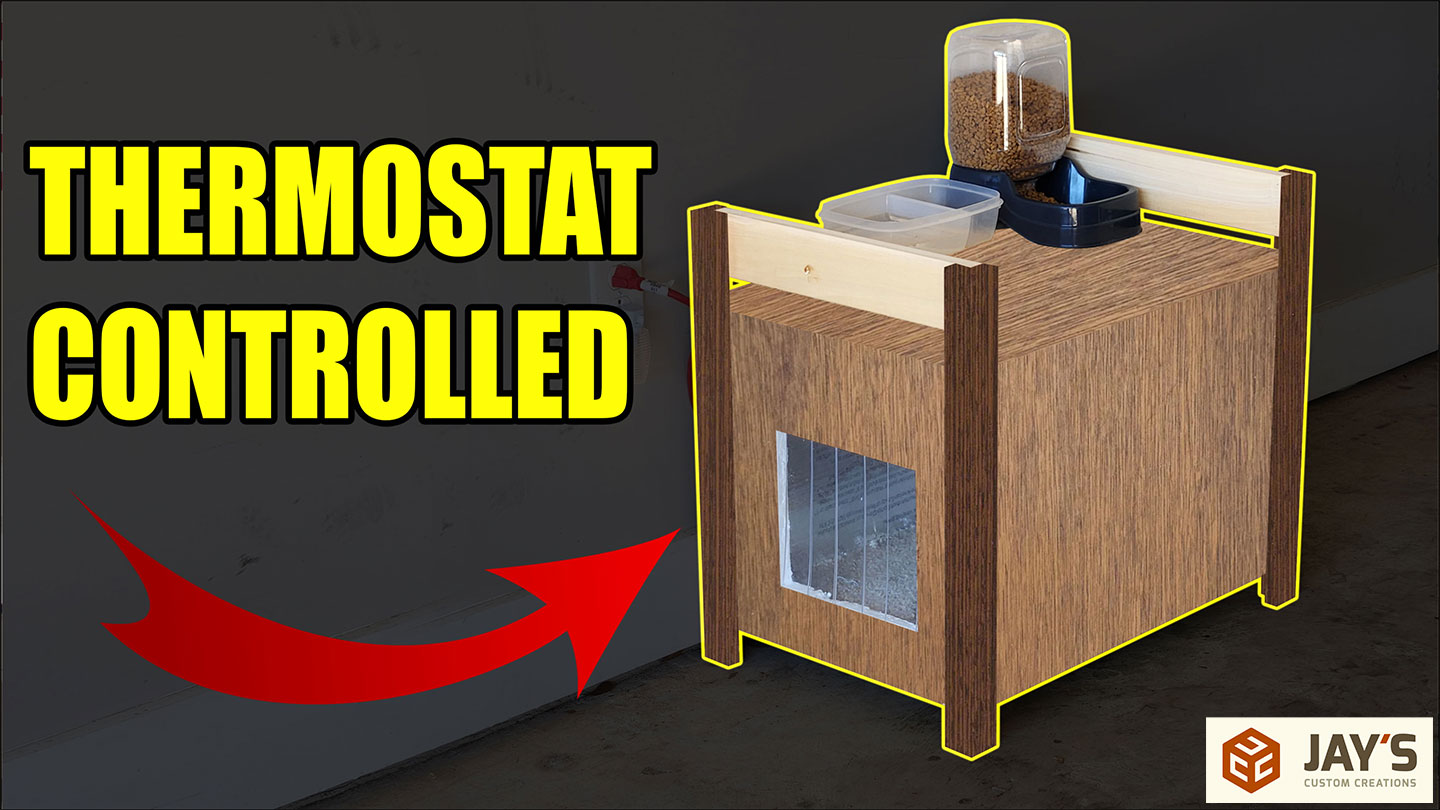
→ Thermostat https://amzn.to/3CbHZYm
→ Heating component https://amzn.to/3vqITN6
→ lamp base https://amzn.to/3G2wcwH
→ Vinyl door flap https://amzn.to/3jCuWce
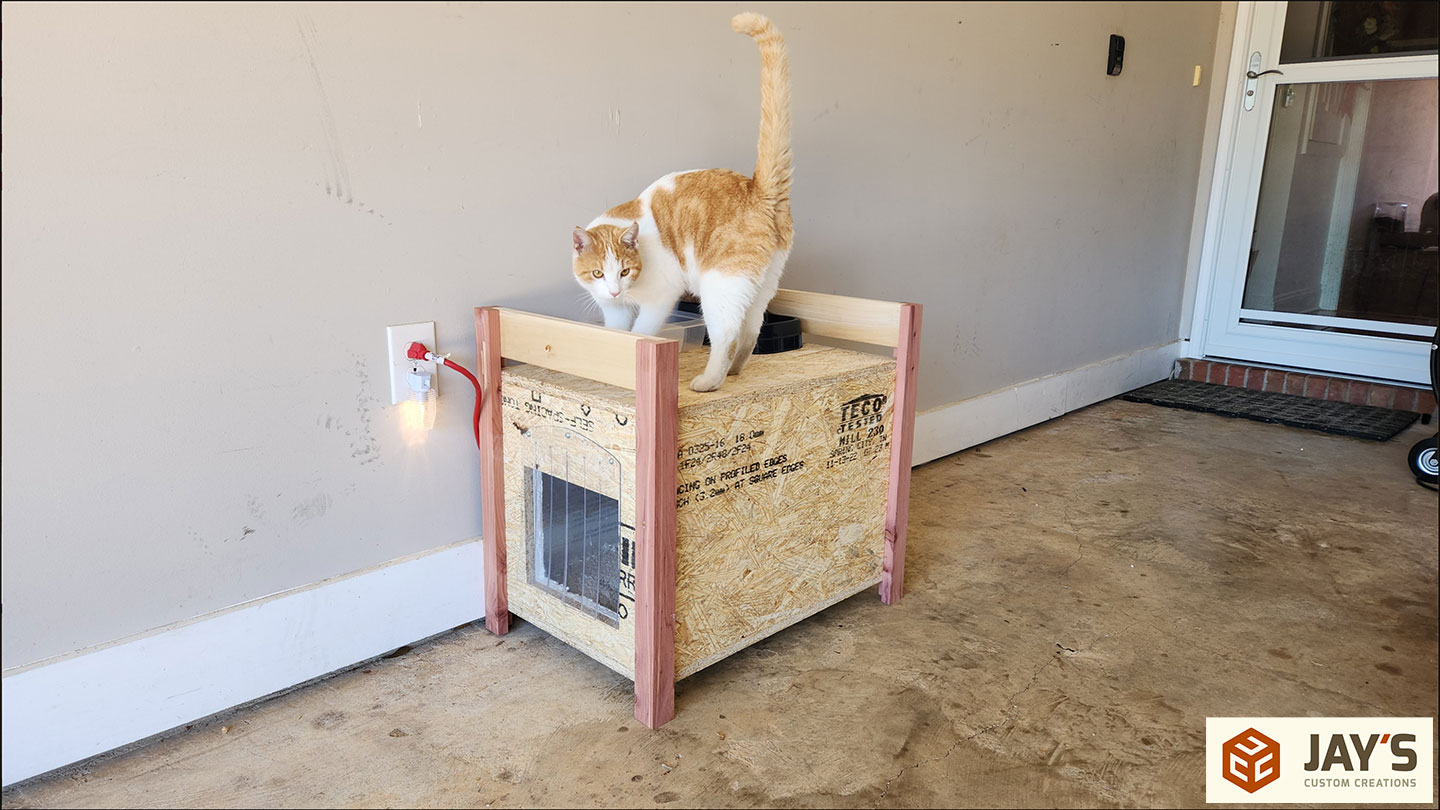
It’s getting chilly, because it does each wintry weather.. My daughter has an outside cat that in most cases sleeps in our storage. We had a small material cave/mattress factor for it, and whilst that works properly for many nights, we need to supply a bit extra heat throughout the in point of fact chilly nights. A handy guide a rough symbol seek for inspiration, a snappy SketchUp interpretation, and fabrics run to begin the construct.

The principle building subject material I went with used to be Advantech OSB floor. In part as it’s just about water-proof and most commonly as it used to be the least dear 3/4” thick sheet excellent I may purchase in the neighborhood.
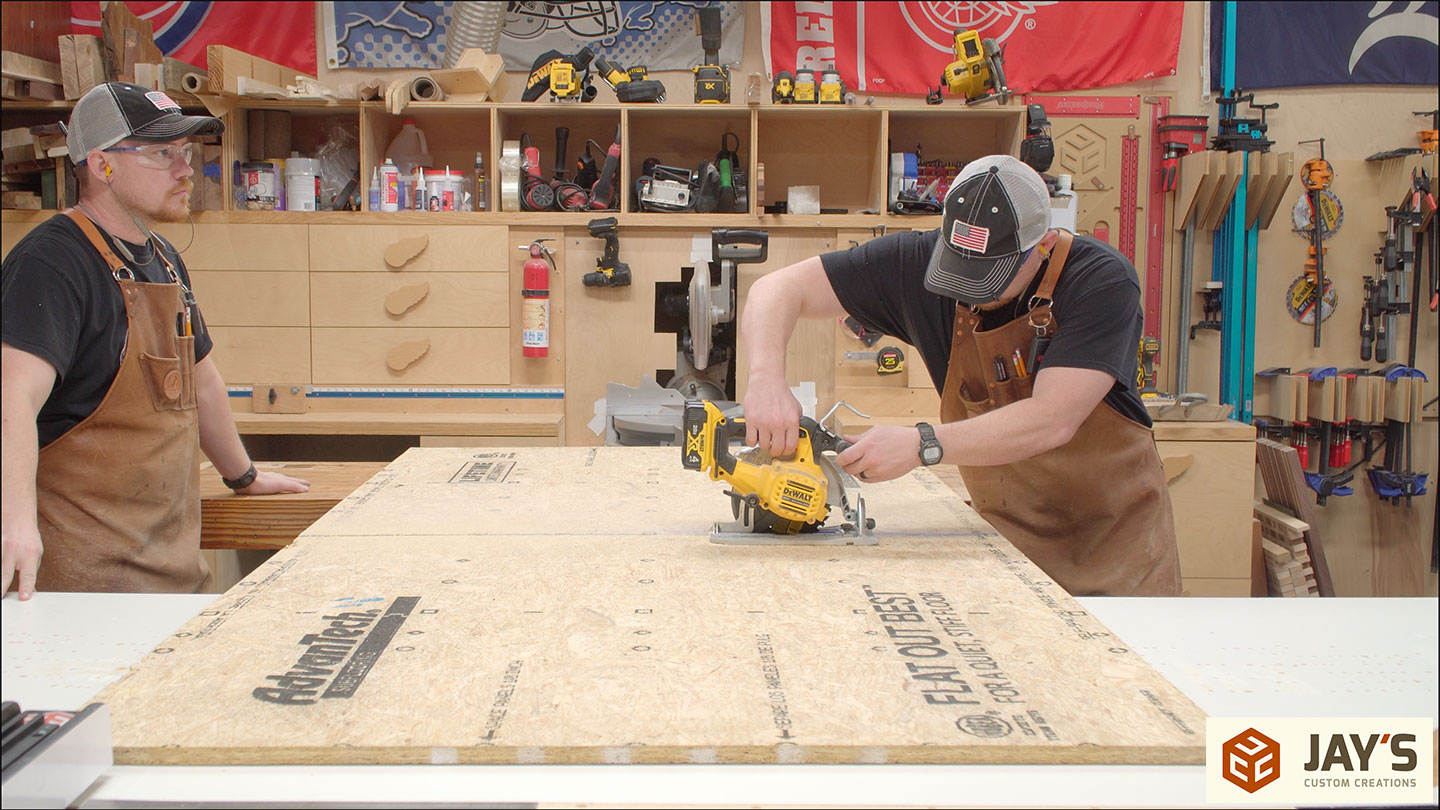
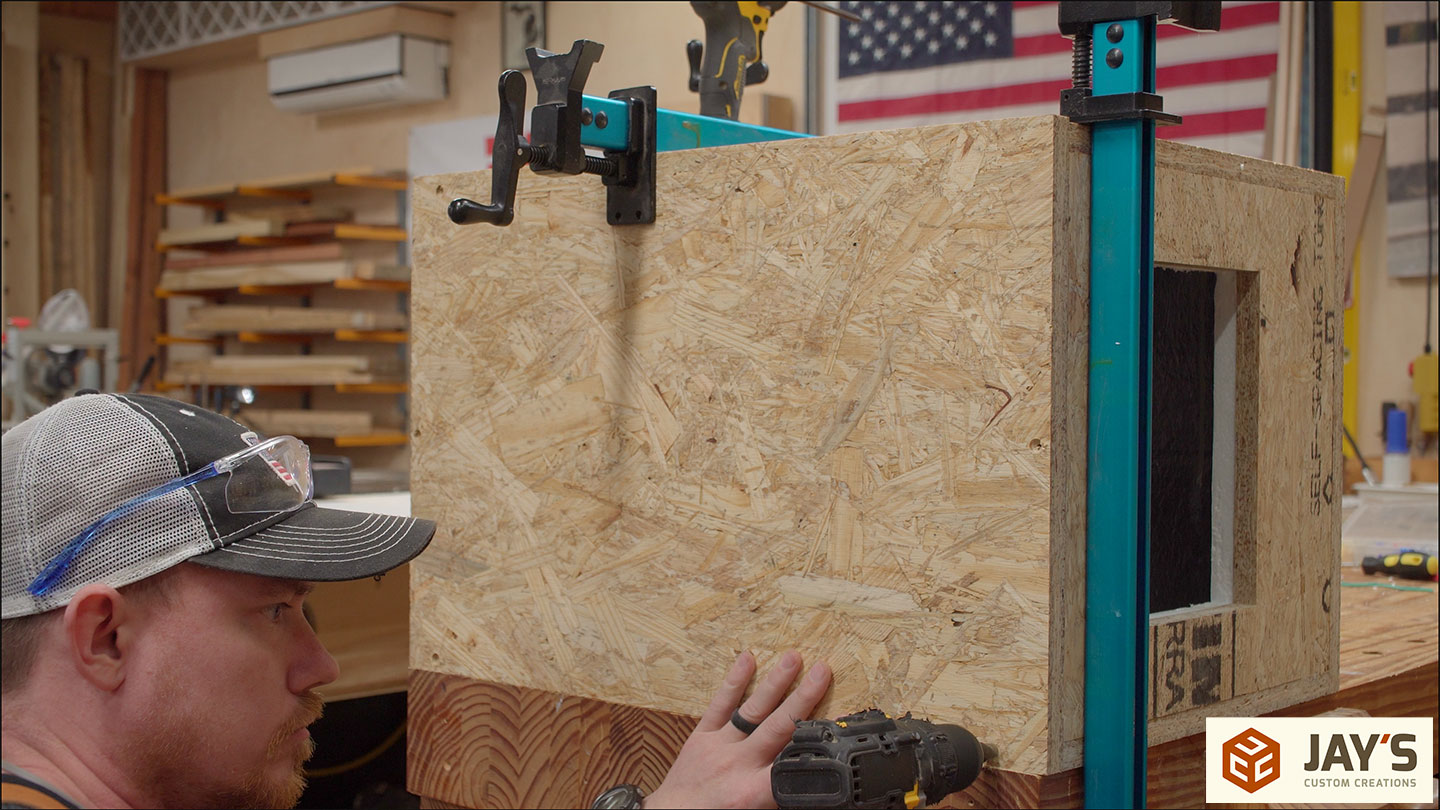
OK, I’m simply construction a field. Not anything fancy. A couple of desk noticed cuts later, and I’ve a stack of six rectangles. I used to be unsure at the door dimension, however I didn’t need it as huge because the vinyl door flap I bought. So I drew what seemed suitable at the entrance panel.
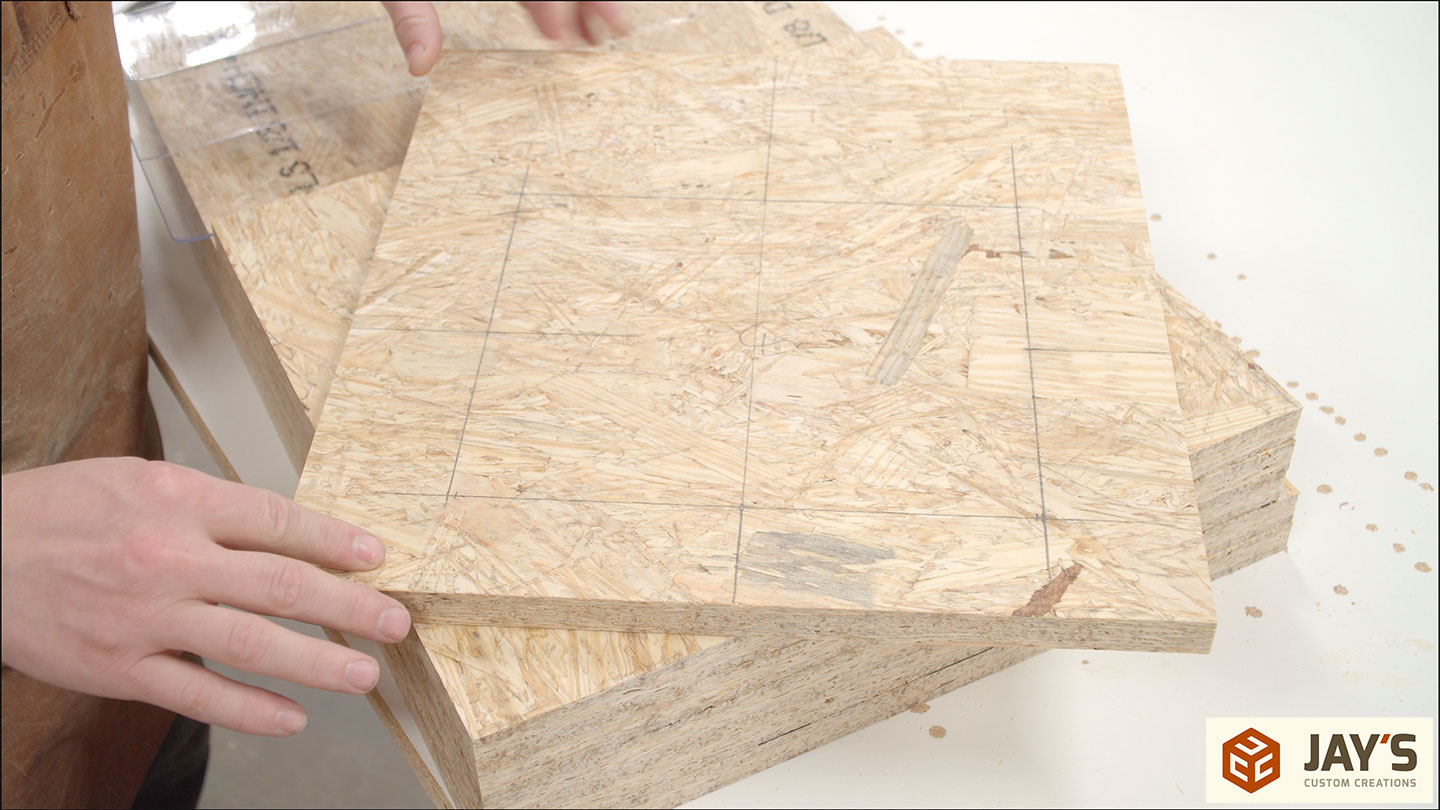
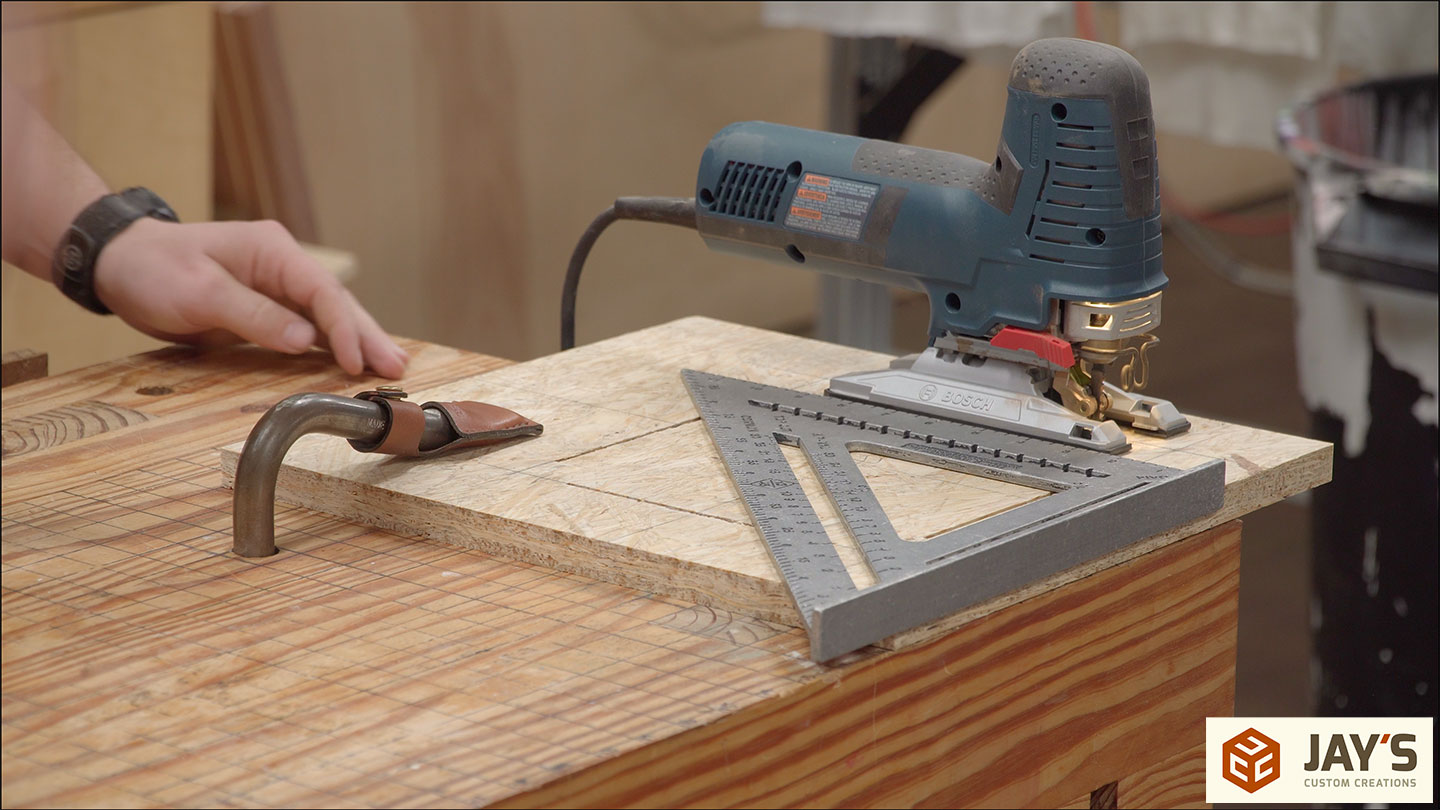
After which use a mixture of my anti-kickback curler guides, and the desk noticed to plunge one immediately minimize in keeping with facet of the outlet. I drew a centerline on every of the cuts to line up with the centerline of the blade, which I drew at the fence. That method, I no less than knew the blade used to be focused at the duration of the road. I didn’t fear about getting it throughout at this step.

And that’s as a result of I used a velocity sq. and a jigsaw to finish the cuts to shape a pleasing crisp inside of nook.
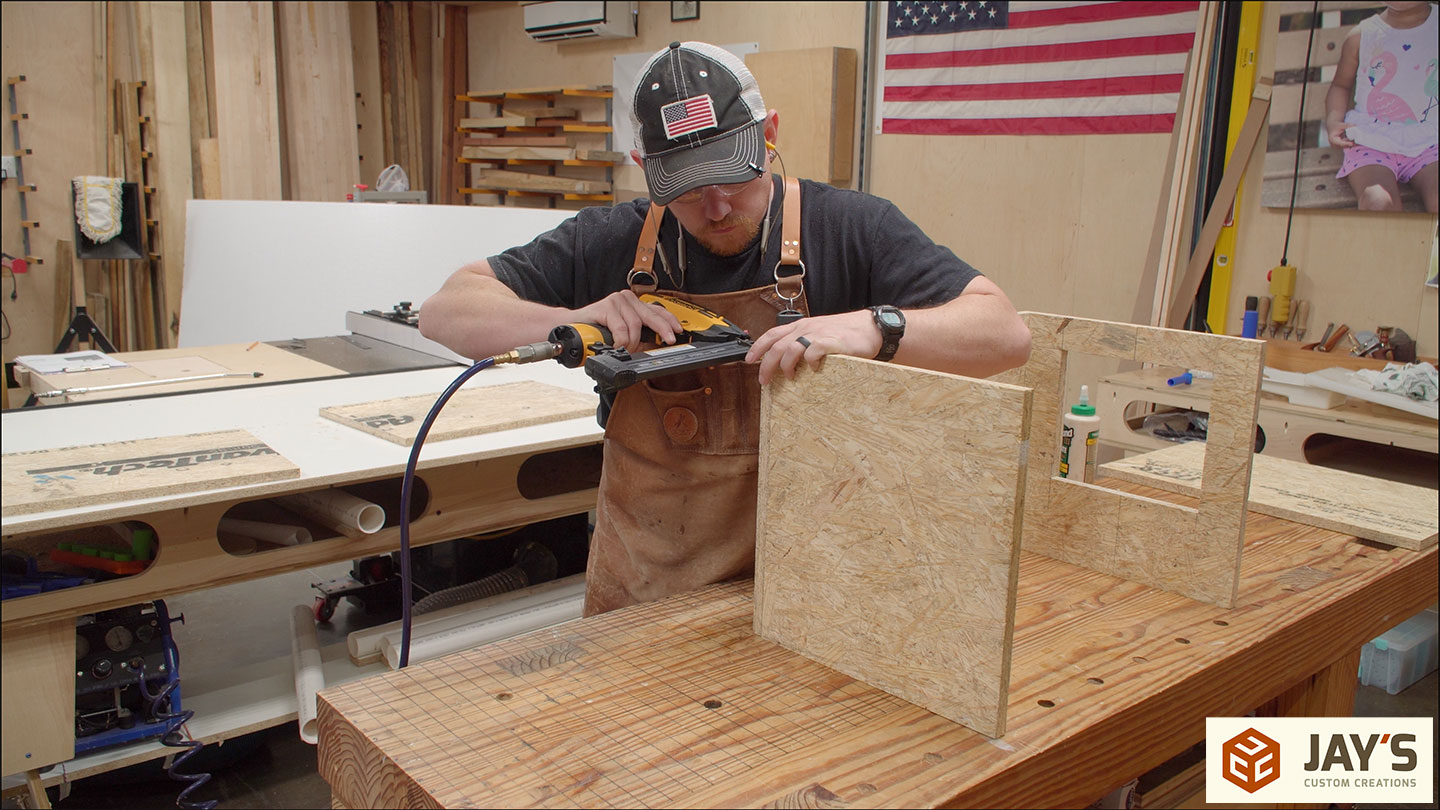
Identical to the outdated days, glue and brad nails to carry the whole lot in combination. Beginning with the 4 aspects and most sensible.
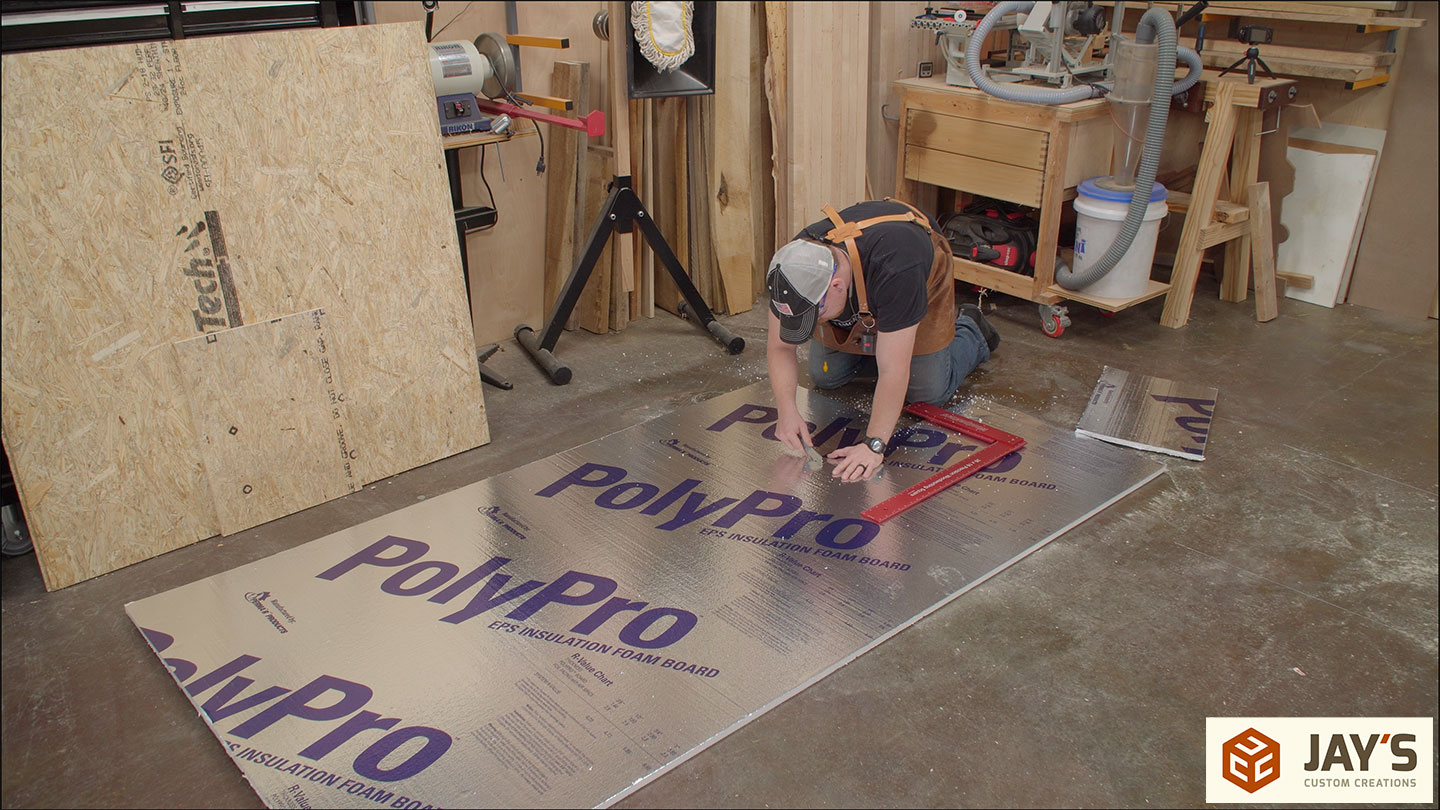
A well-sealed OSB construction would almost definitely be excellent sufficient and dangle the warmth properly sufficient, however we opted so as to add 3/4” Styrofoam insulation. It used to be reasonably priced and simple so as to add. A razor blade and a immediately edge are all this is had to minimize it.
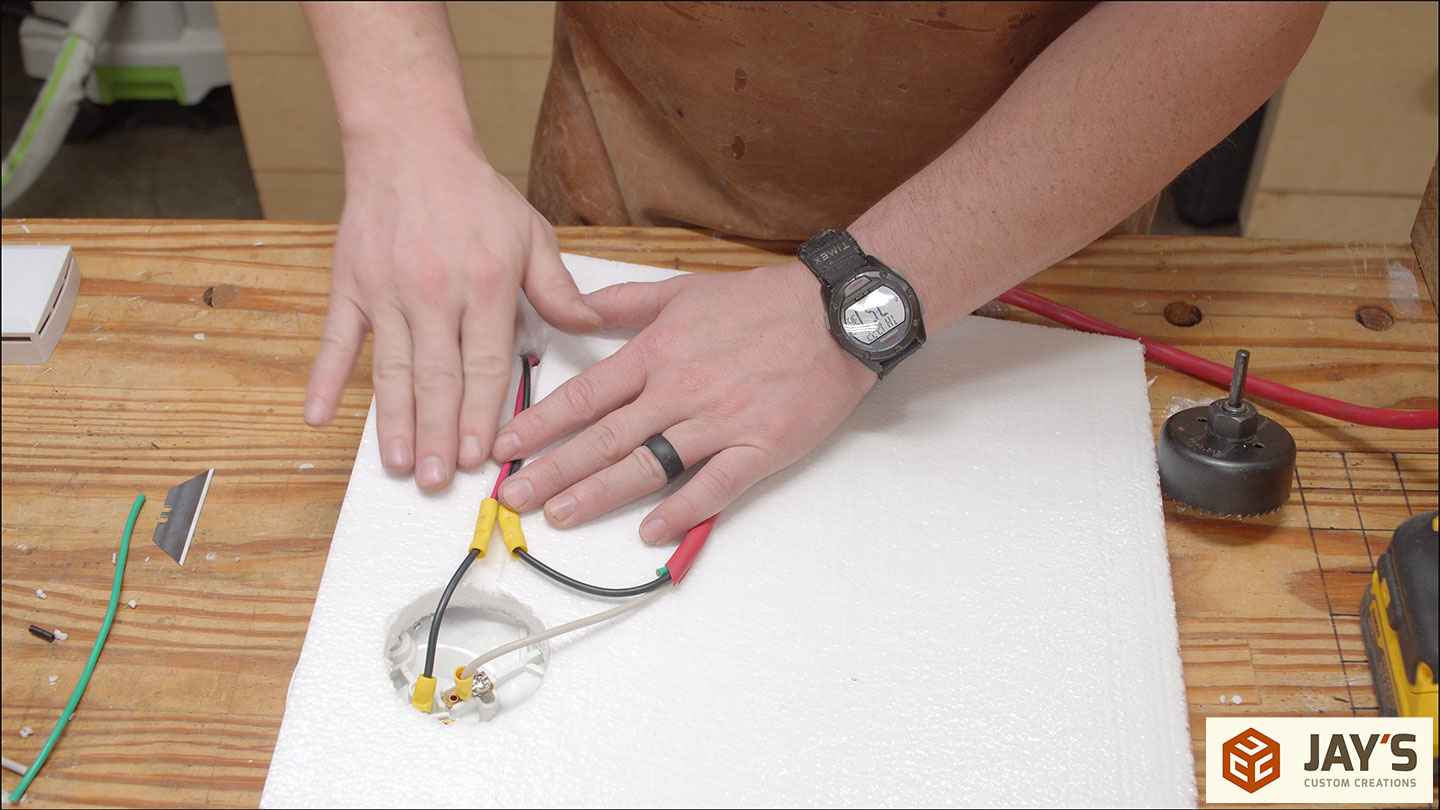
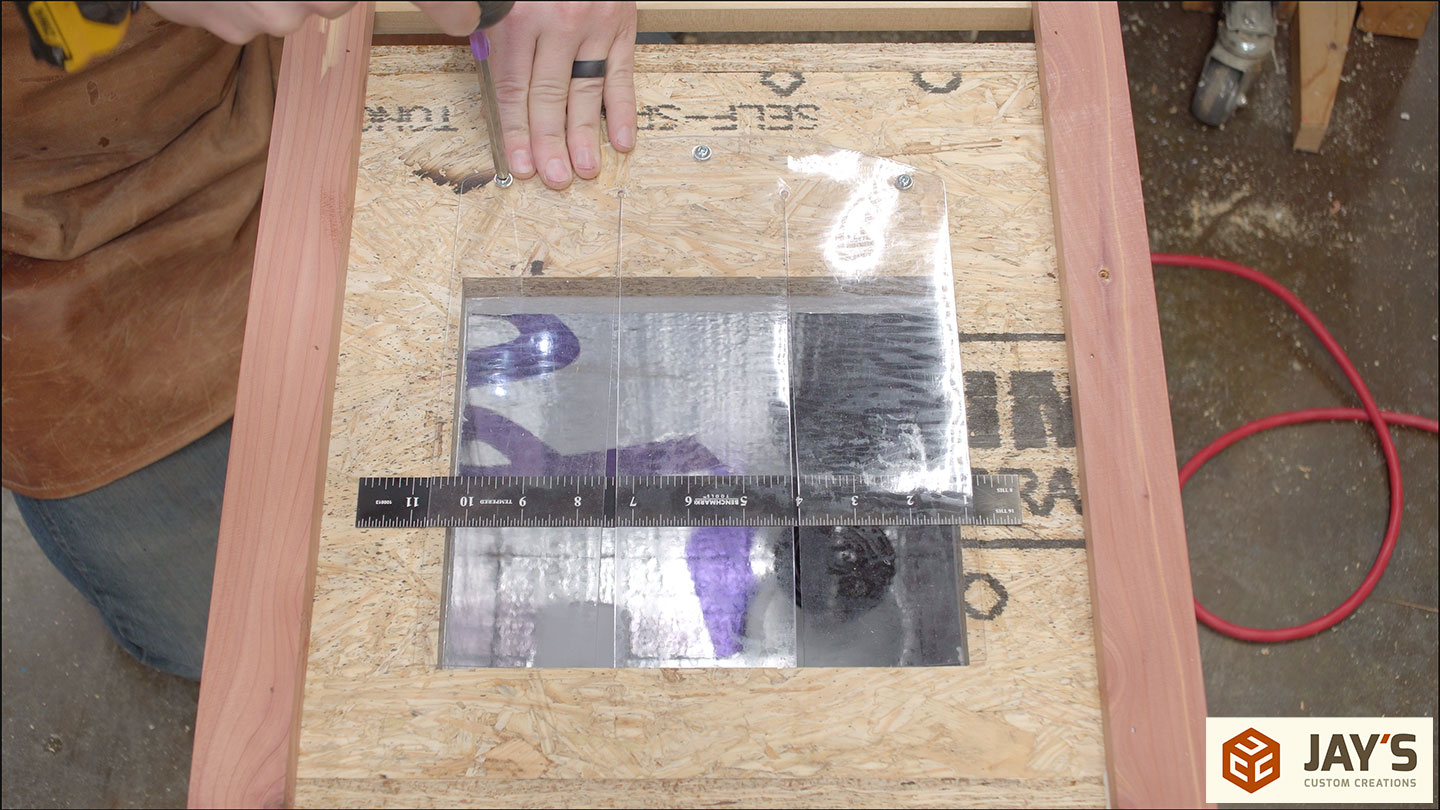
The plastic lamp base I’m the use of wishes a bit little bit of the froth got rid of for twine get right of entry to. That’s simple sufficient with a hollow noticed. I adopted the opening noticed with a standard drill bit sized for the extension twine I selected to hook the whole lot up.

Then the again insulation panel is got rid of to make all of the connections at the bench. I made a channel at the back of the insulation to feed the wires from the thermostat to the lamp base. The thermostat connection is extremely easy. The black twine from the extension twine is the ability twine. It connects to the black “load” twine at the thermostat. When the temperature lowers, inflicting the thermostat circuit to near, energy exits by means of the crimson twine. I hooked up a small piece of black twine to the top of it and hooked up it to the lamp base. The white impartial twine within the extension twine will get hooked up without delay to the impartial at the lamp base. The lamp base and thermostat are each easy electronics that didn’t have a floor, so no floor used to be used.
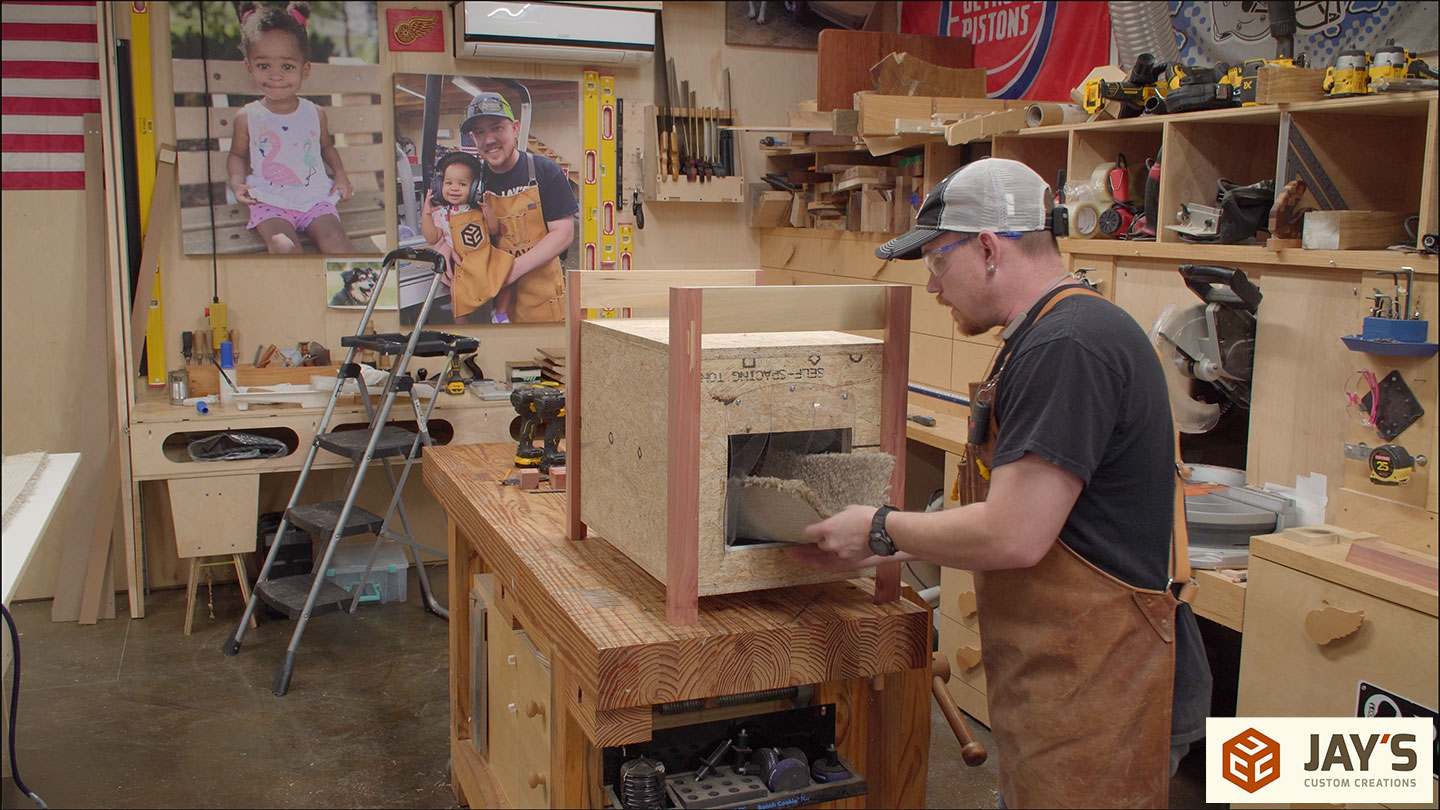
After reinstalling the again panel, the lamp base and thermostat are every secured with a couple of screws. I used a standard mild bulb to check the setup. For somebody short of to make this know that I used a 150w ceramic heating component, and it ended up being too as regards to the highest. Only a heads as much as mount it decrease and almost definitely centralized. Some ceiling foam insulation melted because of the component being too as regards to the highest. I’ll duvet that during a follow-up video.

I sought after no less than some of the panels to be detachable, so I most effective put in the ground panel with screws. This may permit higher get right of entry to if I wish to trade the rest inside of.
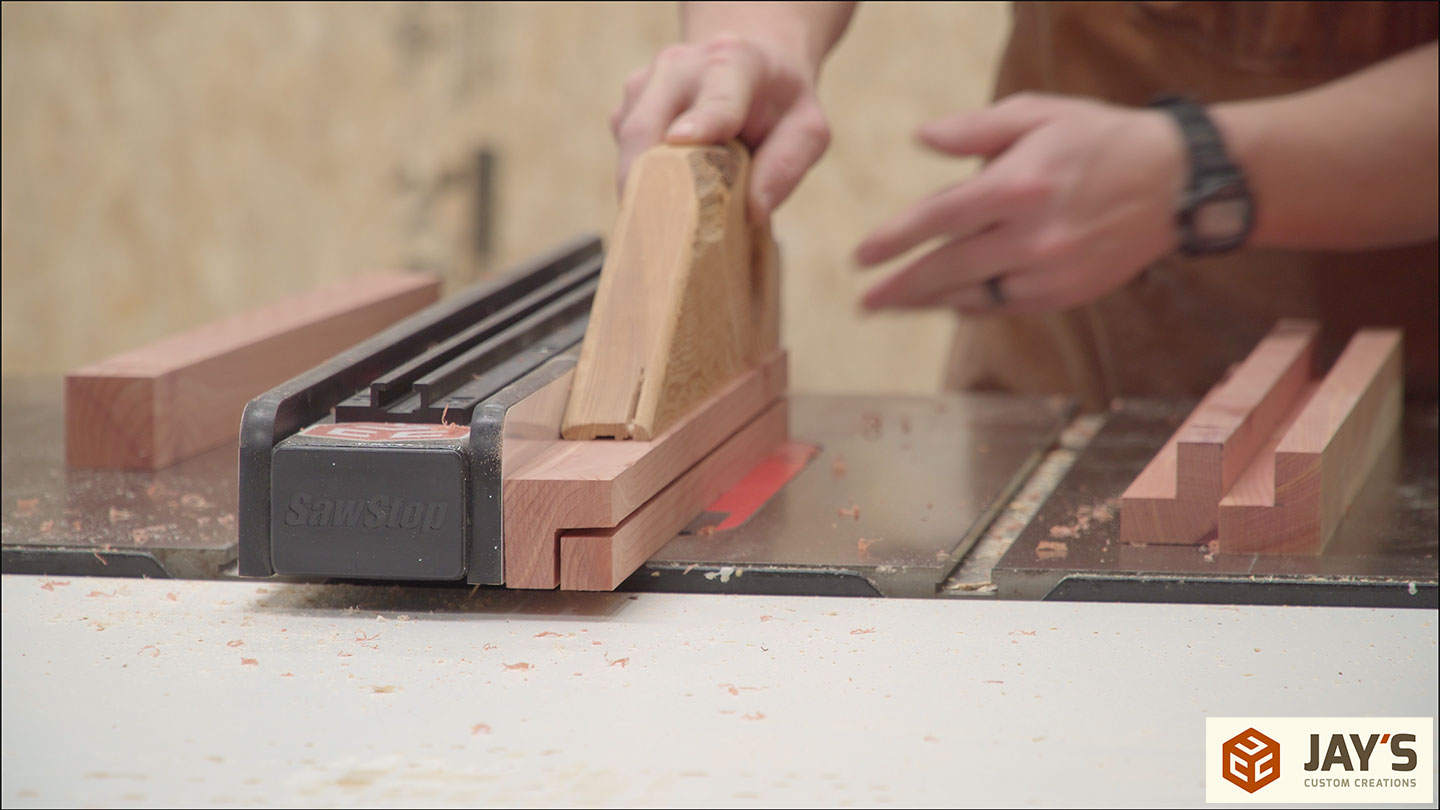
For the legs, I went with some 1-5/8” sq. cedar I had already milled from earlier use. All I wanted used to be a rabbet to mount them to the field. Simple sufficient with two cuts on the desk noticed, ensuring the closing minimize had the waste left of the blade and used to be no longer trapped between the blade and the fence.
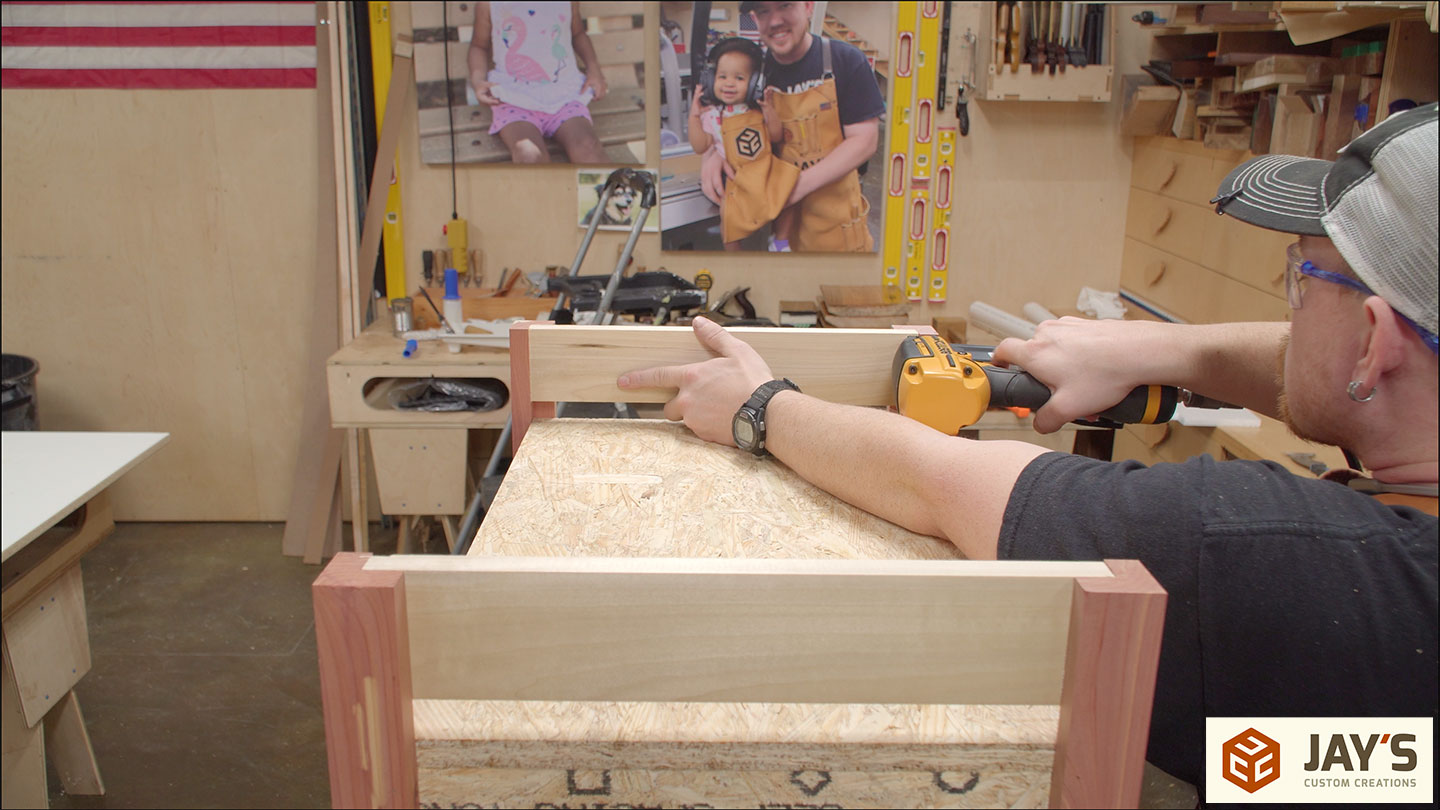
Rails don’t seem to be wanted right here, however they lend a hand save you the cat from knocking the meals bowl off. Scrap picket to the rescue once more. I had a work of poplar that used to be best possible for this. A suitable width and a knot lifeless heart within the board. One rail from every facet of the knot.
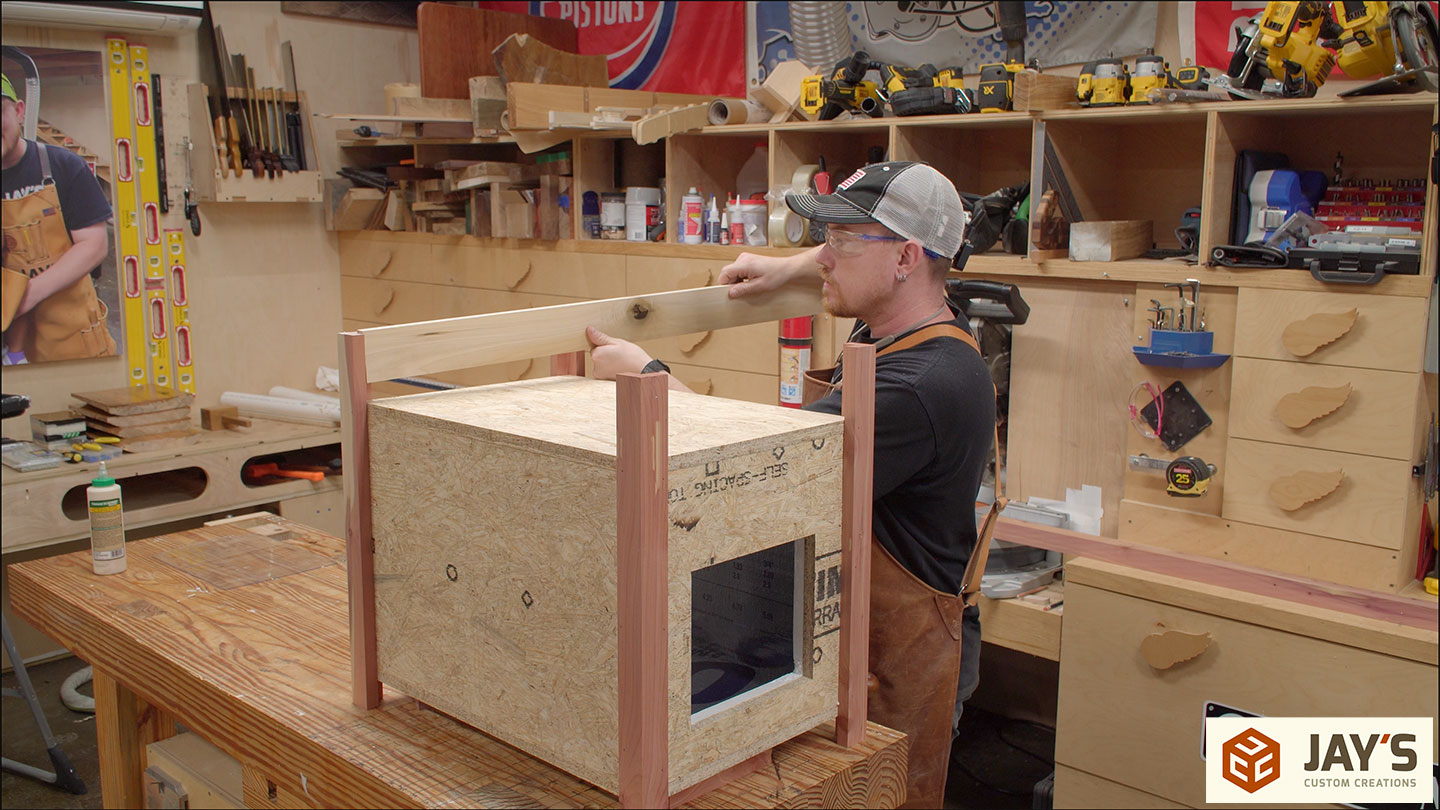
You guessed it; glue and brad nails to carry the rails on.
The door used to be too lengthy, so I trimmed it and secured it with 3 screws. Creating a trim piece to hide the highest of the vinyl door screws is one thing I thought to be however handed on because of the time constraint.
The general piece of the puzzle used to be to chop a work of scrap carpet for the ground.
And that’s it. A easy, comfy, insulated, heated house for my daughter’s cat to stick heat at night time. Now all I’ve to do is wait about 6 months for my spouse to invite, “are you ever going to color that cat space?” to which I’ll answer, “simply because a person says he’s going to do one thing doesn’t imply you need to remind him each 6 months!”