Tag Archives: dovetail jig

‘Early Wound Care Principles’ – Lost Art Press

‘Early Wound Care Principles’ – Lost Art Press

A syringe with splash guard is just right to have available for deep wound in the event you are living a long way clear of a healthcare heart.

The next is excerpted from Dr. Jefferey Hill’s “Workshop Wound Care.” The e-book – the latest providing in our pocket e-book collection – delves proper to the center of what you want to understand when confronted with commonplace workshop accidents, from lacerations, to puncture wounds to subject material within the eye. Dr. Hill is an emergency room doctor and an lively woodworker. So he is aware of precisely the ideas a woodworker wishes to understand in the case of accidents. And he items data in some way {that a} non-medical skilled can simply comprehend it. 

The preliminary steps of wound care are seriously essential to making an atmosphere that promotes therapeutic with a handy guide a rough go back to standard serve as and (if it’s a priority of yours) just right beauty results. As we lined in Bankruptcy 4, Wound Therapeutic Primer, there are a selection of things that may impact the therapeutic procedure.

Wounds that heal smartly have minimum tissue injury, don’t get inflamed and feature tissue layers that line up smartly. The volume of tissue injury is, usually talking, a serve as of the best way the harm took place (overwhelm accidents imply extra tissue destruction versus lacerations, that have minimum destruction except the severed tissue layers). Now and again, on the other hand, movements taken early within the wound care procedure can irritate one of the crucial current tissue injury, or, within the very least, can combat towards developing the optimum therapeutic atmosphere.

Preventing ongoing bleeding is obviously step one in addressing a contemporary wound. However assuming the wound is small-ish and the bleeding isn’t serious sufficient to steered you to hunt care at your native pressing care or emergency division, your subsequent steps must be eager about cleansing the wound to forestall an infection.

In fighting wound infections, the single-most essential step is thorough irrigation of the wound. Even a sell off truck stuffed with antibiotics received’t save you an an infection in a infected wound that wasn’t wiped clean. Why? Exponential enlargement is the rationale. A function of exponential enlargement is that issues appear positive till they aren’t and when issues get dangerous, they get dangerous briefly (see the worldwide COVID-19 pandemic).

Staphylococcus aureus, some of the extra commonplace micro organism in your pores and skin and a widespread reason for wound infections, has a doubling time of about 90 mins. So two micro organism transform 4 in 90 mins, 4 turns into 8 in 3 hours, 8 turns into 16 in four-and-a-half hours, 16 turns into 256 in six hours. No longer too dangerous, in truth. Through 24 hours you’re as much as greater than 130,000 micro organism within the wound. However, let’s say as a substitute of beginning with a wound with handiest two micro organism, you get started in a wound that has 100 micro organism. This time, through 6 hours you’re at 1,600 micro organism. Through 12 hours, 25,600. And through 24 hours, greater than 6.5 million micro organism are within the wound.

Antibiotics are nice and all, however by the point you get them prescribed, stuffed on the pharmacy, into your abdomen, to the bloodstream and out to the wound, they’d be greeted through a mass of masses of hundreds to hundreds of thousands of micro organism.

This isn’t to mention that antibiotics don’t have a job in fighting wound infections. They do, and are prescribed in positive cases in line with the sorts of tissues injured, possibility of an infection and talent of the affected person to combat off infections. However, the single-most essential factor you’ll do to forestall a wound an infection is to wash the wound completely and reduce the micro organism mobile counts within the wound. Get that quantity sufficiently small, and the roving white blood cells that come to a therapeutic wound will normally be capable to handle issues.

‘Dilution is the Technique to Air pollution’
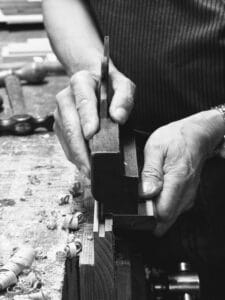
Micro organism in finding their means into wounds in a variety of tactics. First, needless to say micro organism are actually all over. They’re on you, your pores and skin, your chisel, your desk noticed blade, that great piece of white oak that gave you a splinter when you have been seeking to rive out some leg inventory. All over. Micro organism can also be compelled out of your pores and skin right into a wound through the chisel or no matter else brought about your harm. They may be able to catch a journey on a tiny sliver of picket or steel. Or they may well be pressed into the wound as you attempt to cling a dirty rag to it making an attempt to stanch bleeding.

The purpose of irrigation is to rid the wound of as many micro organism and as a lot bacteria-laden detritus as conceivable. Because the outdated surgical maxim “dilution is the way to air pollution” suggests, the top means that that is completed is thru flowing a big quantity of water over and in the course of the wound. The surest solution to blank the wound of micro organism and any overseas our bodies is thru a mix of quantity and power.

The setup for this irrigation is proven within the picture [Above]. The splash guard is mainly a complicated 19-gauge blunt plastic needle with a protect to stay water from spraying all over when you irrigate the wound. The mix of the syringe and this splash guard ends up in a float of saline/water with pressures round 25 to 35 psi.

What About Faucet Water?
How a lot quantity is sufficient quantity? The overall rule of thumb is that wounds must be irrigated with 500ml to 1L of fluid. However in observe, the true purpose is to ensure the injuries are utterly freed from overseas our bodies. Wounds which can be blank in look to start with may escape with smaller volumes of irrigation relying on location, intensity of the wound and mechanism of damage.What About Faucet Water?The kind of irrigation simply described is essential for wounds which can be somewhat deep or relatively infected. Lots of the wounds you’ll maintain within the workshop might be somewhat small nicks, cuts and pores and skin tears. For those minor wounds, thorough irrigation with faucet water will do. Actually, there are a selection of research that display no distinction in an infection charges for wounds cleansed with faucet water vs. saline, even for higher wounds. This in fact assumes that the supply of the faucet water is blank – no longer actually a priority for many municipal water assets, however can be a worry in creating international locations or in underdeveloped and under-resourced wallet of the US.

The method for irrigating a wound with faucet water is moderately easy (if somewhat painful). Flip the faucet to lukewarm/frame temperature water (the ones newly uncovered nerve fibers might be exceedingly delicate to any stimuli). Let the water run over the wound for a number of mins. Re-evaluate the wound to peer if there may be any particles last. If there may be, you’ll attempt to irrigate once more, or attempt to irrigate with the power irrigation setup described above, in case you have a syringe with a dash guard. Then again, if the wound is that grimy you could desire a extra thorough irrigation in a healthcare surroundings.

Why no longer Hydrogen Peroxide, Iodine and so on.
Excluding water or saline, the one thing more that are supposed to be used to wash a wound is a light cleaning soap and perhaps a dilute iodine answer.

My enjoy whilst rising up in the US Midwest was once that each scrape, nick or lower must be wiped clean out with hydrogen peroxide each day till the wound healed. And why no longer? It bubbles like mad, stings somewhat and the wound appears a just right deal cleaner in a while.

There are a variety of issues of the usage of hydrogen peroxide to wash wounds. For starters, it does a significantly better process of killing purple blood cells than it does of killing micro organism. This can also be useful for wounds that experience a large number of dried, caked-on blood as can steadily occur with wounds in bushy spaces. It’s a long way much less useful in your same old wound. For wounds which can be a few days into therapeutic, hydrogen peroxide has been proven to split newly minted pores and skin cells from the therapeutic tissue on the base of wounds. And, in experimental prerequisites, hydrogen peroxide has been proven to lengthen wound therapeutic. In the event you do select to make use of hydrogen peroxide to wash dried blood off, be in a position for some warmth. The chemical degradation of hydrogen peroxide to water and oxygen is exothermic (it provides off warmth). It’s no longer sufficient to reason any thermal burns to the realm, however it’s moderately noticeable.

Iodine is incessantly used to wash wounds and does have some benefits over saline irrigation by myself in some scenarios. Iodine is offered in two formulations: an answer and a scrub. The scrub was once designed to be used on intact pores and skin and for cleansing the outside floor previous to surgical procedure. The detergent blended into the scrub is poisonous to tissues and shouldn’t be utilized in open wounds. Iodine answer is normally offered at a ten p.c focus. When it’s diluted to lower than 1 p.c, it’s secure to be used in open wounds and has superb antibacterial, anti-viral and anti-fungal job. Within the emergency division, iodine-diluted answers are normally used for irrigating wounds at top possibility of an infection (in line with mechanism, contamination, location).

Iodine should be diluted for use in open wounds.

Chlorhexadine is a surgical scrub cleaning soap that also is extensively to be had. It was once additionally designed to be used essentially with intact pores and skin. In case you have had an non-compulsory surgical procedure you’ll have been prompt to bathe with it for a number of days/weeks previous to the surgical procedure. The reason is that it builds up at the pores and skin floor and has potent anti-bacterial houses (nice for lowering the chance of surgical website an infection). It additionally has a detergent that may be poisonous to the tissues in open wounds so its use in wound irrigation is discouraged.

Soaps paintings through liquefying fat and oils, making them soluble in water and in a position to be over excited through operating water. As a result of bacterial mobile partitions are made from fats, cleaning soap is in a position to dissolve a few of these mobile membranes, killing the micro organism. Commercially to be had soaps are all usually moderately delicate of their fat-busting houses (they’re relatively delicate detergents) which means that they must no longer be specifically poisonous to open wounds.

Placing all of it in combination, how must you blank your wound?
First check up on the wound. Massive, gaping wounds or wounds that experience a large number of particles in them will most probably wish to be wiped clean and repaired in a healthcare surroundings. Some preliminary irrigation of those wounds with operating faucet water might can help you triage the wound and might assist evenly blank it in preparation for a extra thorough cleansing through a scientific skilled. After you irrigate beneath operating faucet water, duvet the wound with sterile gauze that has been dampened with sterile saline and head in your native scientific facility.

Smaller wounds, scrapes and evenly infected wounds that you are feeling can also be handled at house must be first evenly wiped clean with cleaning soap and water. Then permit lukewarm faucet water to run over the wound for a number of mins till apparently to be blank in your eye and no particles stays. In the event you nonetheless see some particles, you’ll attempt to use the aerosolized saline wound washes which can be to be had to your native drugstore. It’s no longer transparent how the pressures generated through those merchandise examine to the power irrigation setup used to your native emergency division. As a common rule of thumb, if the wound nonetheless seems grimy, then you definately’ll want extra competitive cleansing through a healthcare skilled and must search care.

Do notice that oftentimes the method of cleansing and irrigating the wound might reason it to begin bleeding (you’ll have washed away the blood clots that stopped any earlier bleeding). That’s OK. After getting completed cleansing the wound, you must be capable to prevent the bleeding once more with a mix of direct power and perhaps a power dressing.

After the wound is wiped clean completely and the bleeding has been stopped, you’re directly to dressing the wound to stay it blank and advertise therapeutic.

Drawing ellipses in SketchUp – FineWoodworking

Drawing ellipses in SketchUp – FineWoodworking

Lately I used to be running on a SketchUp fashion of Thomas Throop’s Oval Facet Desk for plans. This desk has an elliptical best and shelf; a rather fundamental form this is simple sufficient to fashion in SketchUp despite the fact that it is probably not all that glaring. Despite the fact that there are some extensions that may draw them for you I most often simply use the Circle and Scale equipment to do that. But if I want to display the ellipse in a plan I love to incorporate the foci with dimensions to make it simple to structure in the store. If you realize the space between the foci nails pushed into the development board, a loop of string and a pencil will then make fast paintings of drawing the ellipse. The trick is determining the place the foci want to be. It’s essential to calculate the places however there are more uncomplicated tactics. On this video I reveal doing it with an Ellipse plugin from Sketchucation.

It’s price noting that the period of the string from foci to edge to foci is equal to the main measurement of the ellipse.

It’s essential to find the foci by means of building with the Arc device, too. Draw arcs from the center of the facet (there will have to be a vertex there) with the radius equivalent to part the main period. The arcs will intersect the centerline on the foci.

Give it a attempt to see the way you get on.

–Dave


Christmas Tree Cupcake Stand

Christmas Tree Cupcake Stand

Here is an effective way to avoid wasting area and create a dessert show.  This simple to make tiered Christmas cupcake tray holds about 3 dozen cupcakes.

Watch this reel – this is how I constructed it:

View this put up on Instagram

A put up shared via Ana White (@anawhitediy)

Unfastened plans under!

Pin For Later!

Christmas Tree Cupcake Stand

Jack’s Heart Opens

Jack’s Heart Opens

From the dim mild of a wintry gray sky, Jack’s pencil hovered over the drawings on his workbench dipping up and down between finger and thumb. I had won nice credit score for reaching one thing none of my co-apprentices had ever completed. Jack may just now stroll from one finish of his bench on a transparent duckboard…

Learn the overall put up Jack’s Heart Opens on Paul Dealers' Weblog.

Workshop tip: Add a sliding vise to your hollow-chisel mortiser

Workshop tip: Add a sliding vise to your hollow-chisel mortiser

I’ve been pissed off by means of the present fence and hold-down device on my hollow-chisel mortising system. It really works, however continuously forces me to upload clamps to stay the workpiece strong. And the clamps have to be untightened and repositioned after each and every sq. hollow I lower. Additionally, I’ve to reposition the fence to create mortises which are wider than my biggest bit.

I solved those issues as soon as and for all by means of including a machinist’s cross-slide vise to the mortiser. The vise holds workpieces firmly and appropriately, and will also be moved within the X and Y instructions by means of turning two massive handles.

hollow-chisel mortiser with standard stock fence and hold-down assembly

First I got rid of the usual fence and hold-down on my mortiser. Then I drilled holes within the solid iron desk, and bolted down the brand new vise so it was once underneath the mortising bit and sq. to the mortiser’s desk.

The vise steals 5 in. of plunge capability from the mortiser, however I added maximum of that again by means of striking spacers below the submit. One is forged iron, which got here with the system as an adjunct, and the opposite is a 1-3/4-in.- thick, shopmade maple block. For those who lack the accent spacer, you’ll merely make a thicker hardwood block. Both means, you’ll want longer bolts for attaching the submit to the bottom.

The cross-slide vise is a easy repair for a irritating downside. Now I will create best mortises of all sizes, in a long way much less time than prior to, and I glance ahead to the method.

—MICHAEL CHAPMAN, Stilwell, Kan.

Illustrations by means of Dan Thornton
From Tremendous Woodworking factor #301


Roast Your Own | Popular Woodworking

Roast Your Own | Popular Woodworking

Roast Your Own2023-01-05Popular Woodworking//www.popularwoodworking.com/wp-content/uploads/2020/01/01pwm1115roastwood.jpg200px200px

We would possibly obtain a fee while you use our associate hyperlinks. On the other hand, this doesn’t have an effect on our suggestions.

Cooking picket on your kitchen can produce effects that rival strong point kilns.

Luthiers have lengthy used roasted or tempered picket in stringed tools for the reason that roasting procedure pre-stresses the picket and caramelizes the sugars, sealing the pores and rendering them extra immune to moisture.


<br />


By means of registering, I recognize and conform to Energetic Passion Media’s (AIM) Phrases of Carrier and to AIM’s use of my touch knowledge to be in contact with me about AIM, its manufacturers or its third-party companions’ merchandise, products and services, occasions and analysis alternatives. AIM’s use of the guidelines I supply will probably be in step with the AIM Privateness Coverage.


Thinking Like 1987 Again – Lost Art Press

Thinking Like 1987 Again – Lost Art Press

A newly restored 1949 Smith-Corona Silent from Unplug Typewriter Co.

The primary writing magnificence I took at Northwestern’s journalism faculty – “B-01 Elementary Writing” – used to be meant to weed out about one-third of the scholars. You needed to make a “B” within the direction otherwise you had been thrown out. 

The category used to be deliberately boot camp-ish. And there have been a number of infractions that will lead to an “F” to your day’s paintings, comparable to misspelling a right kind noun. (I can by no means misspell “Nicaragua” once more.)

In all probability essentially the most dastardly element of the category used to be that you simply had been required to sort the whole lot on guide typewriters within the writing lab. It used to be Spring 1987 after I took that magnificence. And electrical (even Selectric) typewriters had been commonplace, and devoted phrase processors had been within the writing labs for the complicated scholars.

Each and every screw, lever and nook of the device has been chemically wiped clean and reassembled.

Numerous my fellow scholars had been freaked in regards to the manuals. Plus the way to use correcting fluid. And moans comparable to, “The place is the ‘1’ key? My device is lacking that key!”

Operating on a guide used to be the one benefit I had within the magnificence. For the primary twenty years of my existence, the whole lot I wrote used to be on my guide typewriter, which have been passed all the way down to me by means of my mom. I knew the device inside and outside. I needed to restore the article, oil the article. Blank it to stay it running, particularly the platen. And alter the ribbon, in fact. 

I didn’t like electrical typewriters. They made a hum like a worm zapper, and each time I brushed a key by chance I’d soar in my seat. I wished a typewriter that required effort to make use of. And used to be quiet.

I’ve by no means accomplished neatly in establishments. However this grade intended the whole lot to me.

I slightly handed Elementary Writing with a B-, absolutely the lowest grade that allowed me to proceed in class. And I continuously characteristic my love of manuals to be the rationale I didn’t get a C or worse.

This week I took supply of an awesome piece of labor that has introduced numerous feelings to the fore. It’s a fully restored 1949 Smith-Corona Silent. A wonderful and compact piece of insane engineering.

The device used to be utterly rebuilt by means of Meagan Syata of the Unplug Typewriter Co. I’ve been following her paintings on Instagram for some time. And one day our paths crossed. Her husband is a woodworker, and so they are living in Hope, Arkansas, my house state. We labored out a industry (I feel I were given the most productive a part of the deal) – one typewriter in alternate for an enormous pile of books.

It’s simply… best.

The typewriter confirmed up the day before today, and I can’t take my eyes or arms off of it. It seems and works find it irresistible is new from the manufacturing facility. And after studying about and observing the whole lot that Meagan does to those machines, I’m really not stunned.

This typewriter goes to get used. I hate writing notes and quick letters by means of hand. My handwriting is horrible. I’m a significantly better typist. 

I doubt I’ll ever write a guide the usage of it. However who is aware of? I’ve accomplished stupider issues (comparable to our letterpress model of “Roman Workbenches.”)

To be fair, I don’t have romantic notions about the usage of a guide typewriter. I don’t do detective cosplay, and I’m no longer a “His Lady Friday” reenactor. Like my handplanes and saws, this can be a instrument. And understanding the way to use all of the gear is a part of my DNA.

As a creator with an extended historical past with those machines, it’s great to have the sort of again in my ownership.

You probably have any hobby in any respect in those outdated machines, do take a look at Meagan’s retailer. I’m extremely inspired. Plus, if you are going to buy one, chances are you’ll simply save an outdated typewriter from getting lower up so its keys will also be became jewellery.

— Christopher Schwarz

Even the case. The entirety works easily – as though my grandfather purchased it new in 1949 then by no means touched it.

Doll High Chair

Doll High Chair

Reader picture by means of SRAPER2 

Pin For Later!

Doll High Chair

Two Time-Tested Tools – Paul Sellers’ Blog

Two Time-Tested Tools – Paul Sellers’ Blog

This week I’ve labored considerably with two gear utilized in woodworking and every so often in different fabrics like stone and plastic. One is definitively referred to as a rasp. Rasps are available quite a lot of widths, lengths and shapes. Hand-made rasps, referred to as hand stitched, will also be dear. My favourites up to now are the ones made by means of Auriou of France; the only I depend on maximum is the Cupboard rasp. This rasp is flat on one aspect and spherical at the reverse face. The top follows a steady boat form culminating in a delightful and helpful level and for many people those are probably the most helpful and sensible varieties irrespective of measurement. Mine is now 13 years outdated and it nonetheless cuts picket greater than smartly; fantastically is the phrase, actually. The smaller and narrower variations, perhaps 1/2″ to three/4″ vast and six-8″ lengthy, are superb for tighter, smaller paintings, shaping handles and such. Regardless of the dimensions, they’re fantastically balanced within the hand and lower fantastically successfully.

Two Auriou rasps aspect by means of aspect give me maximum of what I would like in my shaping gear that can not come from my spokeshaves.

Prior to now, I normally prompt the 4-in-hand rasp, the kind utilized by farriers for trimming horse hooves after reshoeing horses. Those are a virtually first rate starter rasp for duties like shaping be that disposing of arduous corners to curves as in spoon and spatula making, reducing forums and so forth, however in recent times those rasps have are available with softer metal and fail to stay their edge for extraordinarily lengthy or are certainly are simply flat poorly made, a facsimile of what used to be the trade same old. When a rasp loses its reducing edges it turns into a bruising put in force bluntly attacking just right picket to go away it extra bruised than finely lower. I really like the type of ‘chew‘ and edge retention you get from the hand-stitched variations as with Auriou and Logier. My hope is that they’re going to proceed to live to tell the tale and stay elevating long run generations of professional rasp makers.

As a substitute of the device-made variations, every of those stitched is chiselled in by means of hand and amazingly they make a distinction within the lower to present high quality no device-lower manner can provide.

With reference to the 4-in-hand rasp: what’s in point of fact treasured is that you simply get 4 surfaces at the similar rasp. They’ve no take care of because the metal itself is the dangle you get and what you’ve is just right grip. The flat aspect will give you a part-period of exact rasp with the crucial layers of barbed sewing whilst the opposite part of the period is basically a report with finer reducing and smoothing skill. The opposite aspect is spherical and in this aspect, you once more get the rasp and report however within the spherical as a way to talk. It’s not that i am positive why the most productive makers of rasps have now not replicated a best-notch model of this device — a 12-14″ lengthy model with the boat-formed ends can be a wonderfully useful gizmo and most definitely a absolute best dealer for them. Nudge, nudge! Neatly inside their capability.

Nobody must disregard this financial, 4-in-hand rasp as a substitute for a just right starter device. It’s excellent for seeing if shaping is for you and your lengthy-time period long run issues.

I take note the day I switched from the 4 in hand to the Auriou cupboard rasp; the 12″ #10 sewing. It used to be an evening and day enjoy but I additionally recall a 4-in-hand model that used to be in point of fact smartly made and intensely at hand all in one device. They impulsively declined in high quality and this used to be a right away results of less expensive imports robbing first rate makers by means of coming in at not up to part the cost with a glance-alike that fooled everyone into pondering they have been if truth be told getting one and the similar device. By the point everybody realised the adaptation, the great makers have been long past. That mentioned, 4-in-arms as distinct from farrier’s rasps do paintings and paintings smartly sufficient. They’re simply inferior to the top class variations. They are perfect for seeing if what you need to make use of rasps for shall be part of your long run; we ceaselessly use a transitional device like this ahead of we spend cash. on further particular ones.

It used to be sending a brand new woodworking maker to shop for a £140 rasp that brought about me to reconsider issues. The farrier model is indisputably nonetheless a just right have compatibility for beginning your children out or in case you are best making a couple of pieces requiring shaping by means of this technique of hand paintings. Somebody achieving into the longer term for lengthy-time period shaping will now know to imagine the hand-stitched variations and there are other makers available in the market who make really nice rasps, some from puts just like the Czech Republic are actually superb and are most often more cost effective too. I personal a pair and experience them.

I purchased the Shinto noticed rasp as a substitute and feature examined it out for a just right period of time. I used one rather than my Cupboard Rasp to check out to figure out its longevity, capability and so forth. Its primary downfall is there is not any spherical face to it so it’s most commonly useable on flat and convex surfaces. Hollowing is out of the query. Its benefit is that it has each coarse and fantastic in one rasp. So far as worth is going, the cost has risen. It sort of feels it is going to value you someplace round £30-35. After a 12 months’s use, it has much less chew than the Auriou, to the purpose that I ordered its alternative. Evaluating the 13 years of use with the only 12 months of the Shinto leans against getting one-quarter the time I were given from my Auriou however my Auriou remains to be going and I choose the heft and really feel of it normally. So, my conclusion is that there actually is little distinction in total value aside from that we do have the spherical again to the Auriou and the coarse and fantastic faces of the Shinto.

The coarse aspect of the Shinto eliminates plenty of picket impulsively and aggressively and this will also be just right for some facets of woodworking . . .

For the primary phase, I will be able to are living with out the coarse aspect of the Shinto despite the fact that I will be able to see it being very at hand every now and then for starting up subject material in amount and temporarily. What I will not are living with out is the spherical again of the Auriou or different makers I’ve. A snappy turn of the wrist to maintain hollows and rounds similarly smartly with the similar fineness. However I’m content material now that I understand it isn’t an both-or. I will be able to prolong the lifetime of my Auriou and double and even triple its longevity by means of the usage of either side of the Shinto noticed rasp.

. . . then again, or the opposite aspect, you’ve a actually finer enamel that works rather well whenever you get used to the kind of drive to use.

Conclusion: After lengthy-time period checking out, I experience proudly owning each the dearer rasps and the Shinto however the 4-in-hand- meets other standards. In case you get started with the 4-in-hand you’ll lose not anything beginning out and it’s just right for kids to paintings with. Then imagine the Shinto when you suppose you’ll don’t have any want for the spherical face of a correct rasp; this can be a stepping stone to proudly owning a top class rasp. There may be true pleasure in proudly owning an Auriou and maintaining it for absolute best paintings longer term. I believe for many woodworkers with restricted time of an afternoon per week on the bench that this may turn out to be an entire life device for them

Cabinet Doors and Drawer Fronts – Outdoor Kitchen Island – Day 4

Cabinet Doors and Drawer Fronts – Outdoor Kitchen Island – Day 4

Day 4 of the out of doors kitchen island construct begins with the door and drawer entrance meeting. I’m the usage of 1/2” plywood for the panels and will want to minimize a rabbet on every panel sooner than meeting.

However first, a snappy notice on those JessEm curler guides. I really like them however haven’t been the usage of them in recent years because of laziness. Now and again I am getting in my very own approach. I’ve them, they paintings nice, and I must use them always. For those who’re no longer accustomed to them, they’ve a curler on a slight inward attitude towards the fence. The curler has grippy subject material to carry the workpiece and they just roll ahead. This very much reduces the chance for kickback. For smaller items not up to a few inches they only get in the way in which. On this case, they’re going to be useful.

When used, I’m straight away grateful that I’ve them. It’s peculiar how some pieces I’ll move out of my approach to make use of and others I’ll have lazy moments, even making an allowance for how handy they’re.

For the panel rabbets, I selected to make use of a dado stack within the desk noticed with a sacrificial fence. The sacrificial fence lets in the overall dado stack for use and buried within the fence. The fence place determines the width of the rabbet and the peak of the dado stack determines the intensity of the rabbet. As soon as dialed in, the interior face of the panel must be flush with the interior face of the door and drawer entrance frames. The entrance may have the standard 1/4” step not unusual in shaker cupboards.

Now the doorways and drawer fronts can also be assembled. Since the panel is an engineered panel, all of the panel can also be glued in position. Little need for a spread and contraction hole right here.

After you have the entire doorways and drawer fronts in clamps I notice why maximum cupboard stores choose to outsource their door introduction. Between milling the lumber, reducing the joiner, and assembling the doorways there may be a large number of time intake. It simply is sensible for a large number of cupboard stores to outsource this step.

Whilst the doorways and drawer fronts are in clamps I converted to the legs. The 4 nook legs shall be sq. and the 3 inside legs shall be oblong.

The everyday milling technique of jointer > planer > miter noticed > desk noticed is adopted.

On the other hand, the desk noticed used to be handiest used for the nook leg rabbets. Those too will are compatible in position by the use of a rabbet. Two cuts on the desk noticed to create it however take into accout of the second one minimize I made. It’s generally no longer really useful to have the offcut trapped between the fence and the blade for kickback causes. If the piece has any pressure motion whilst being minimize you possibility that offcut being shot again like a missile. On this case, I didn’t see any indication of inner stresses and I extensively utilized a push stick with stay the offcut shifting ahead, previous the blade.

I’m the usage of the router desk so as to add a stopped chamfer element on every of the legs. The chamfer will get started and forestall a couple of inches clear of every finish of the leg so I scribed visible reference marks at the fence. It’s simple sufficient to begin and forestall at those traces through eye. No forestall block gadget is vital.

Throughout the chamfering procedure, I had an oopsie! The mud assortment at the router desk pulled some of the legs into the bit after I didn’t need it to. This gouge must be patched certainly one of two techniques. If this had been a transparent end piece I’d course a rabbet into the brink to totally get rid of the oopsie. Then glue a grain matching piece in position, flush it with each huge faces, then recreate the chamfer forestall location. Fortuitously, it is a painted piece so filling this with Bondo or one thing identical shall be more uncomplicated and simply as applicable.

The nook legs shall be secured with glue and a couple of screws in the course of the inside of the cupboard.

It’s time for the hinges. Those 1/2” overlay Blum comfortable shut hinges are my go-to for overlay doorways. They’re affordable and tremendous simple to enforce. I’m appearing this section on the drill press in the beginning as a result of that in point of fact is the quickest method to make the cup hinge holes.

On the other hand, I couldn’t to find the right Forstner bit for the duty so I opted to make use of my CNC as an alternative. My setup is to just minimize one hinge hollow at a time. If I had been to create a program for each cup hinges I’d want a new program for every door of a special top. As a substitute, I made a program that has one hollow minimize on two doorways on the similar time. One is the highest hollow and the opposite is the ground hollow. By means of operating the minimize as soon as, switching the doorways, and operating the minimize a 2d time I’ll have all of my cup hinge holes minimize the similar distance clear of the highest and backside in the entire doorways irrespective of top.

Pop the hinges in position and upload the small screws to protected them. Relying at the picket species, pilot holes could also be required. Poplar is reasonably comfortable so I opted to not make the pilot holes.

One ultimate step sooner than putting in the doorways and drawer fronts is to flush the fringe. A hand aircraft in a workbench vise gets the task accomplished simply superb however I opted to make use of my belt sander. This is among the maximum used machines in my store that will get reasonably little airtime. It’s extremely at hand for lots of duties out of doors of woodworking as neatly.

The hinges used are 1/2” overlay hinges. Because of this when put in at the face frames they’re going to overlay the face body through 1/2” when closed. The one alignment wanted through the installer is to verify the peak is about for the highest and backside 1/2” overlay. One of the best ways to try this is with a forestall block clamped to the cupboard someplace. I generally put the forestall block at the backside in order that gravity works for your prefer. On the other hand, the space between the highest of the door and the ground of the drawer is what is going to be maximum noticeable so I opted to position the forestall block on most sensible. From right here, I will be able to use my foot to raise the door whilst I take advantage of my palms to carry the door and protected it with screws.

The drawer fronts are even more uncomplicated. The forestall block rests on most sensible of the doorways, pilot holes are drilled, and a couple of screws added from the interior of the drawer cling the drawer entrance in position. Those doorways and drawers will in the end get pulls that fit the countertop.

(*4*)

And that’s it for day 4 of development in this construct. All that’s left to do is somewhat little bit of fundamental trim paintings to the entrance and again plywood panels, the middle sink fortify, and the leveling ft. I’ll be completing the bottom with milk paint however will cling off on that till I am getting the matching farm desk constructed. That approach I will be able to spray them each on the similar time.